
PandaDoc eVault Integration
Connect a PandaDoc account to Concord eVault so every completed document is imported into the target vault.
Before you get started, know that each PandaDoc account connection can be configured to treat imported documents as authoritative or non-authoritative copies. Authoritative copies are deleted from PandaDoc once secured in the vault, since they cannot exist as the official version in both systems. Non-authoritative copies remain in PandaDoc and are stored in eVault as a regular upload. See Copy Behavior below for how to choose. If you need a local copy of an authoritative import, ask Concord Support about Certified Prints.
Before you begin: To get started with the PandaDoc integration, you must be an admin user for your organization in Concord eVault, and have admin access to your PandaDoc workspace. eVault supports multiple PandaDoc accounts connected to a single vault.
The setup has three parts, plus a test:
- Part 1 - Connect PandaDoc to eVault via OAuth and copy the eVault webhook URL.
- Part 2 - Create the webhook in PandaDoc and share the signing secret with eVault.
- Part 3 - Map PandaDoc folders to eVault folders.
- Part 4 - Send a test document end-to-end.
Part 1: Connect PandaDoc to eVault
Step 1: Open the PandaDoc integration page
First, navigate to the Organization section of Concord eVault.
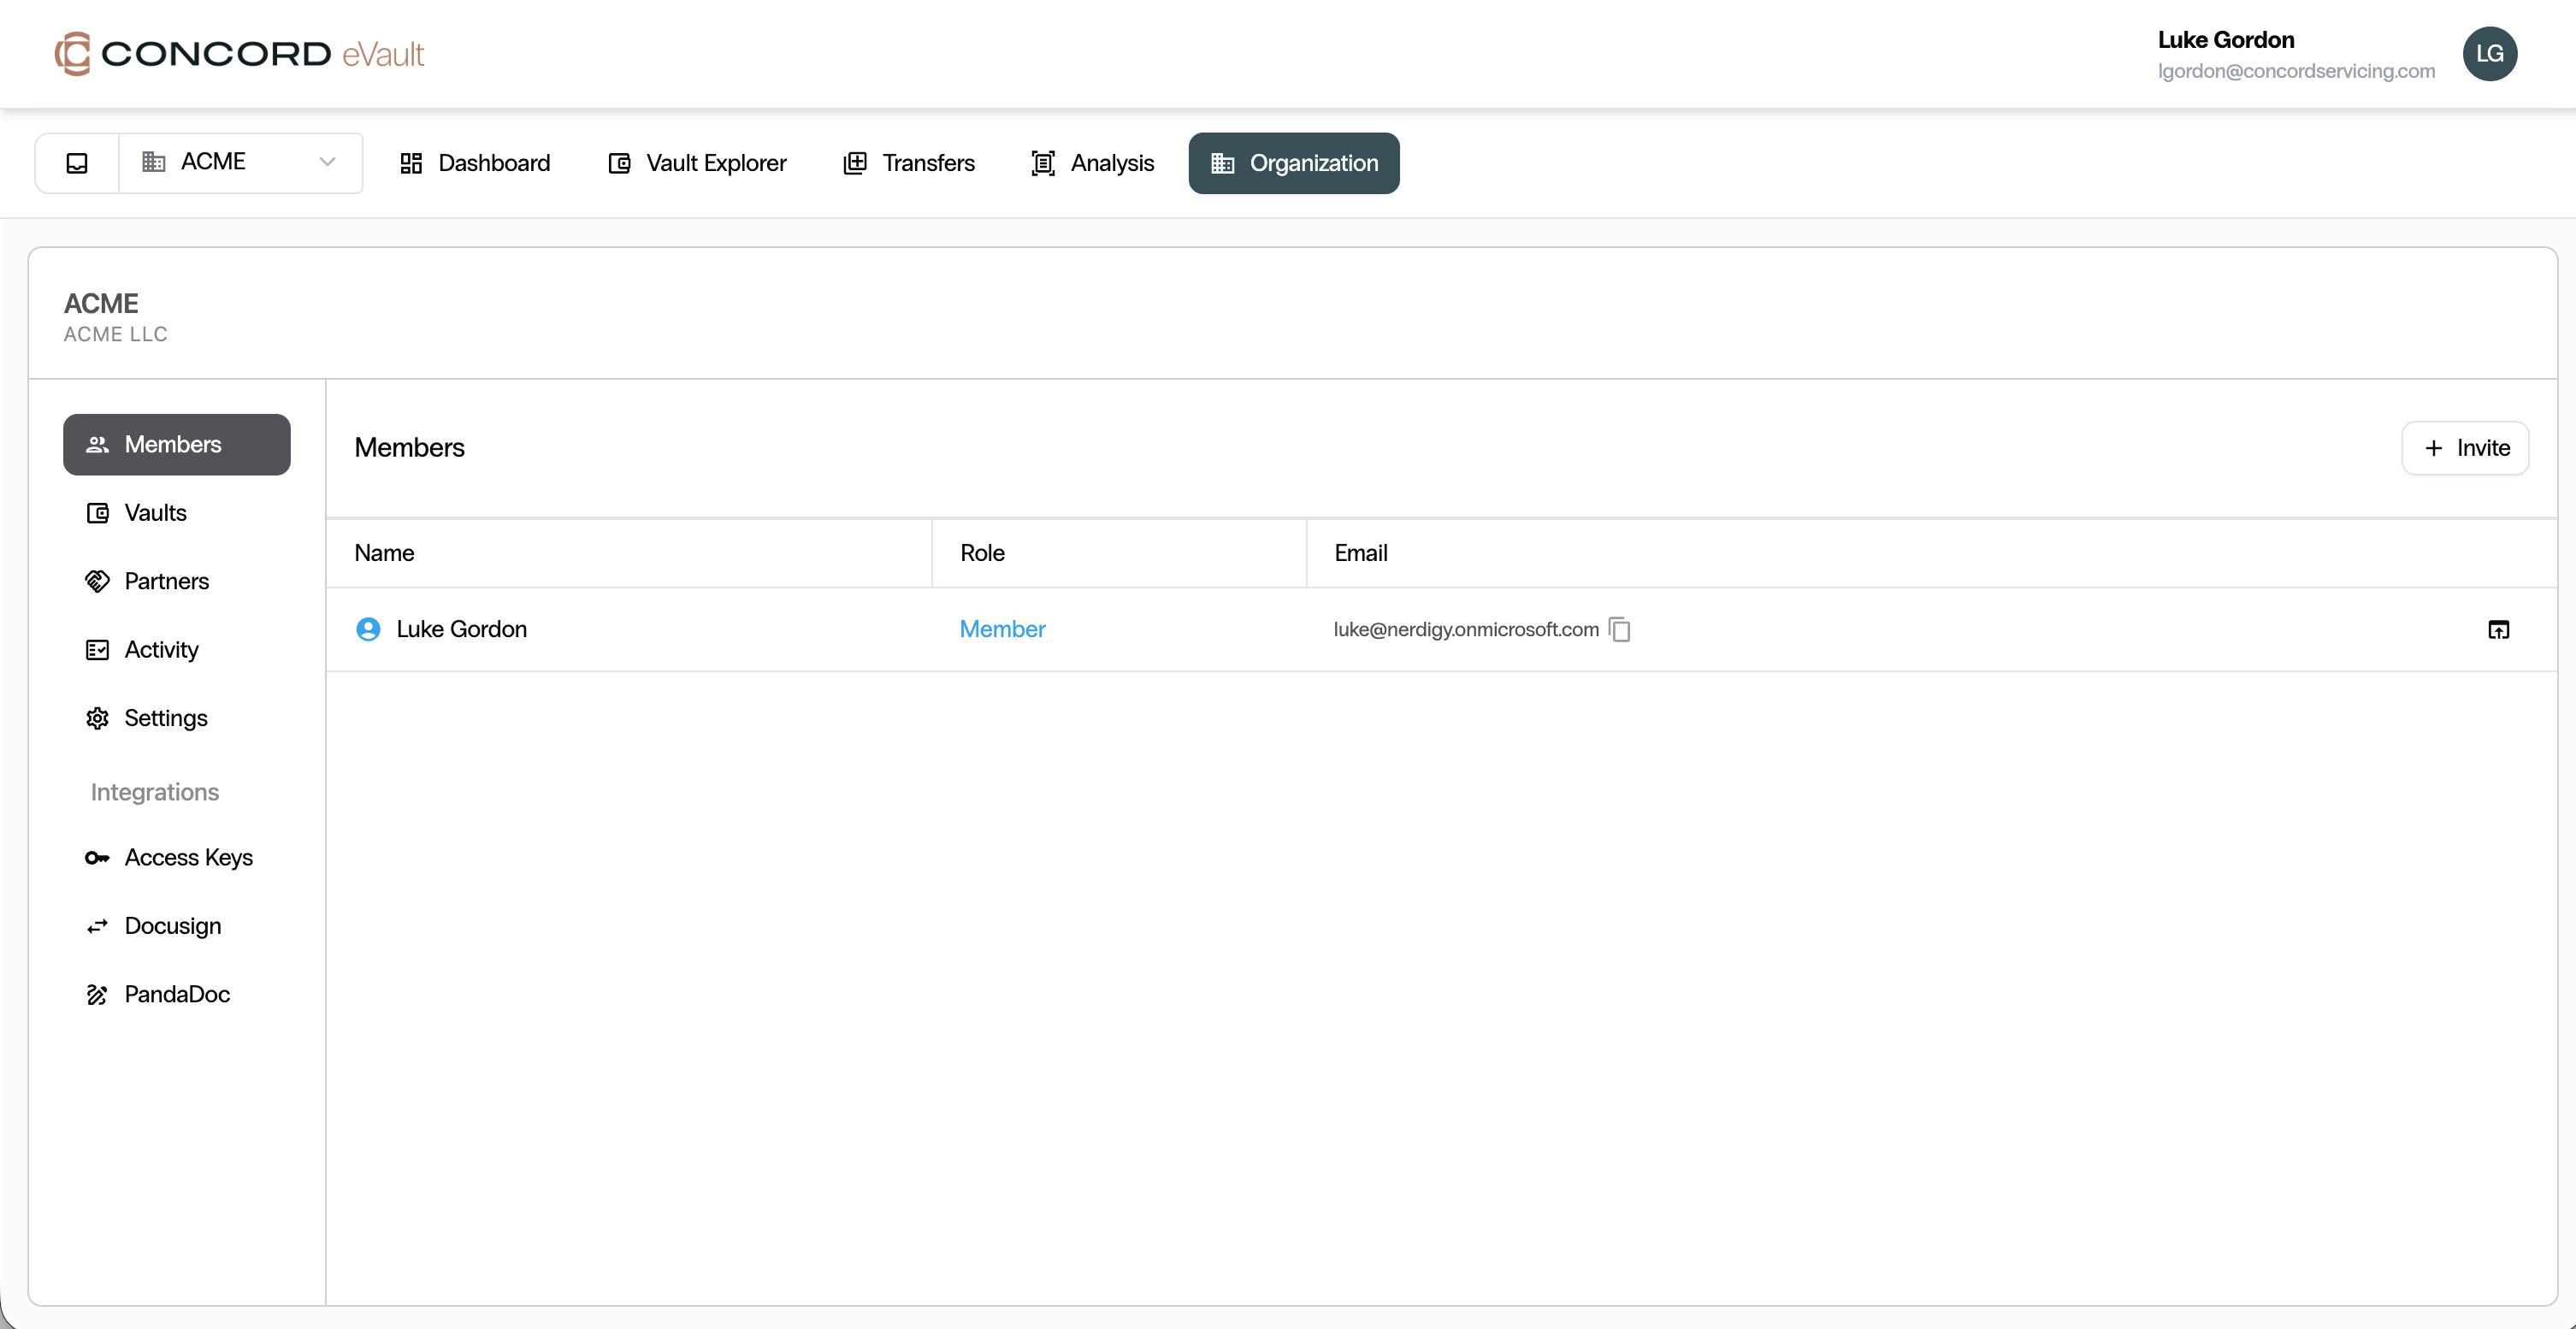
Next, on the left-hand side under Integrations, click the PandaDoc nav link.
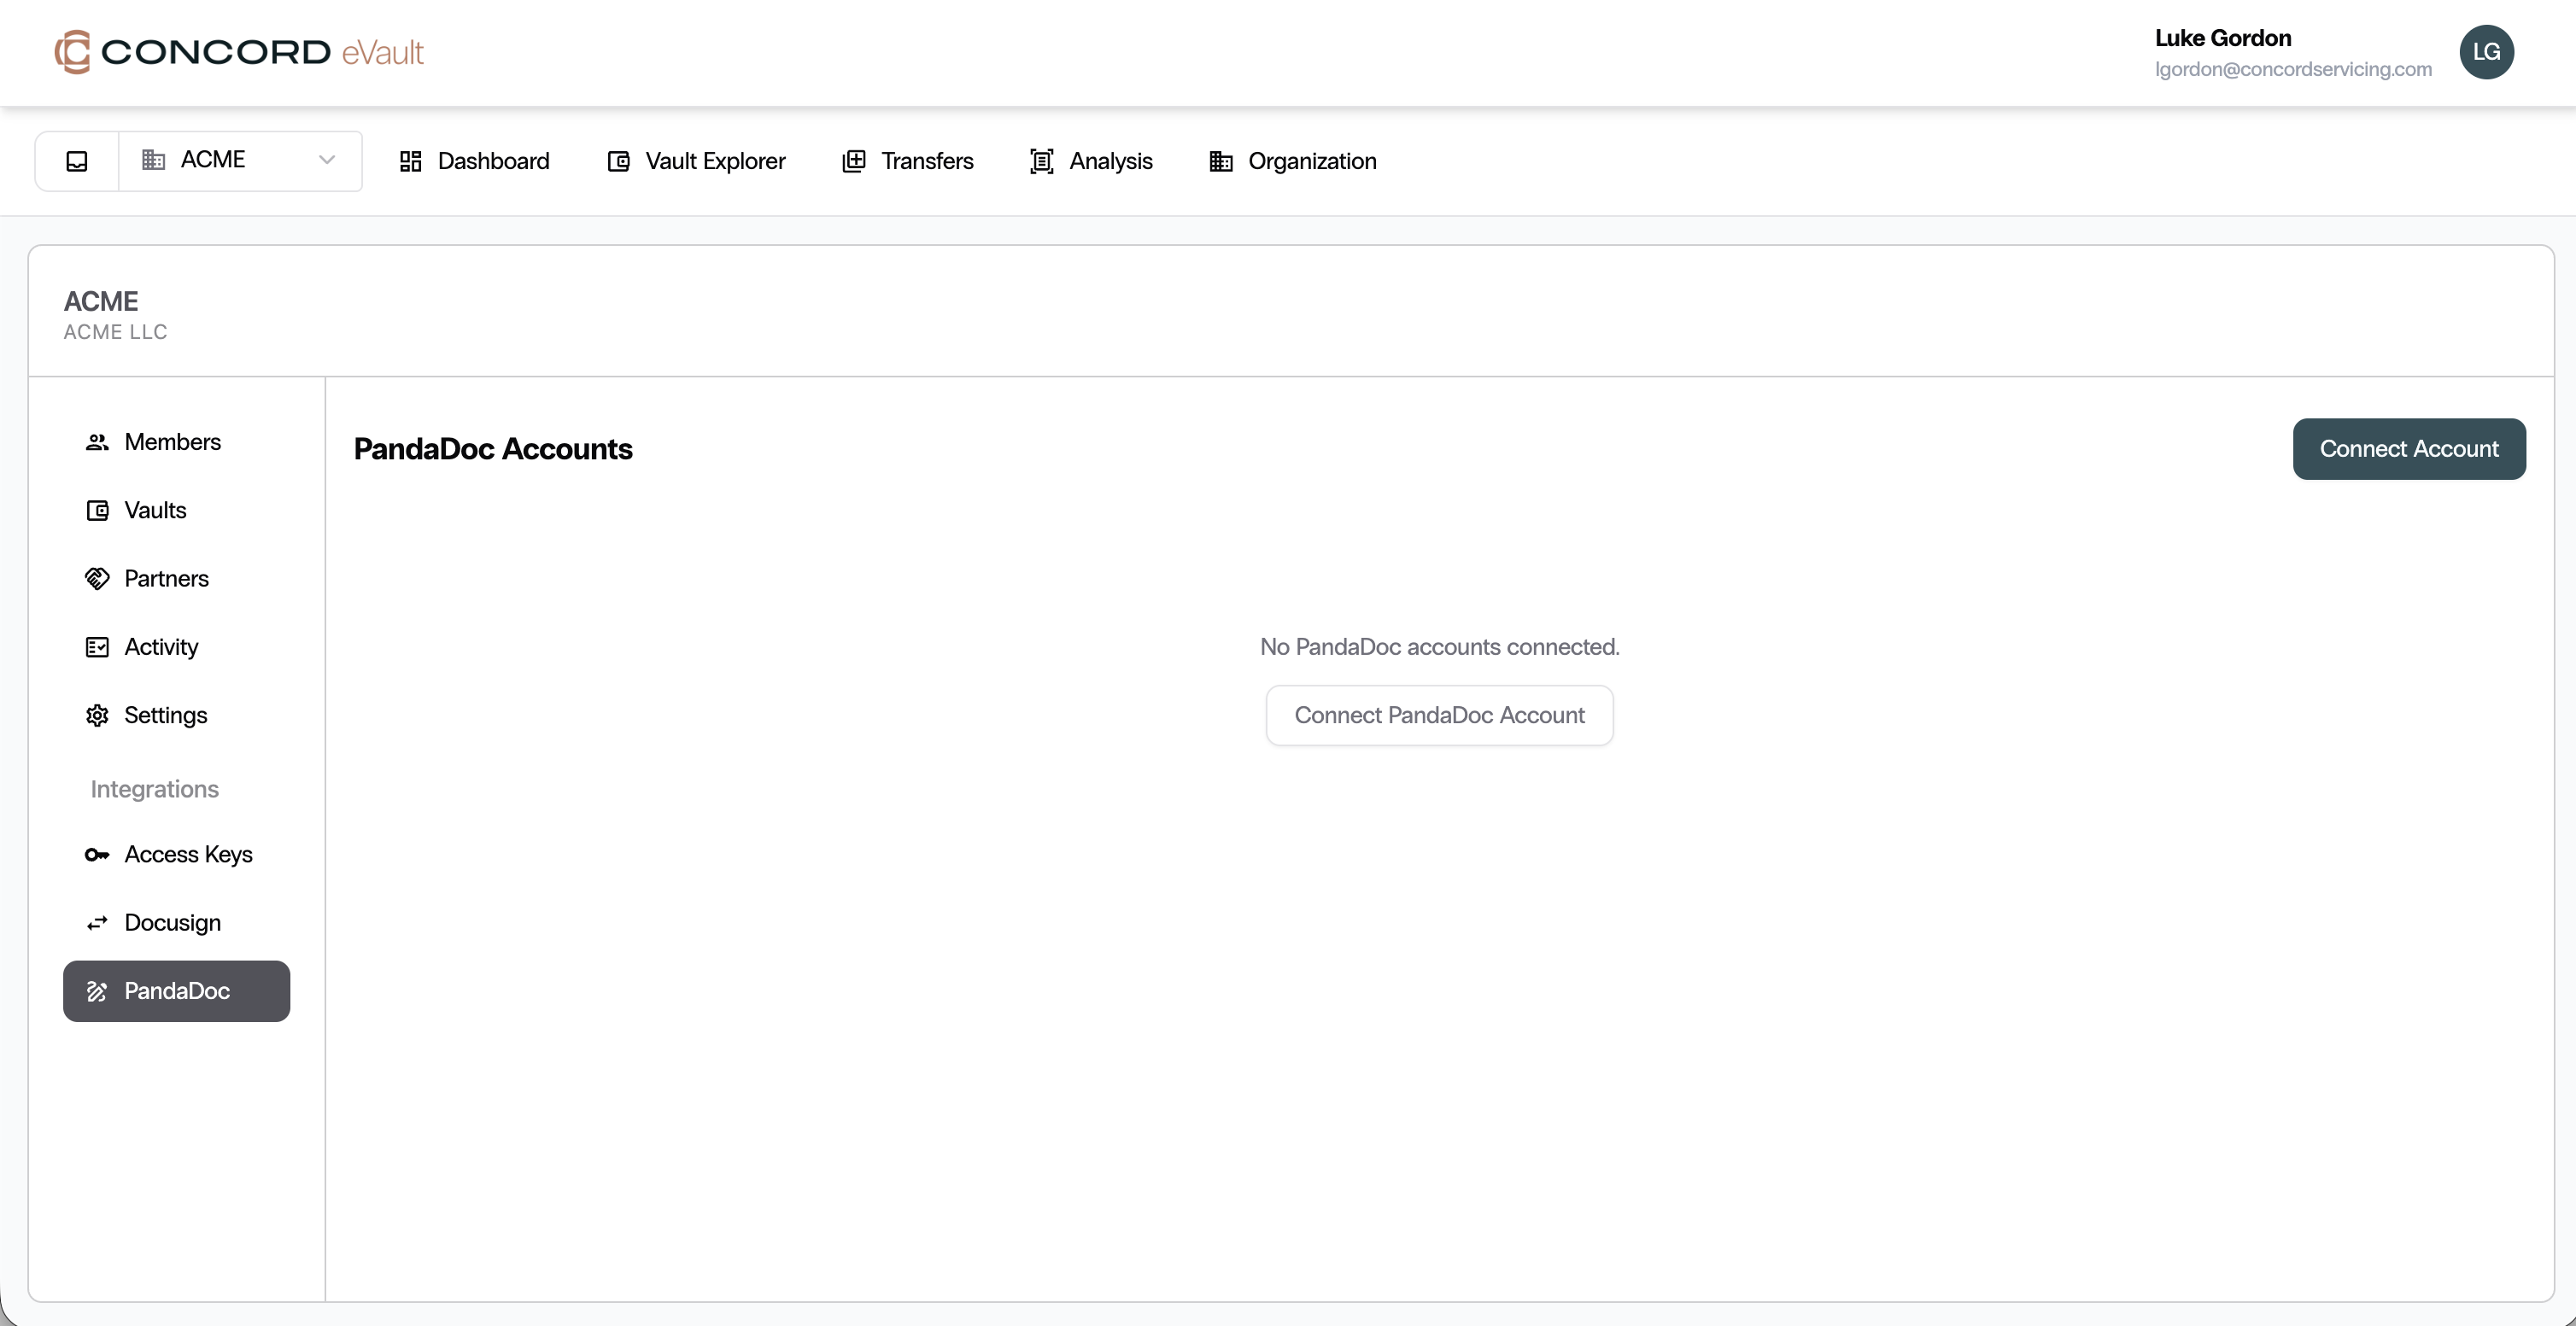
Step 2: Start the connection
On the PandaDoc integration screen, click Connect Account on the right-hand side. Type the name you want to use for the PandaDoc account in the dialog. Concord eVault supports multiple PandaDoc accounts connected to a single vault.
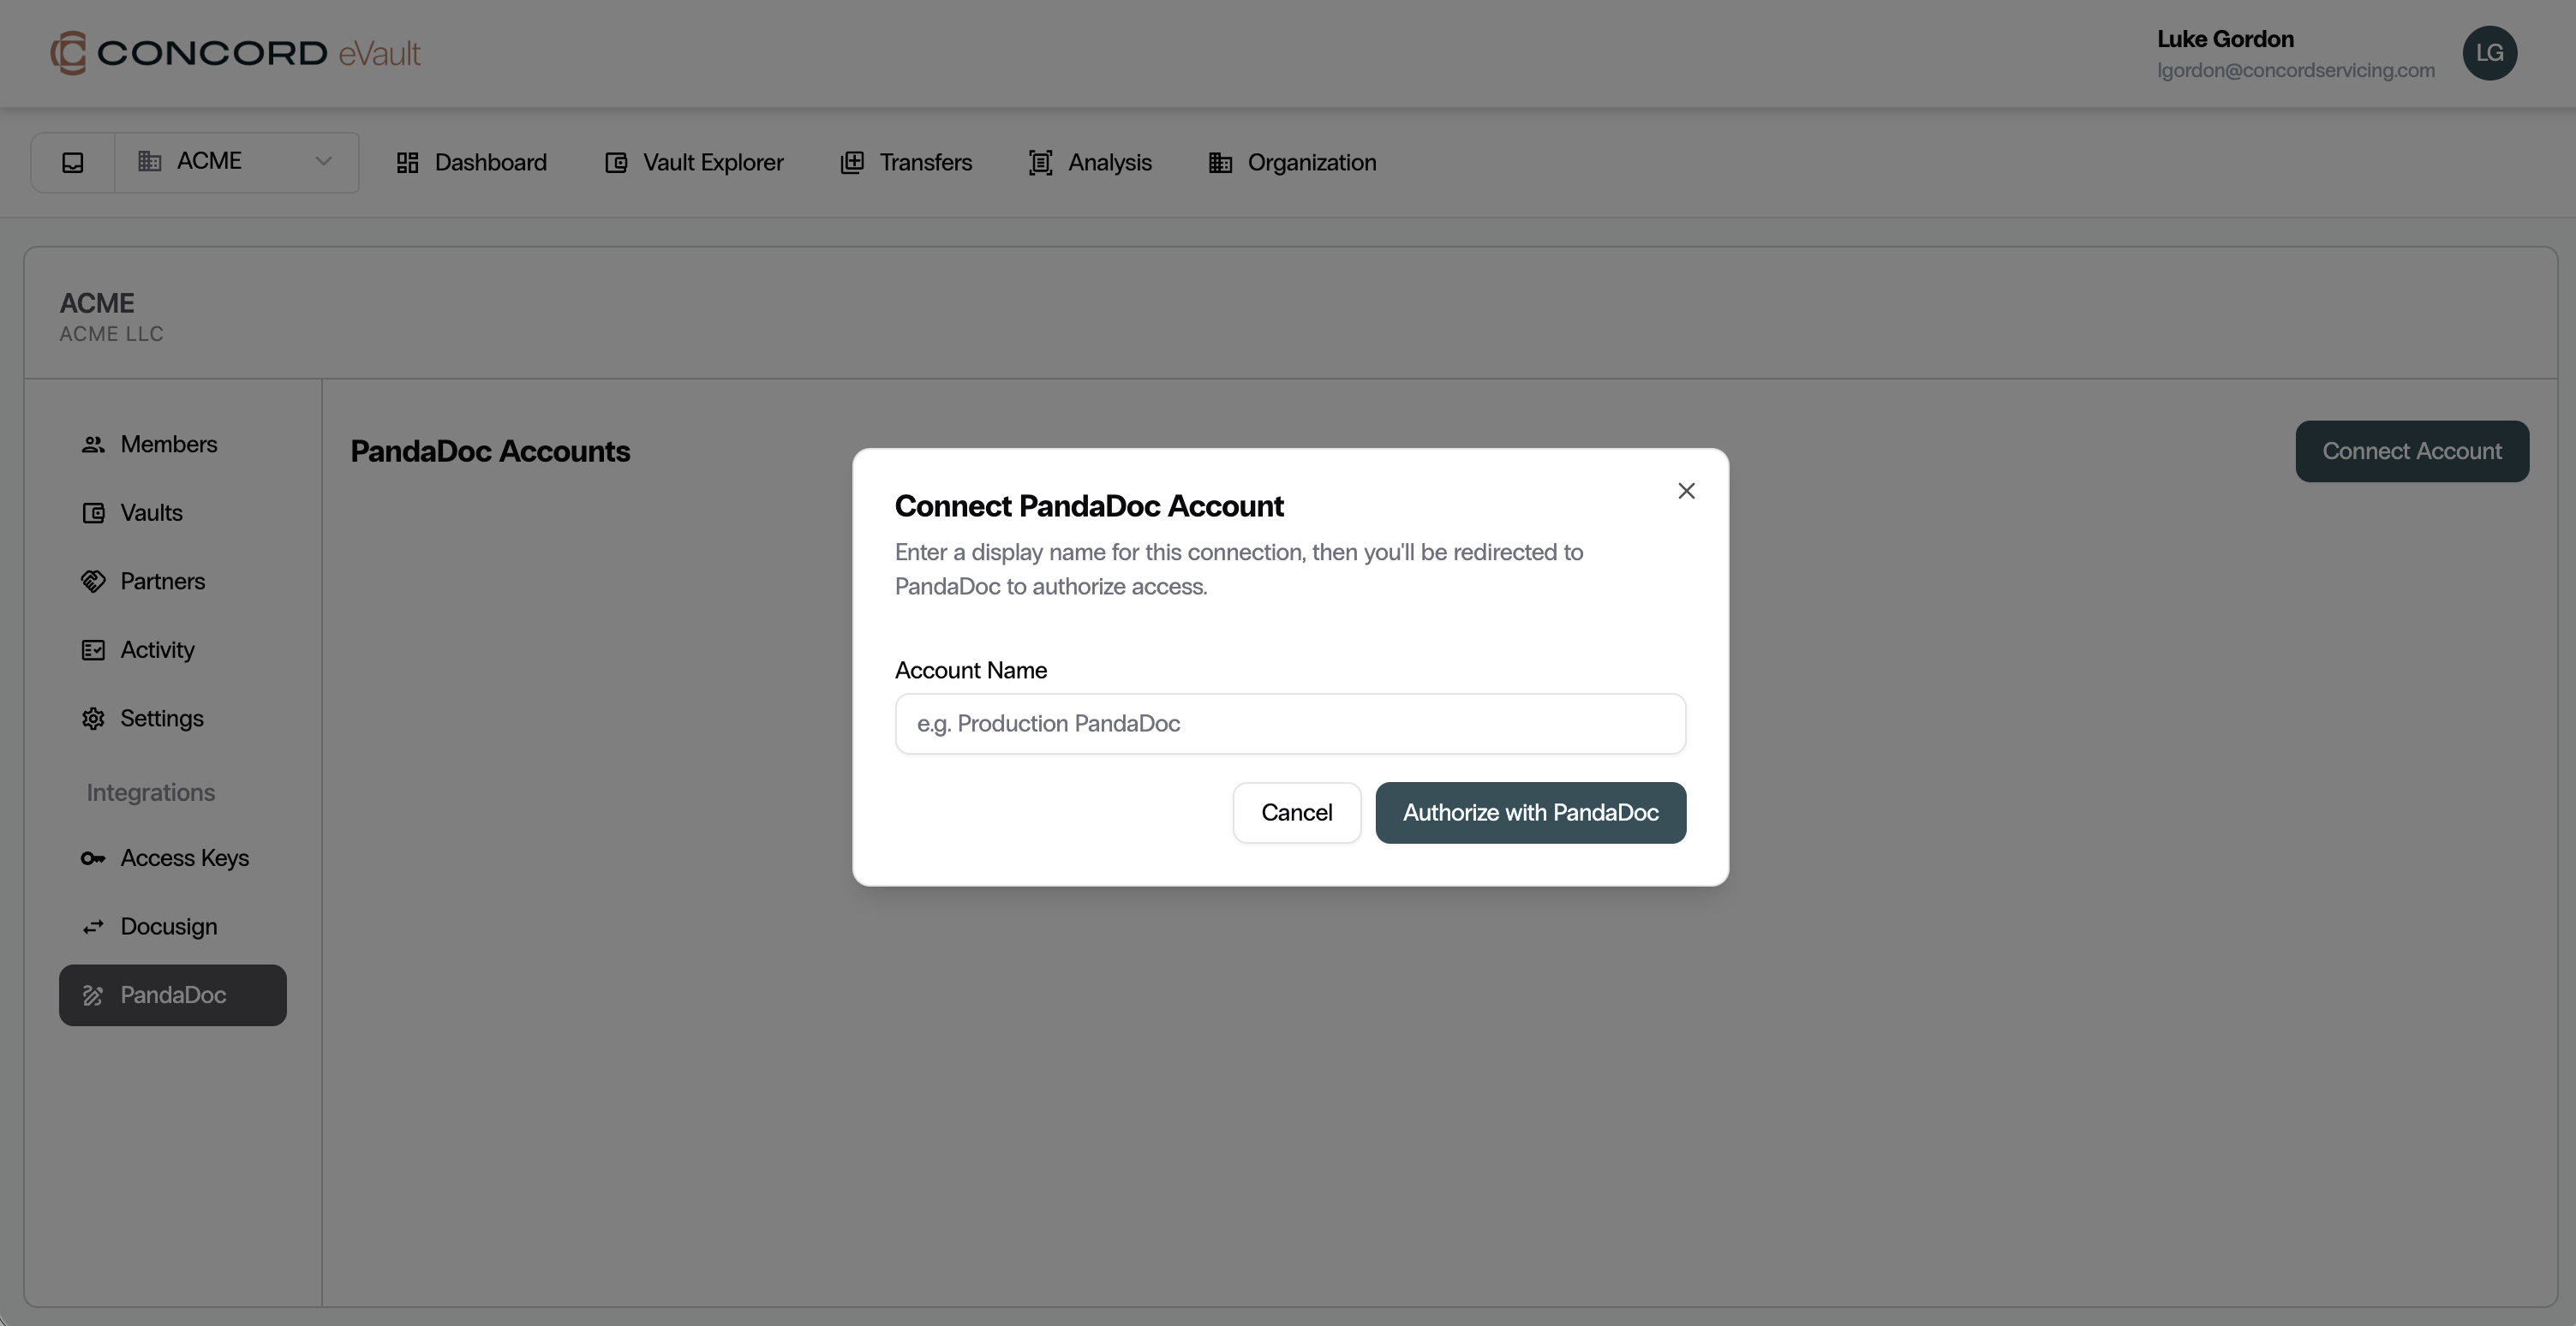
Step 3: Authorize in PandaDoc
Next, click Authorize with PandaDoc. This will navigate you to a screen where you can authorize the Concord PandaDoc application to interact with your PandaDoc account.
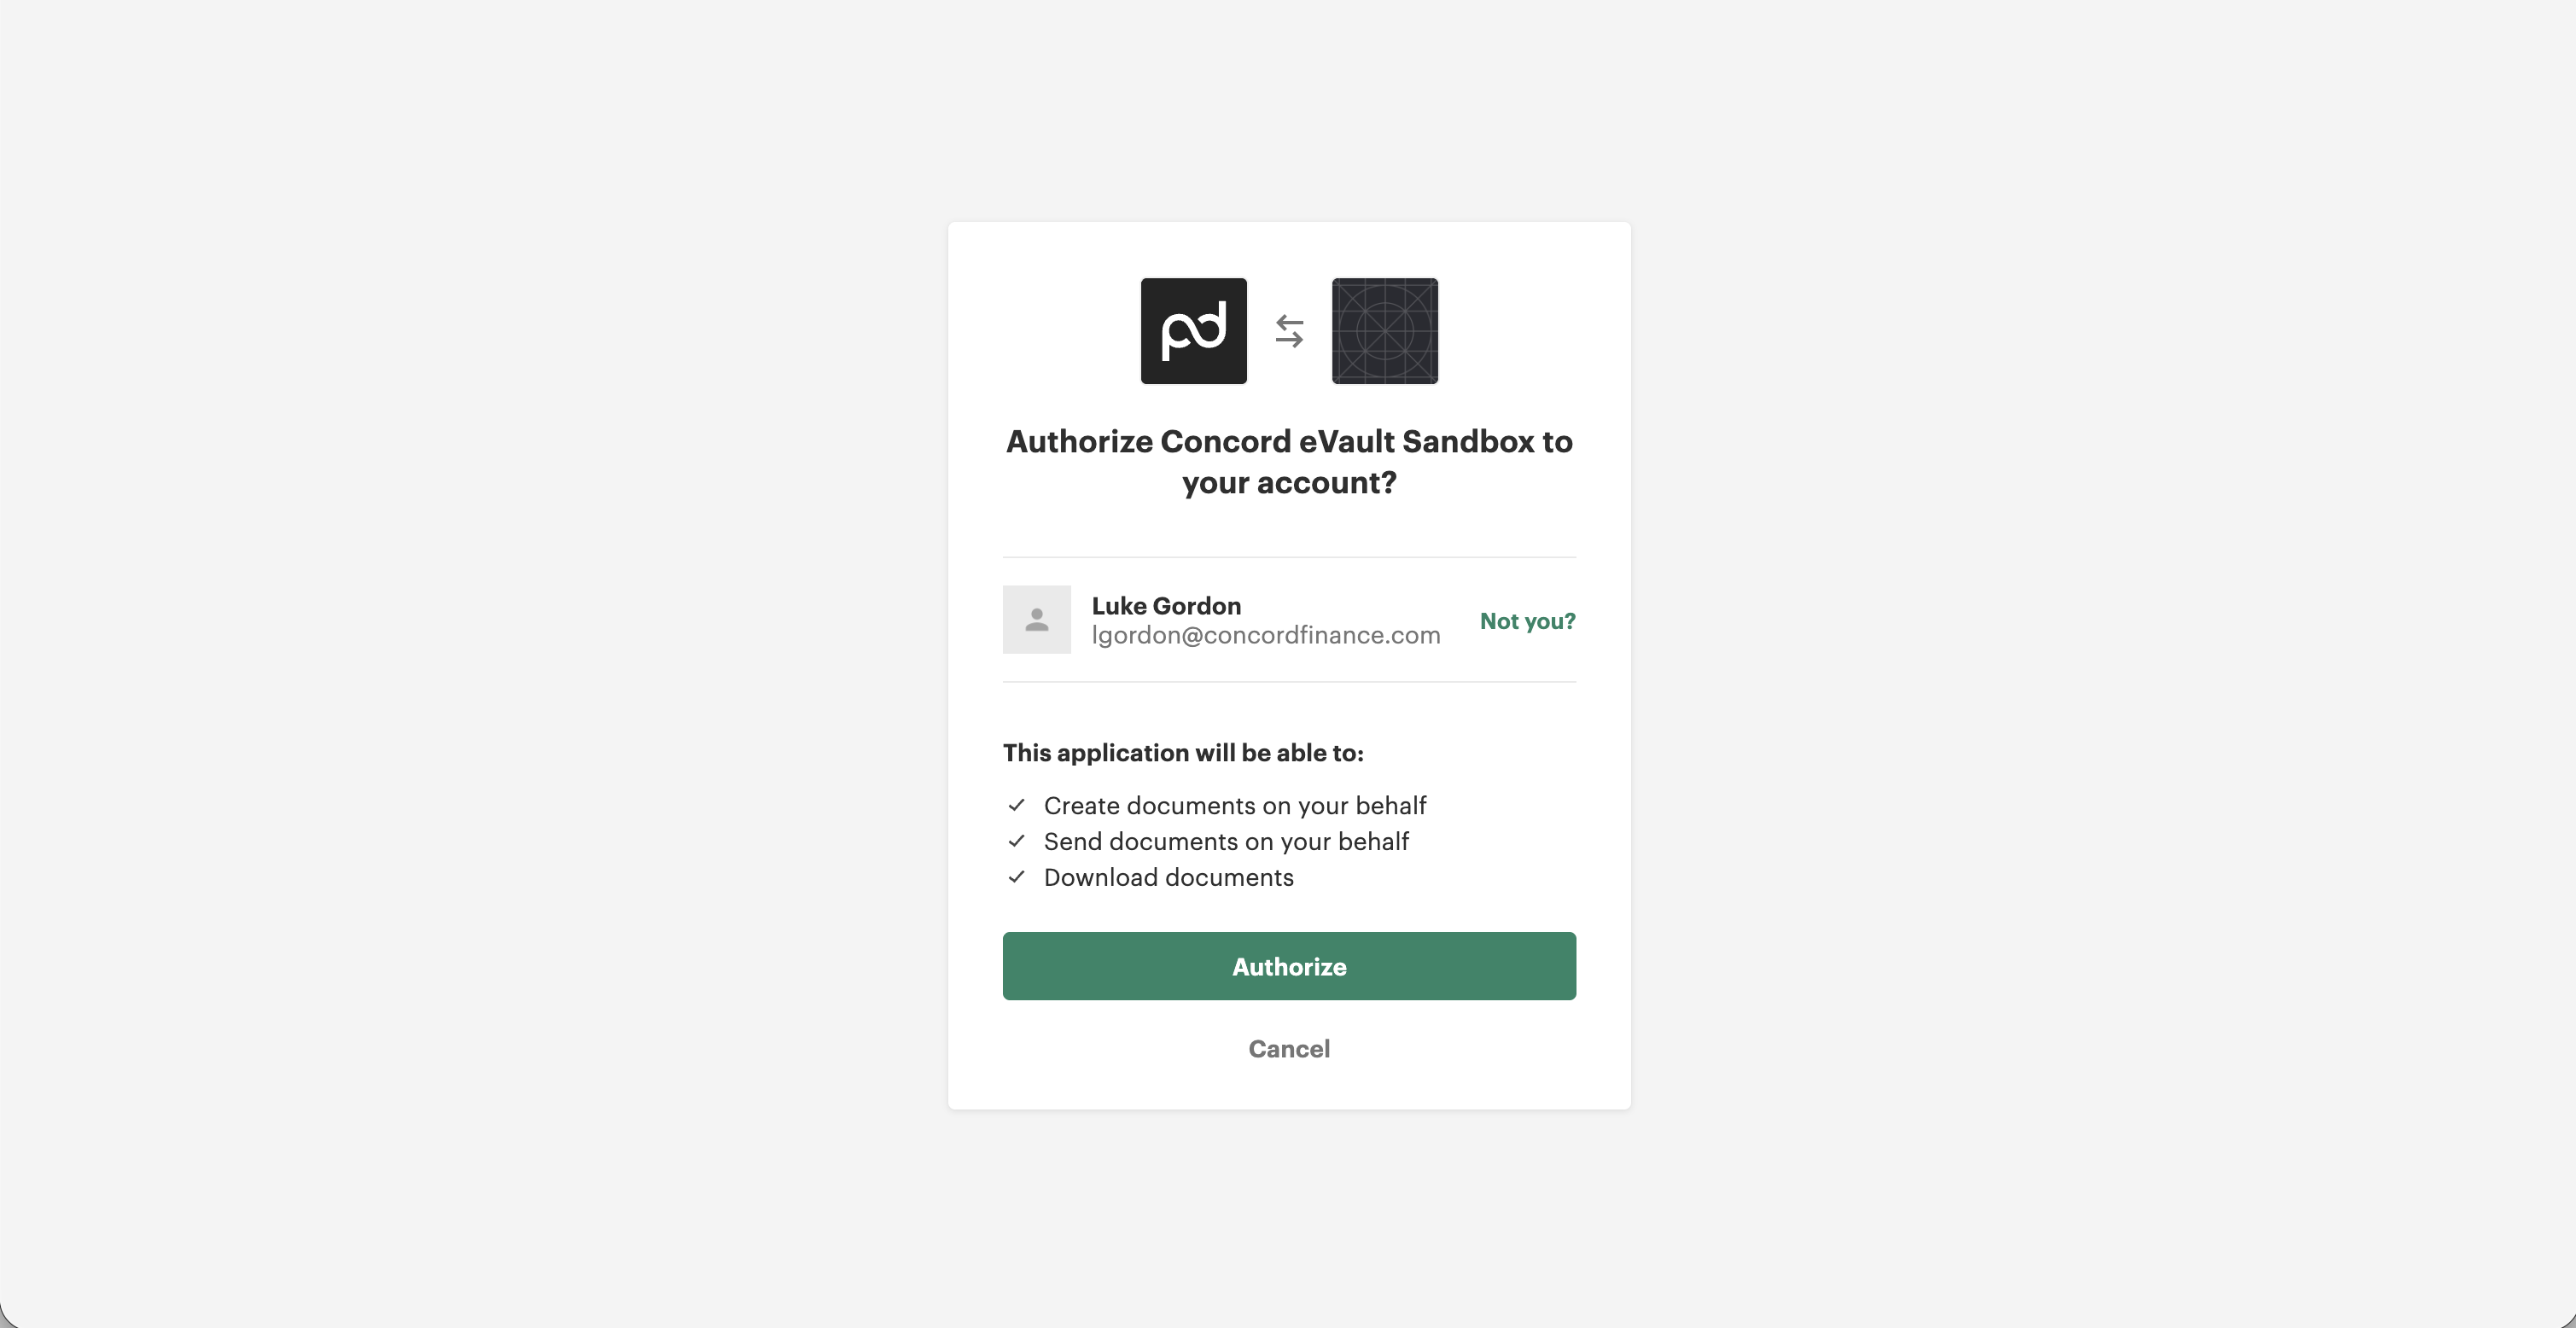
Step 4: Copy the webhook URL
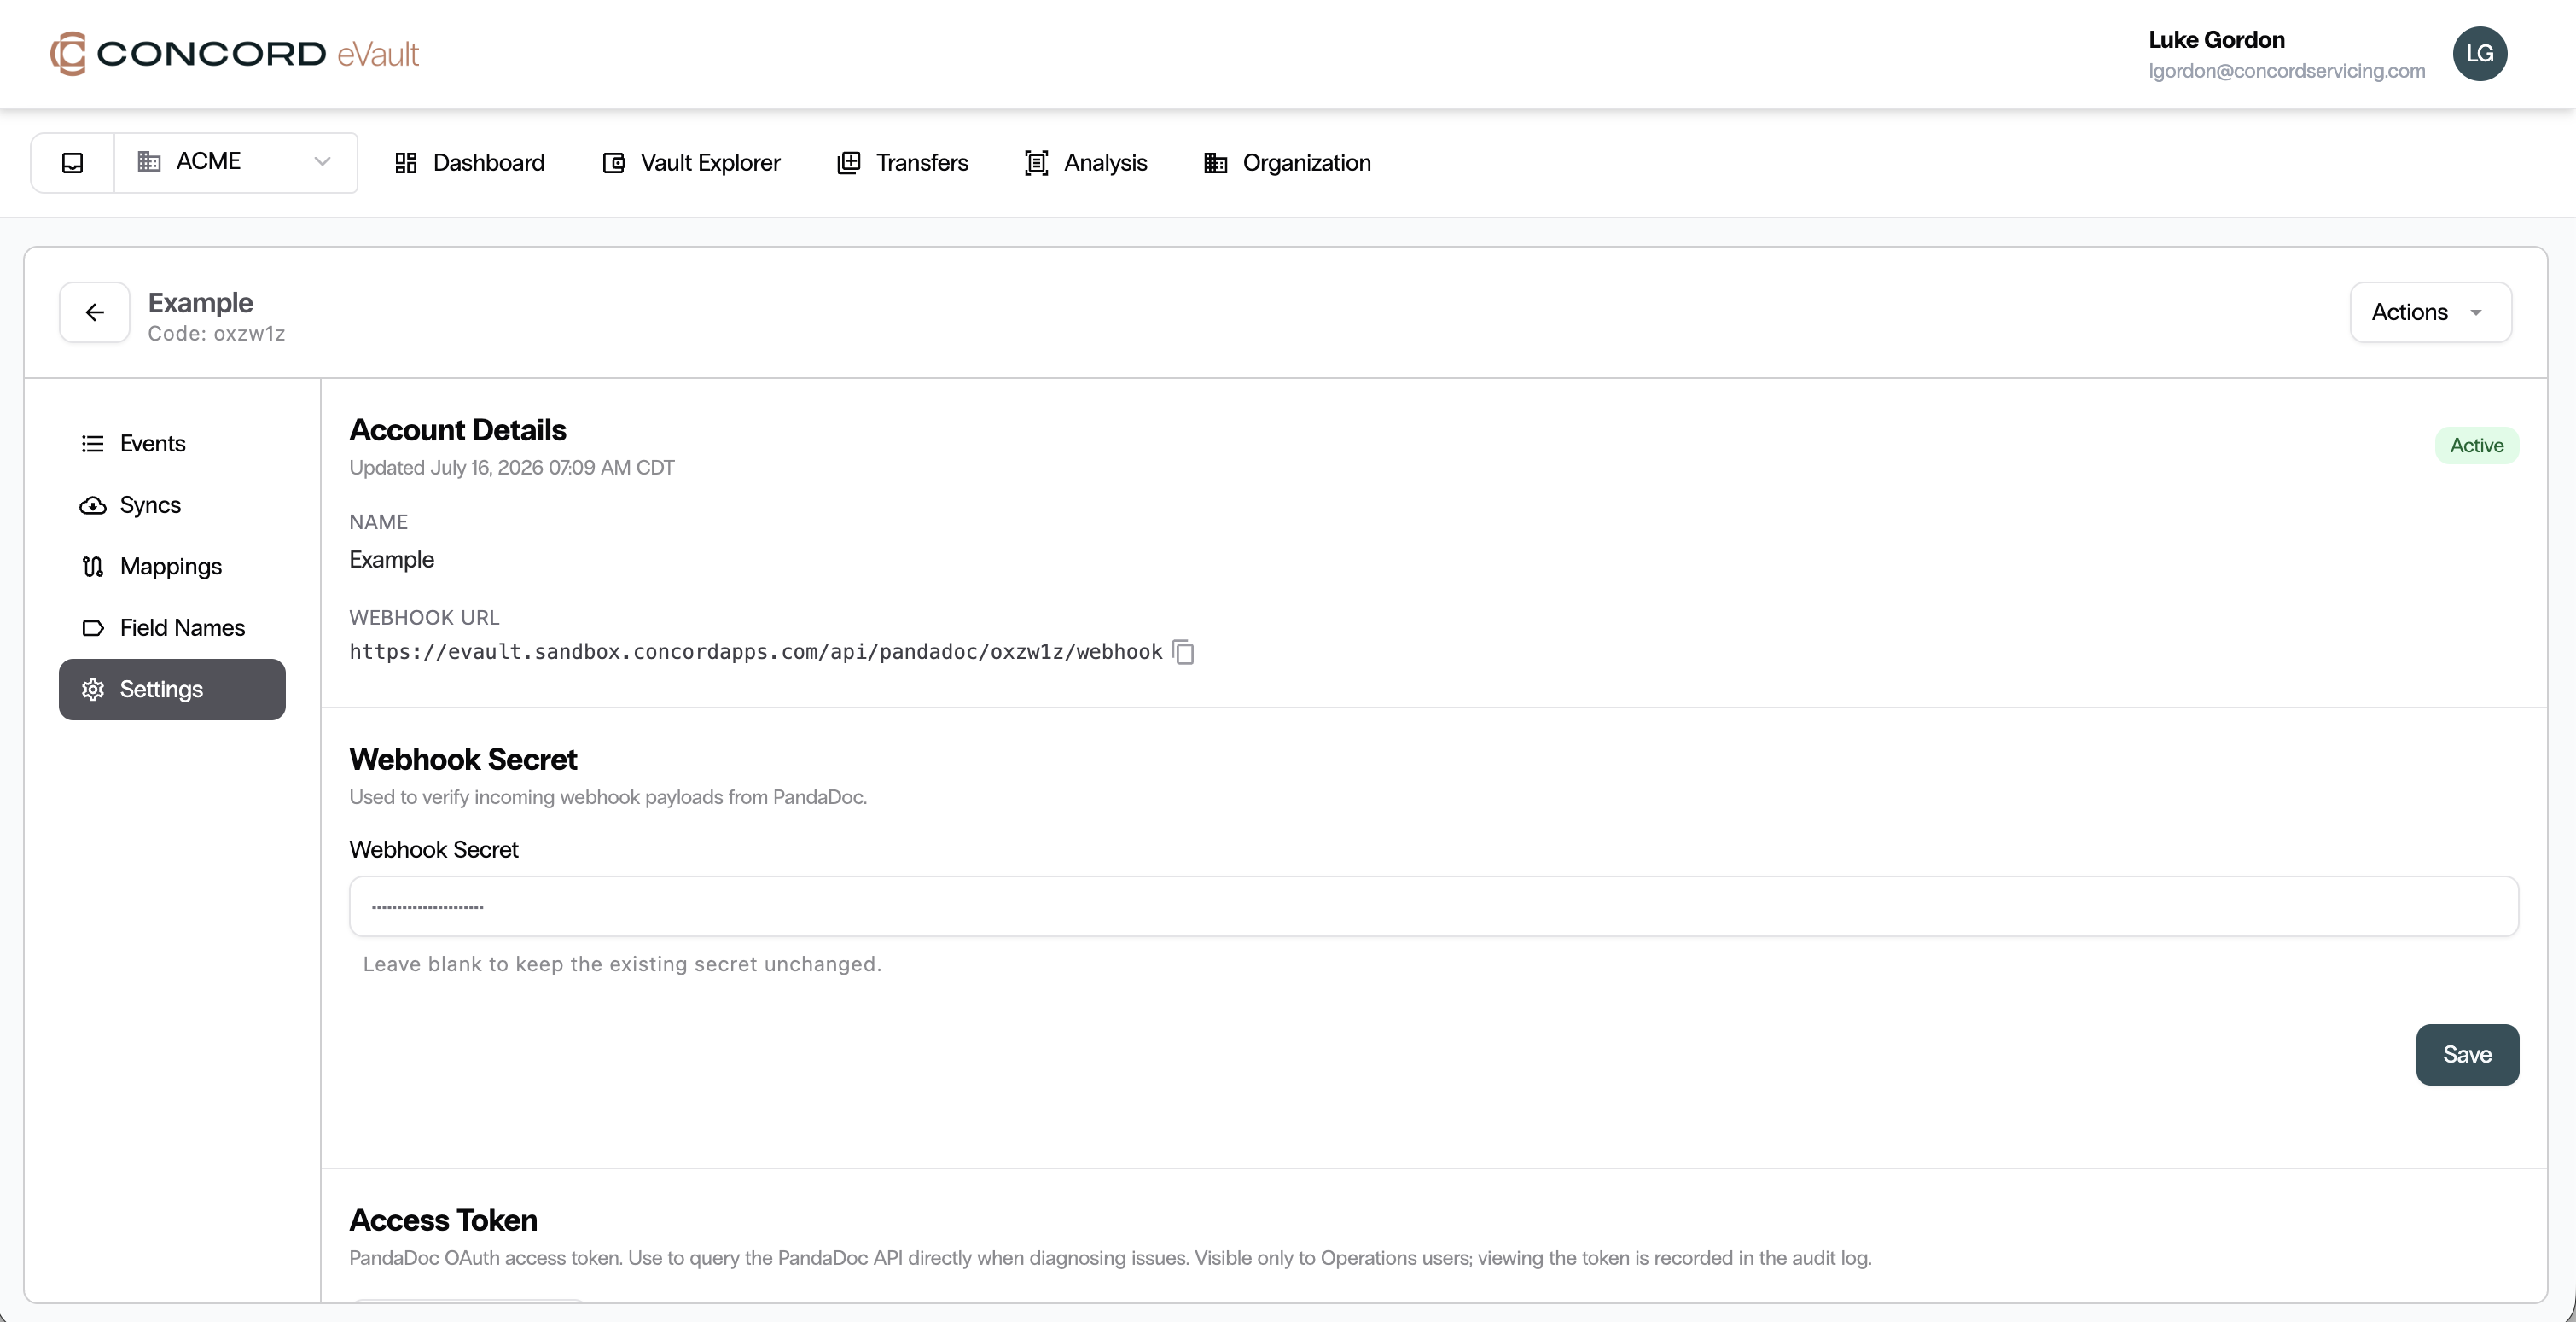
After you authorize the Concord PandaDoc application, you will be redirected back to Concord eVault. You will now see the account details screen for your PandaDoc account, as well as a webhook URL. Click the copy icon next to the webhook URL. These webhook URLs will be unique to each account integrated with each vault.
Part 2: Create the webhook in PandaDoc
Step 5: Open the PandaDoc Dev Center
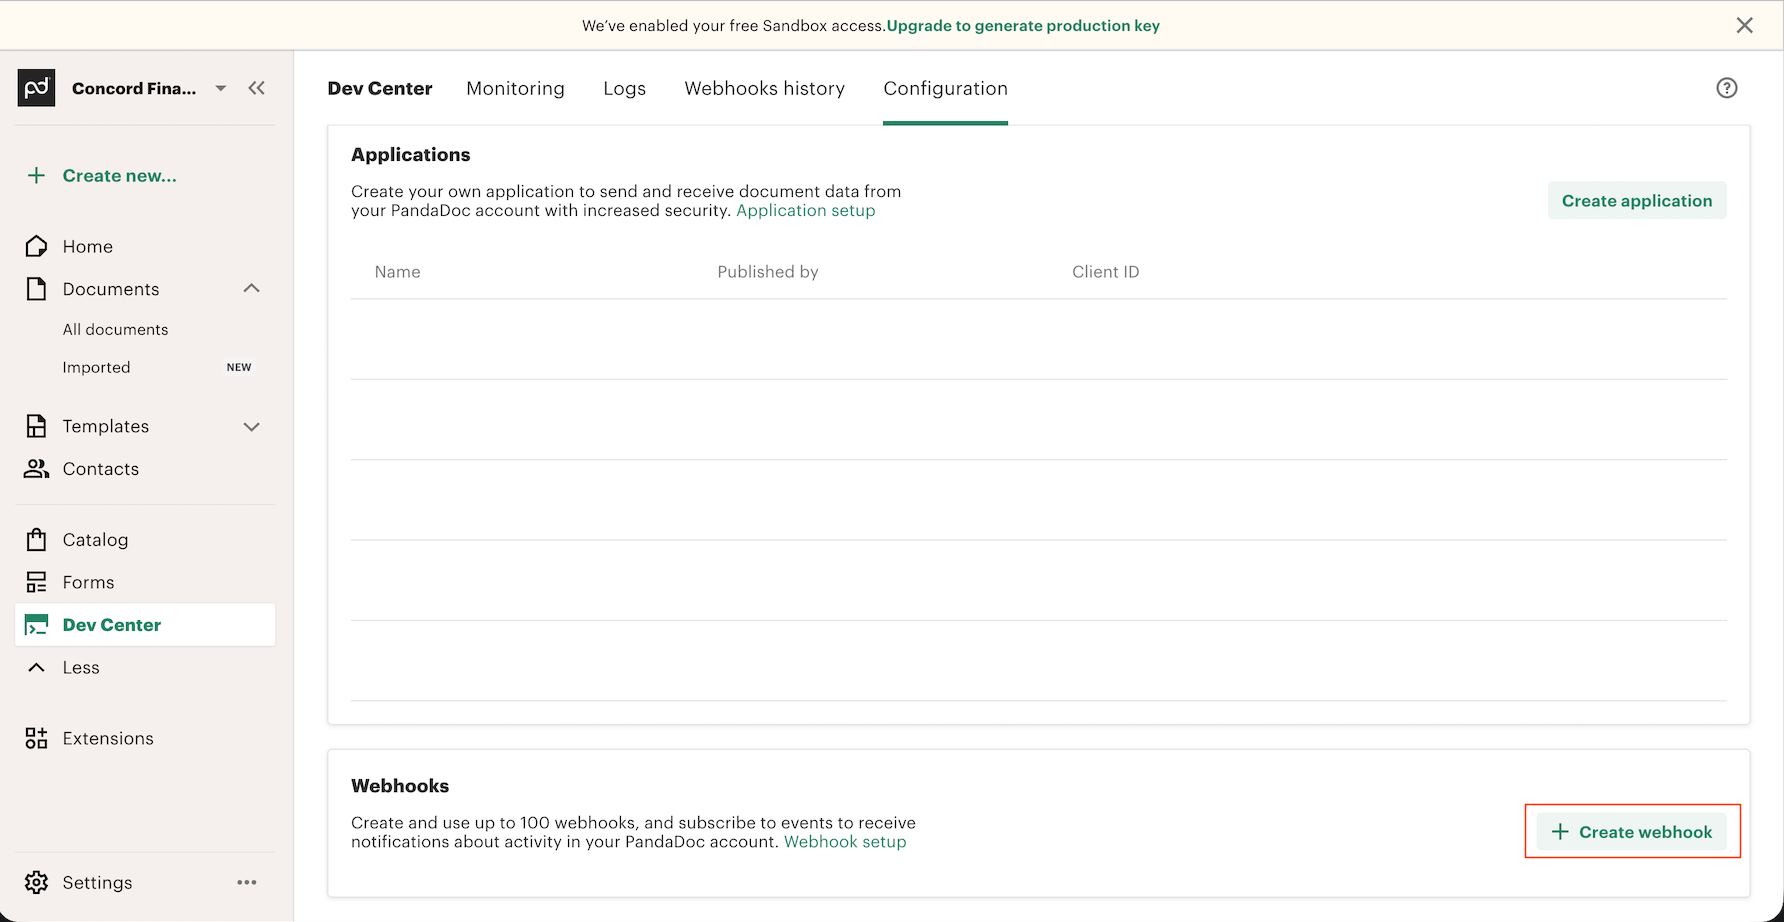
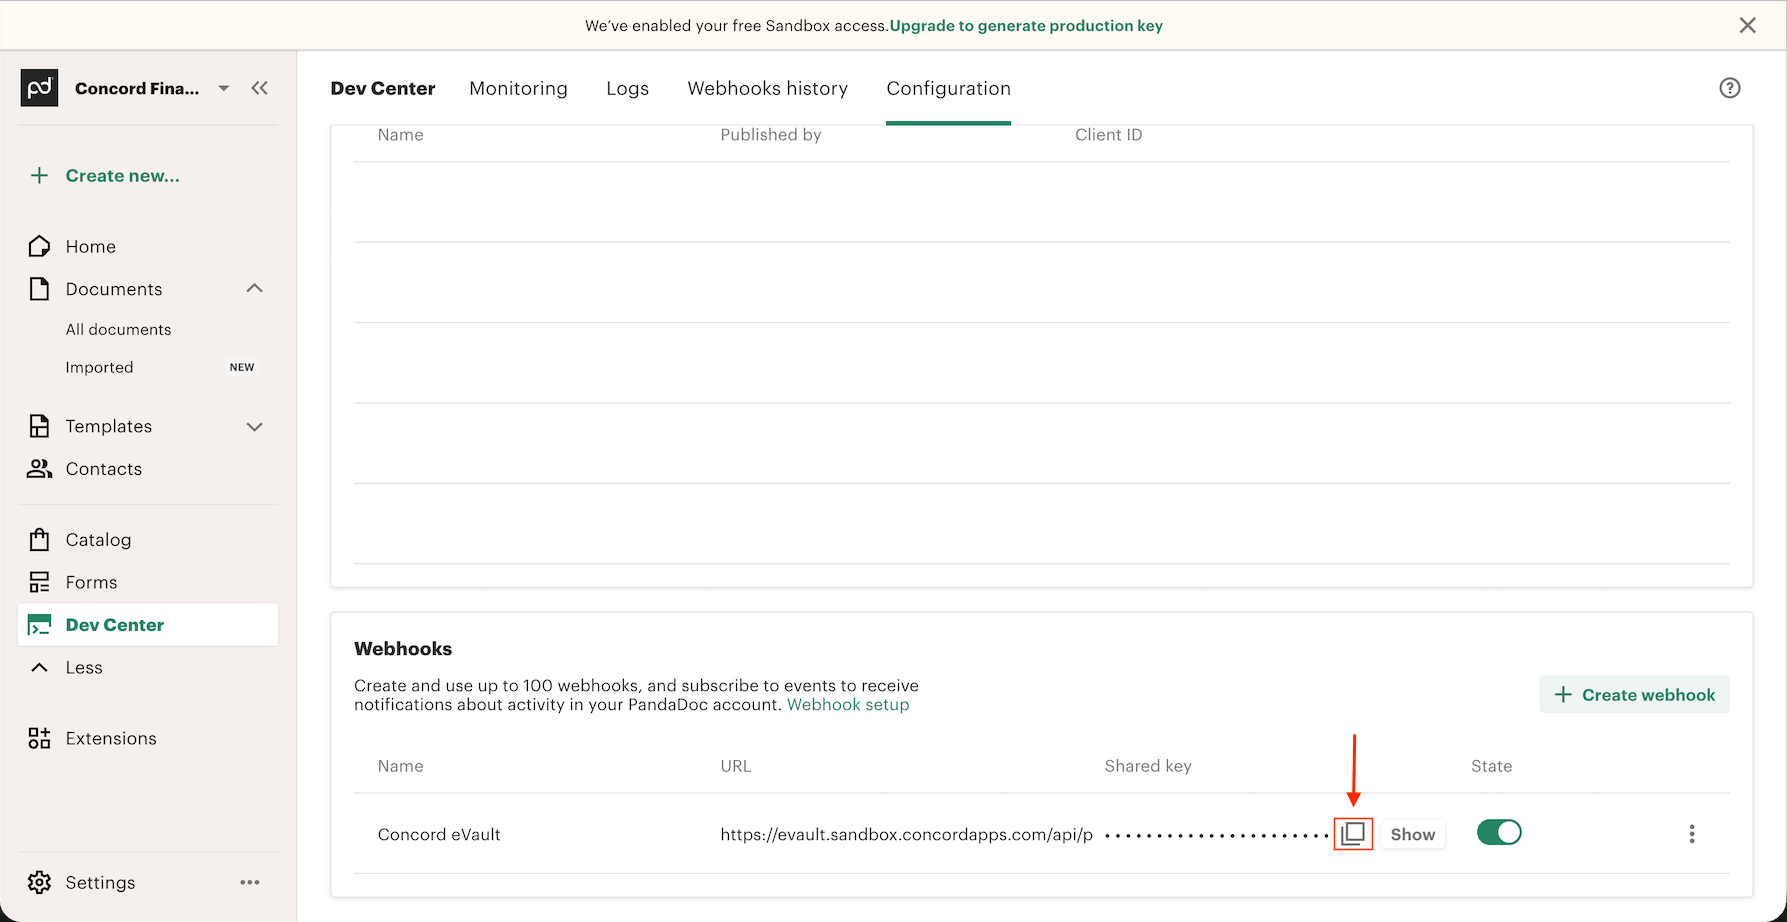
After you have copied the webhook URL, go back to your PandaDoc account. Go to the Dev Center on the left-hand side navigation and the Configuration tab, as shown in the screenshot. Click the Create Webhook button in the bottom right-hand corner.
Step 6: Configure the webhook
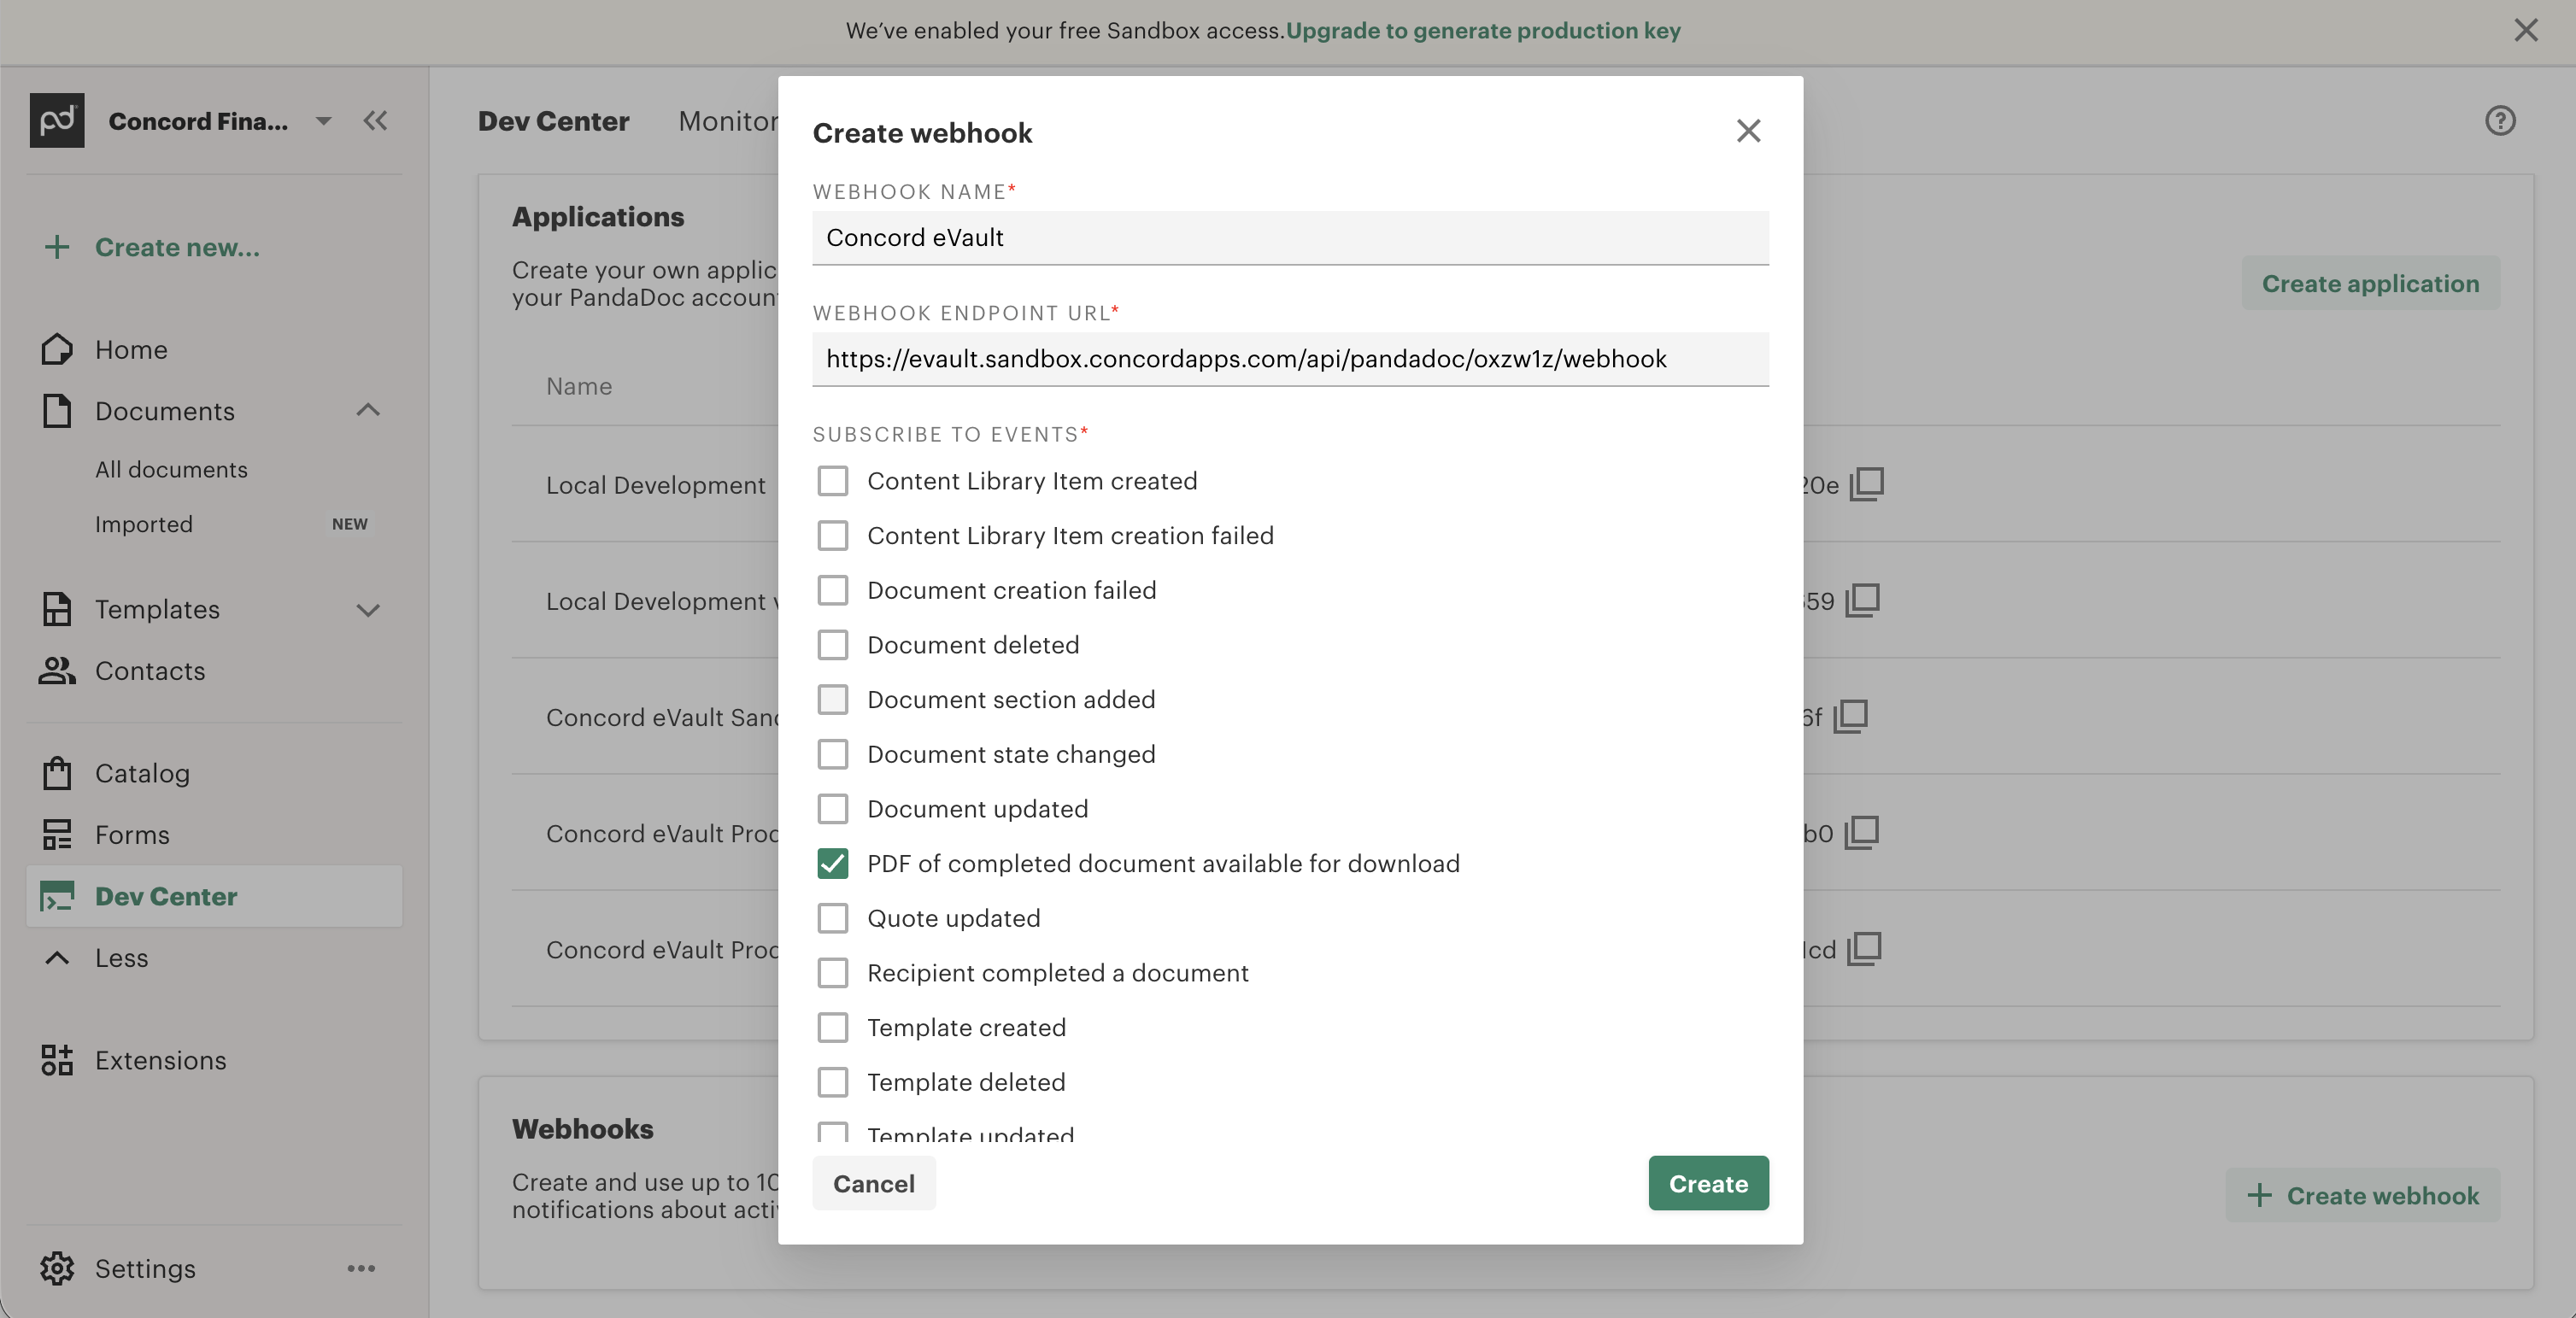
Enter a name for your webhook and then paste the URL you had copied previously. Also, make sure to select the checkbox for PDF of completed document available for download.
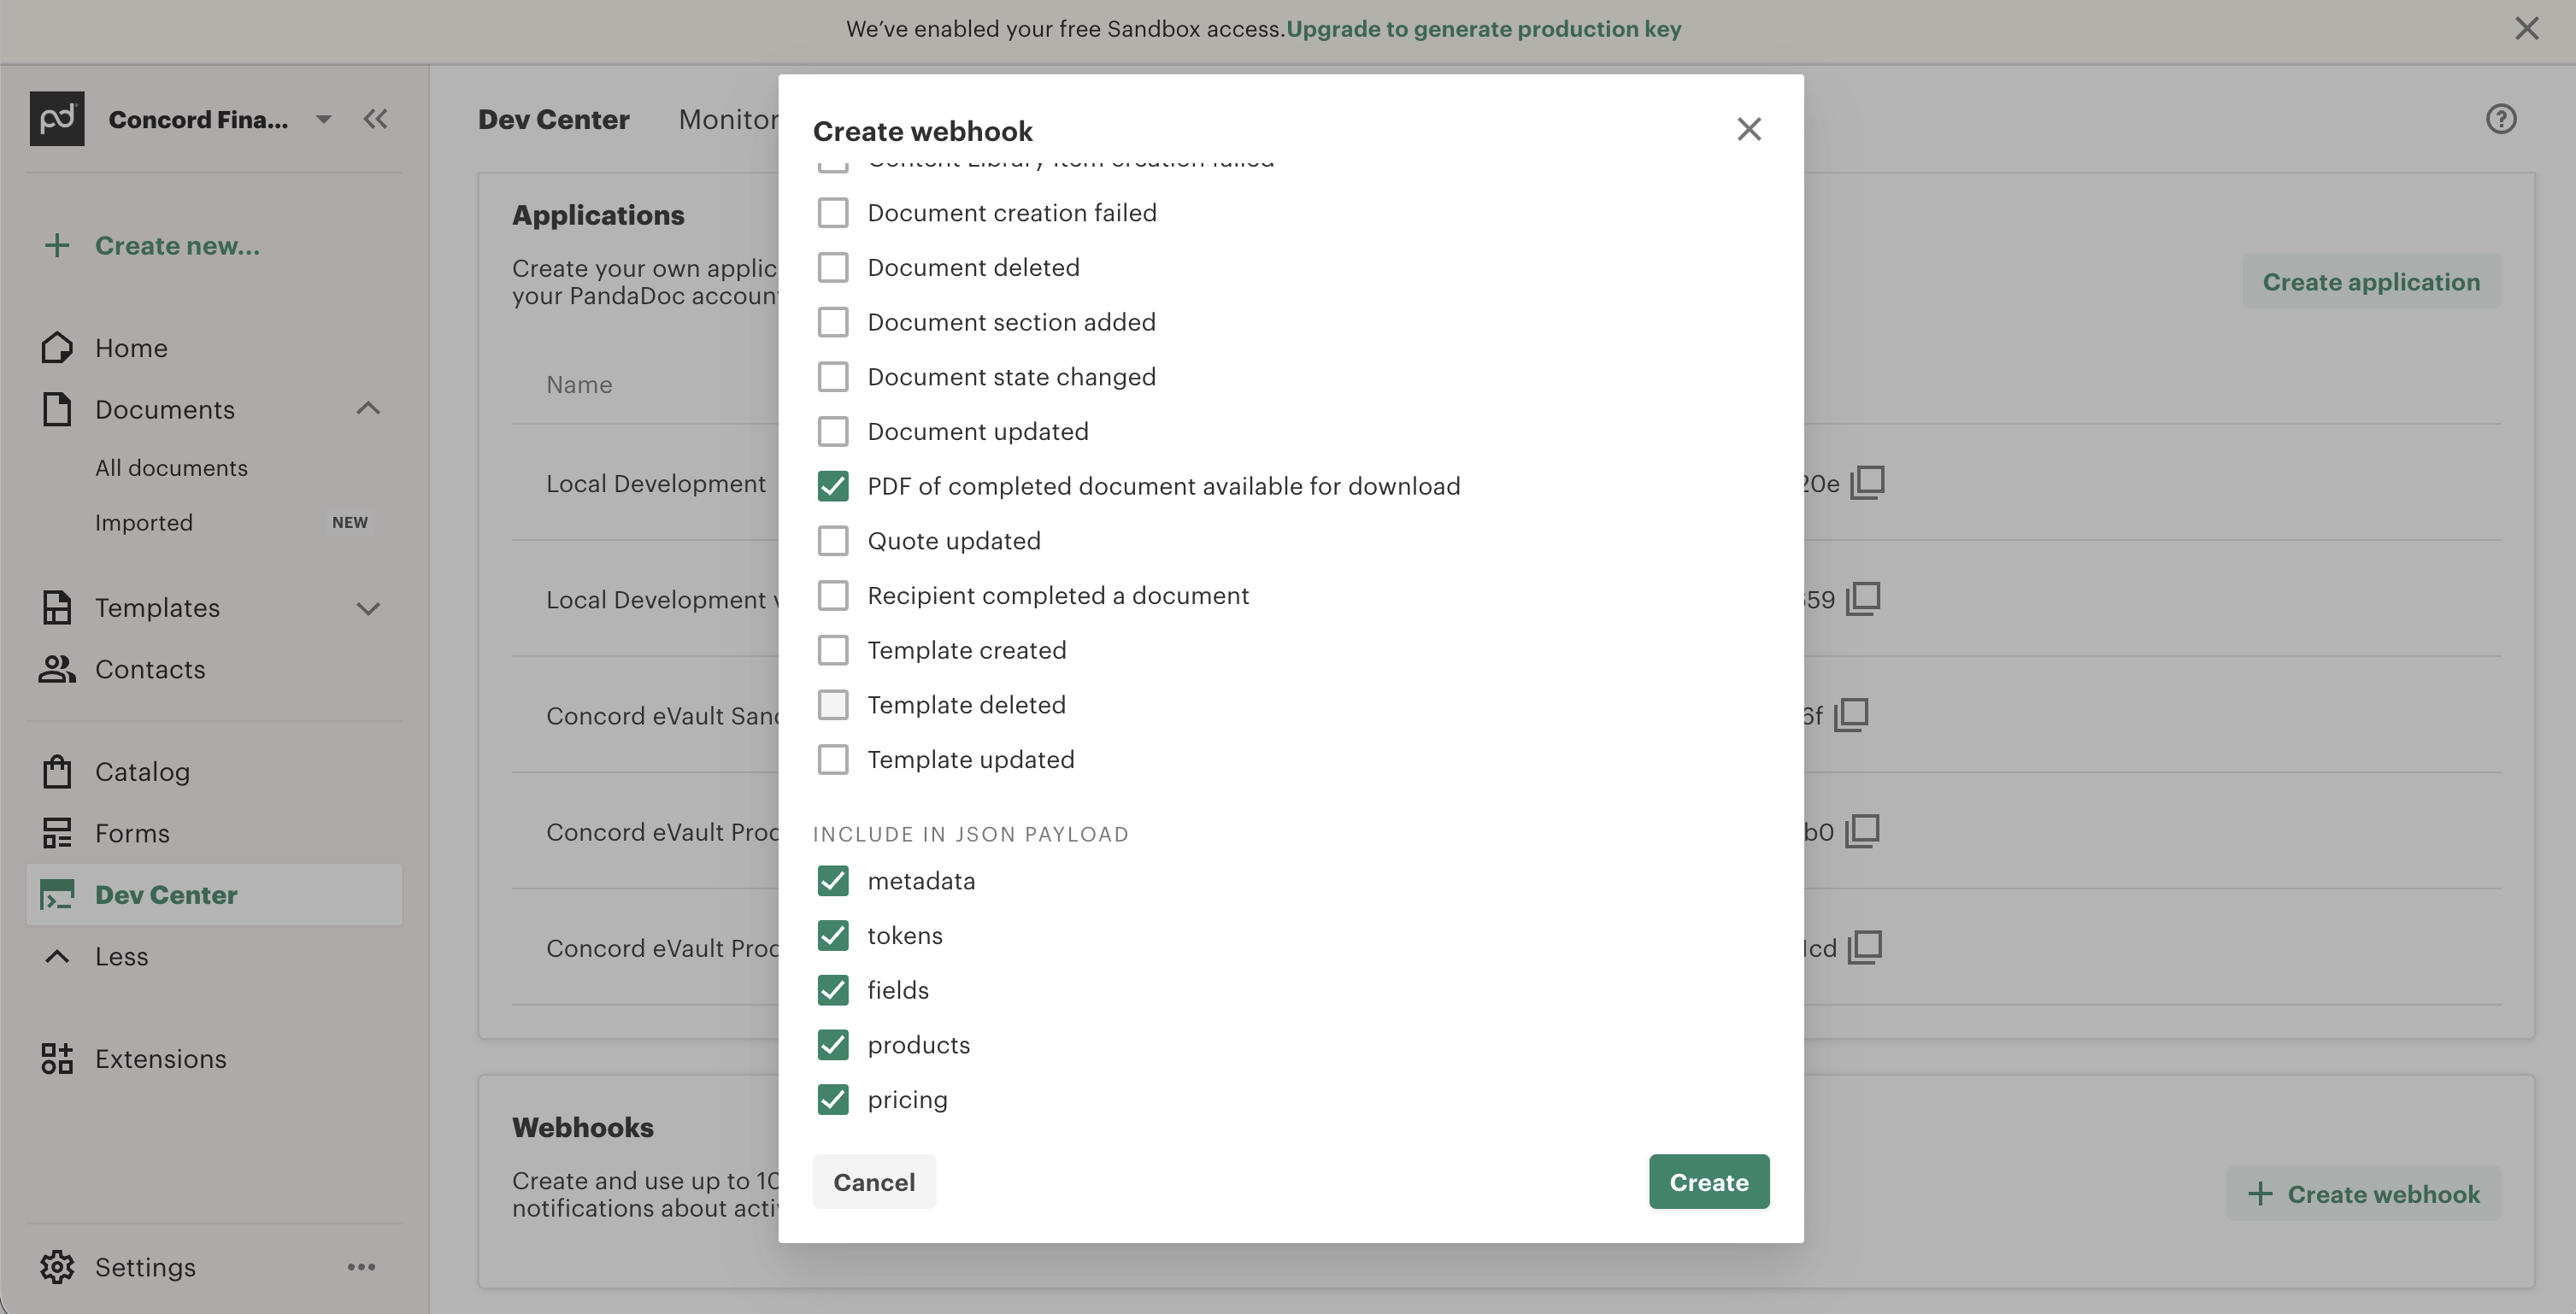
Scroll down in the dialog and make sure you have also selected all the fields to include in the JSON payload as seen in the screenshot.
Step 7: Share the signing secret with eVault
- Click the Create button to create the webhook. This will now populate the webhook in the table you'll see in the screenshot below.
- Click the copy icon next to the shared key. This will copy a secret key we will use in Concord eVault to verify that events sent from PandaDoc originated from PandaDoc itself.
Back in Concord eVault, paste the webhook secret you copied into the Webhook Secret input field and click Save.
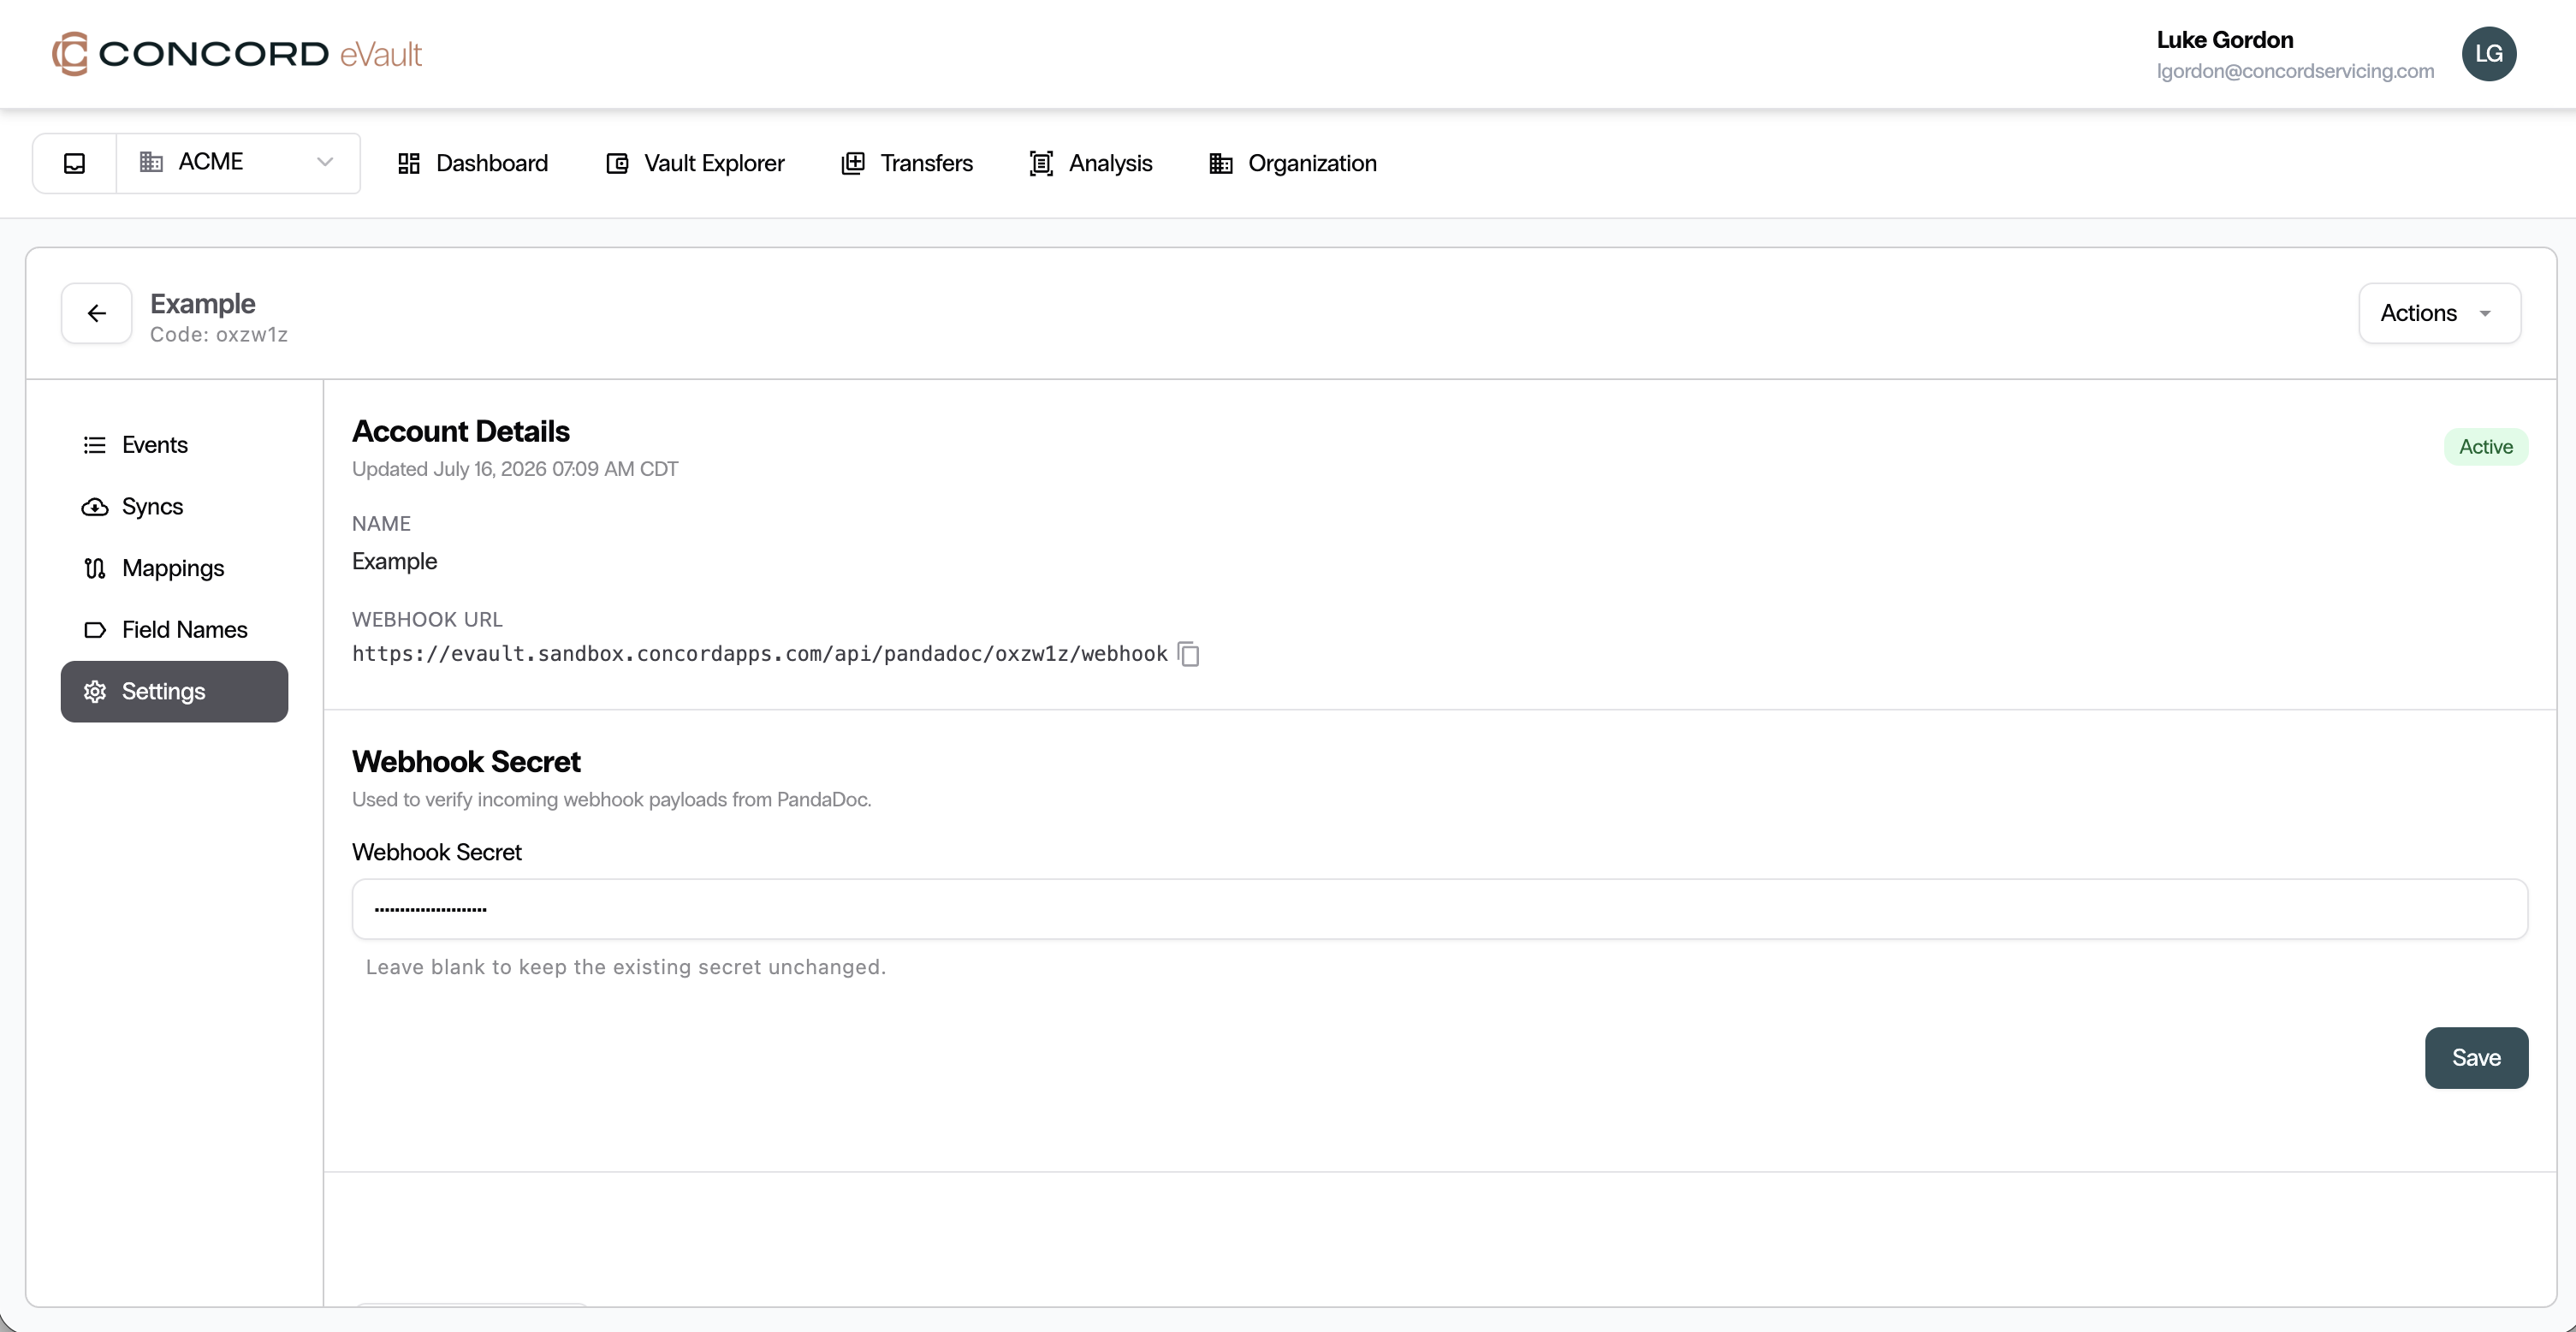
The secret is only shown once in PandaDoc. If you lose it, regenerate it in PandaDoc and update the value in eVault.
Part 3: Map PandaDoc folders to eVault folders
Step 8: Open Mappings
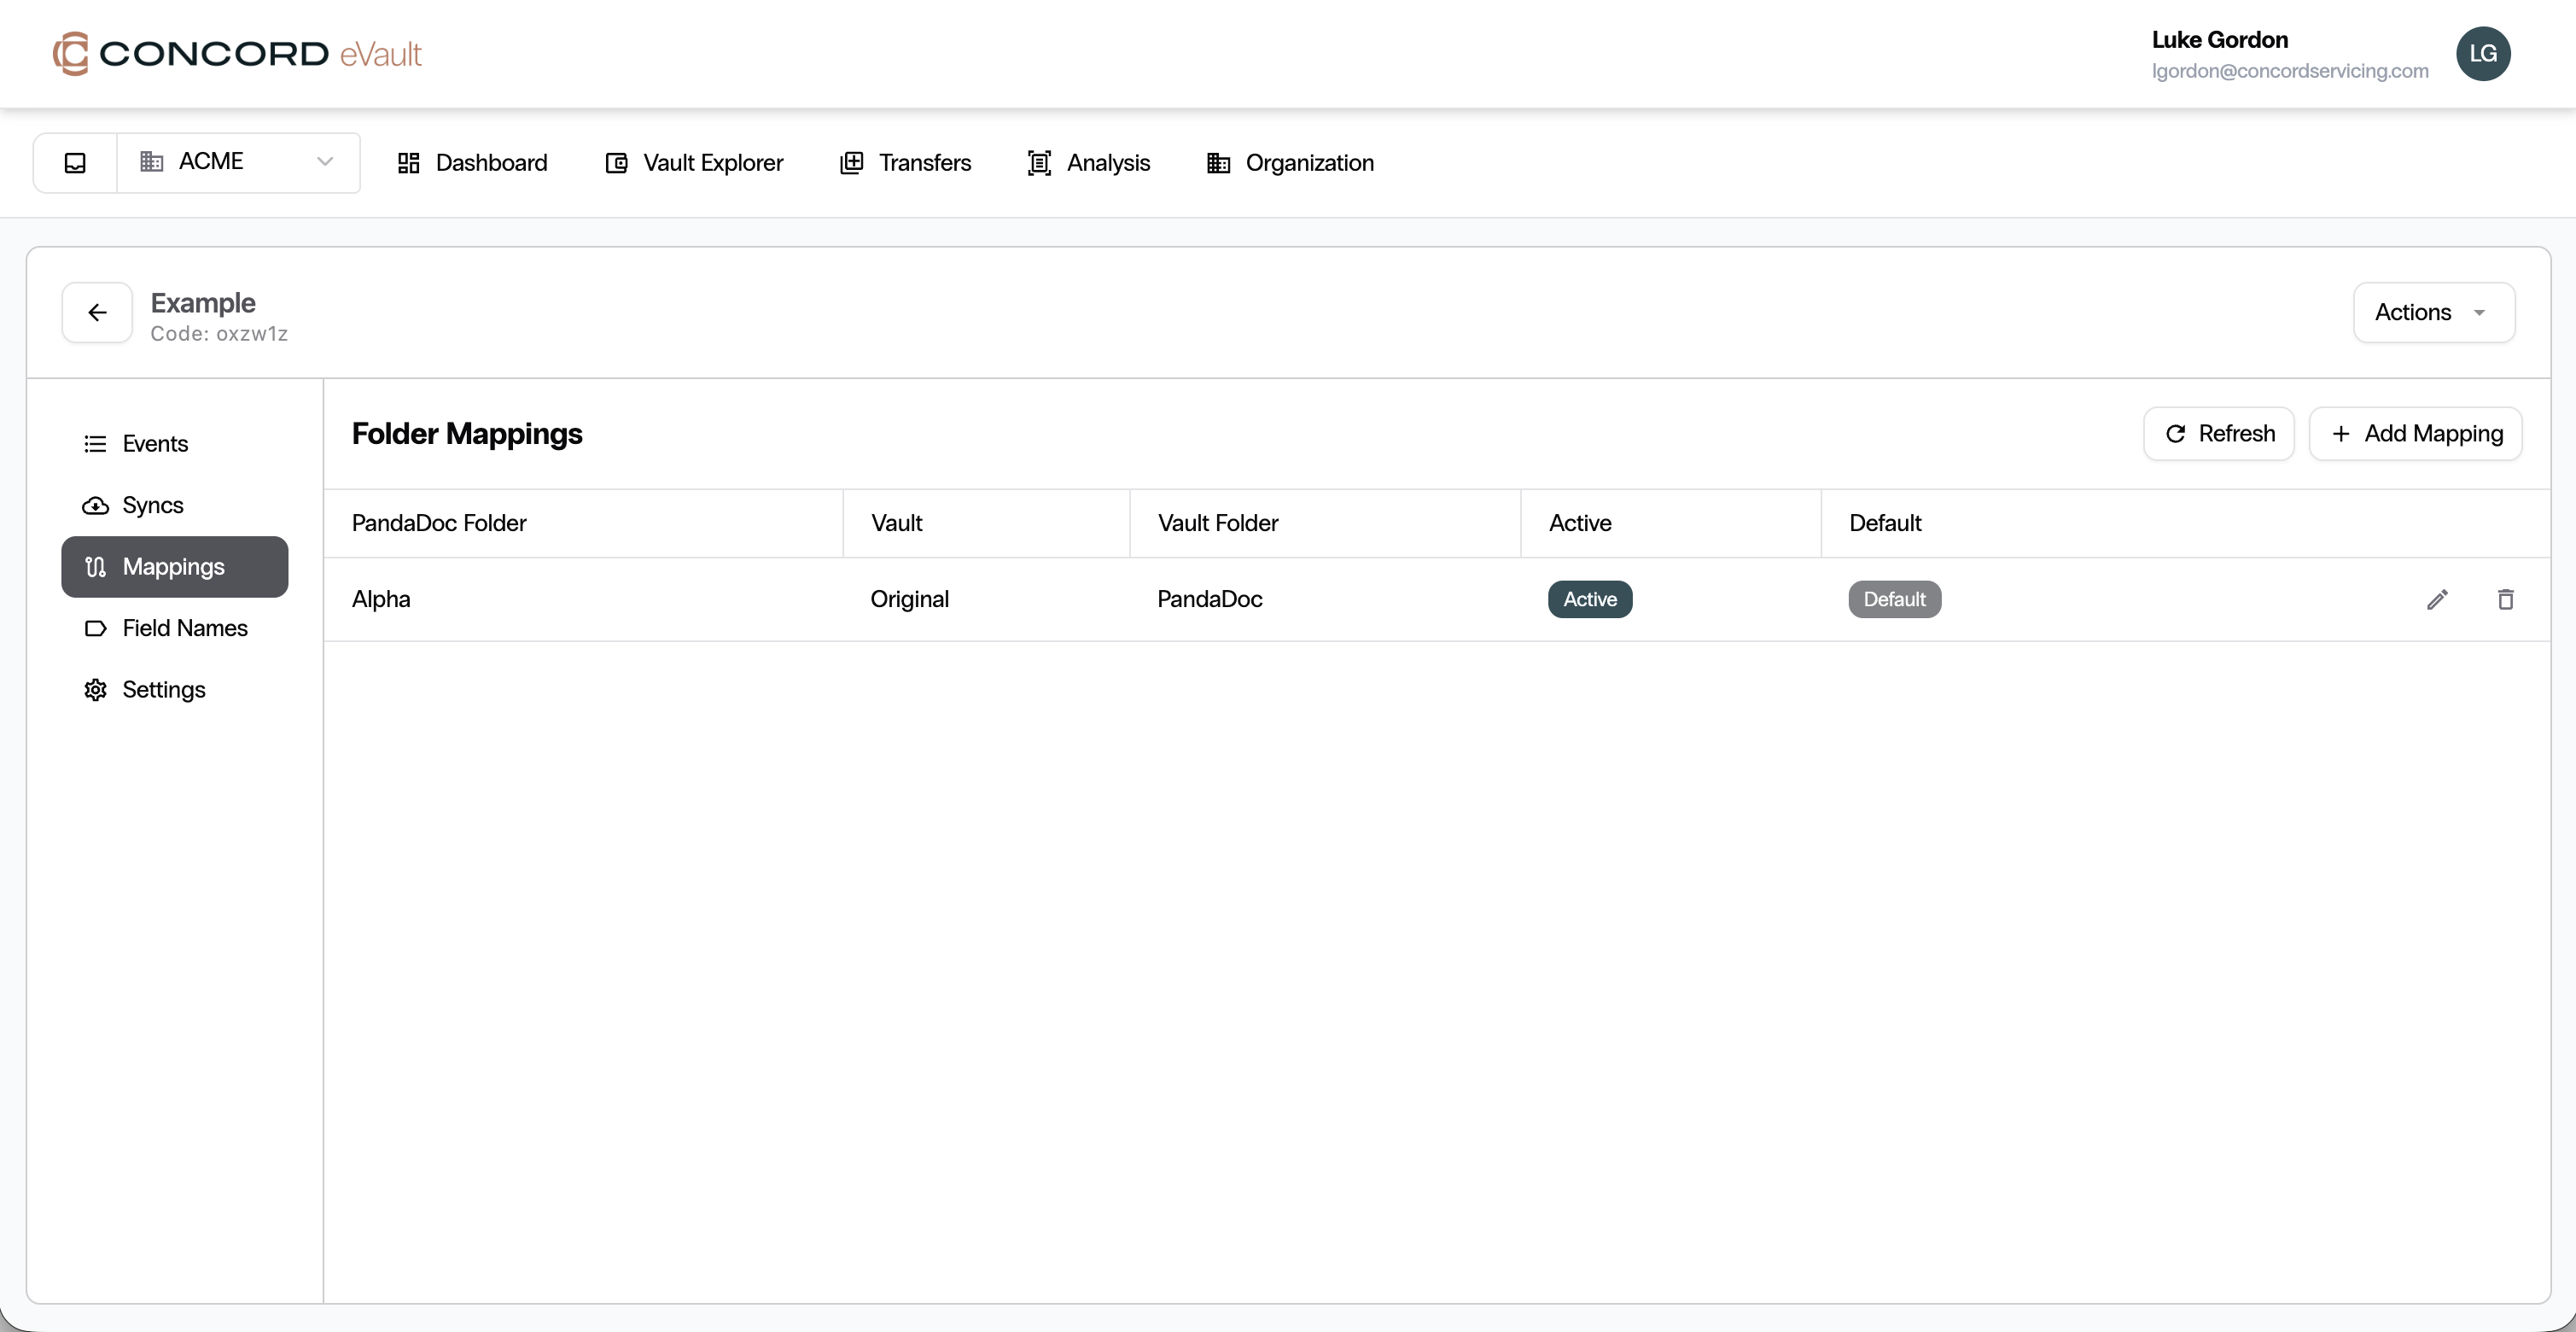
For the next step we need to tell Concord eVault how you want to map the documents from PandaDoc into your vault folders. On the left-hand side, click on the Mappings nav link.
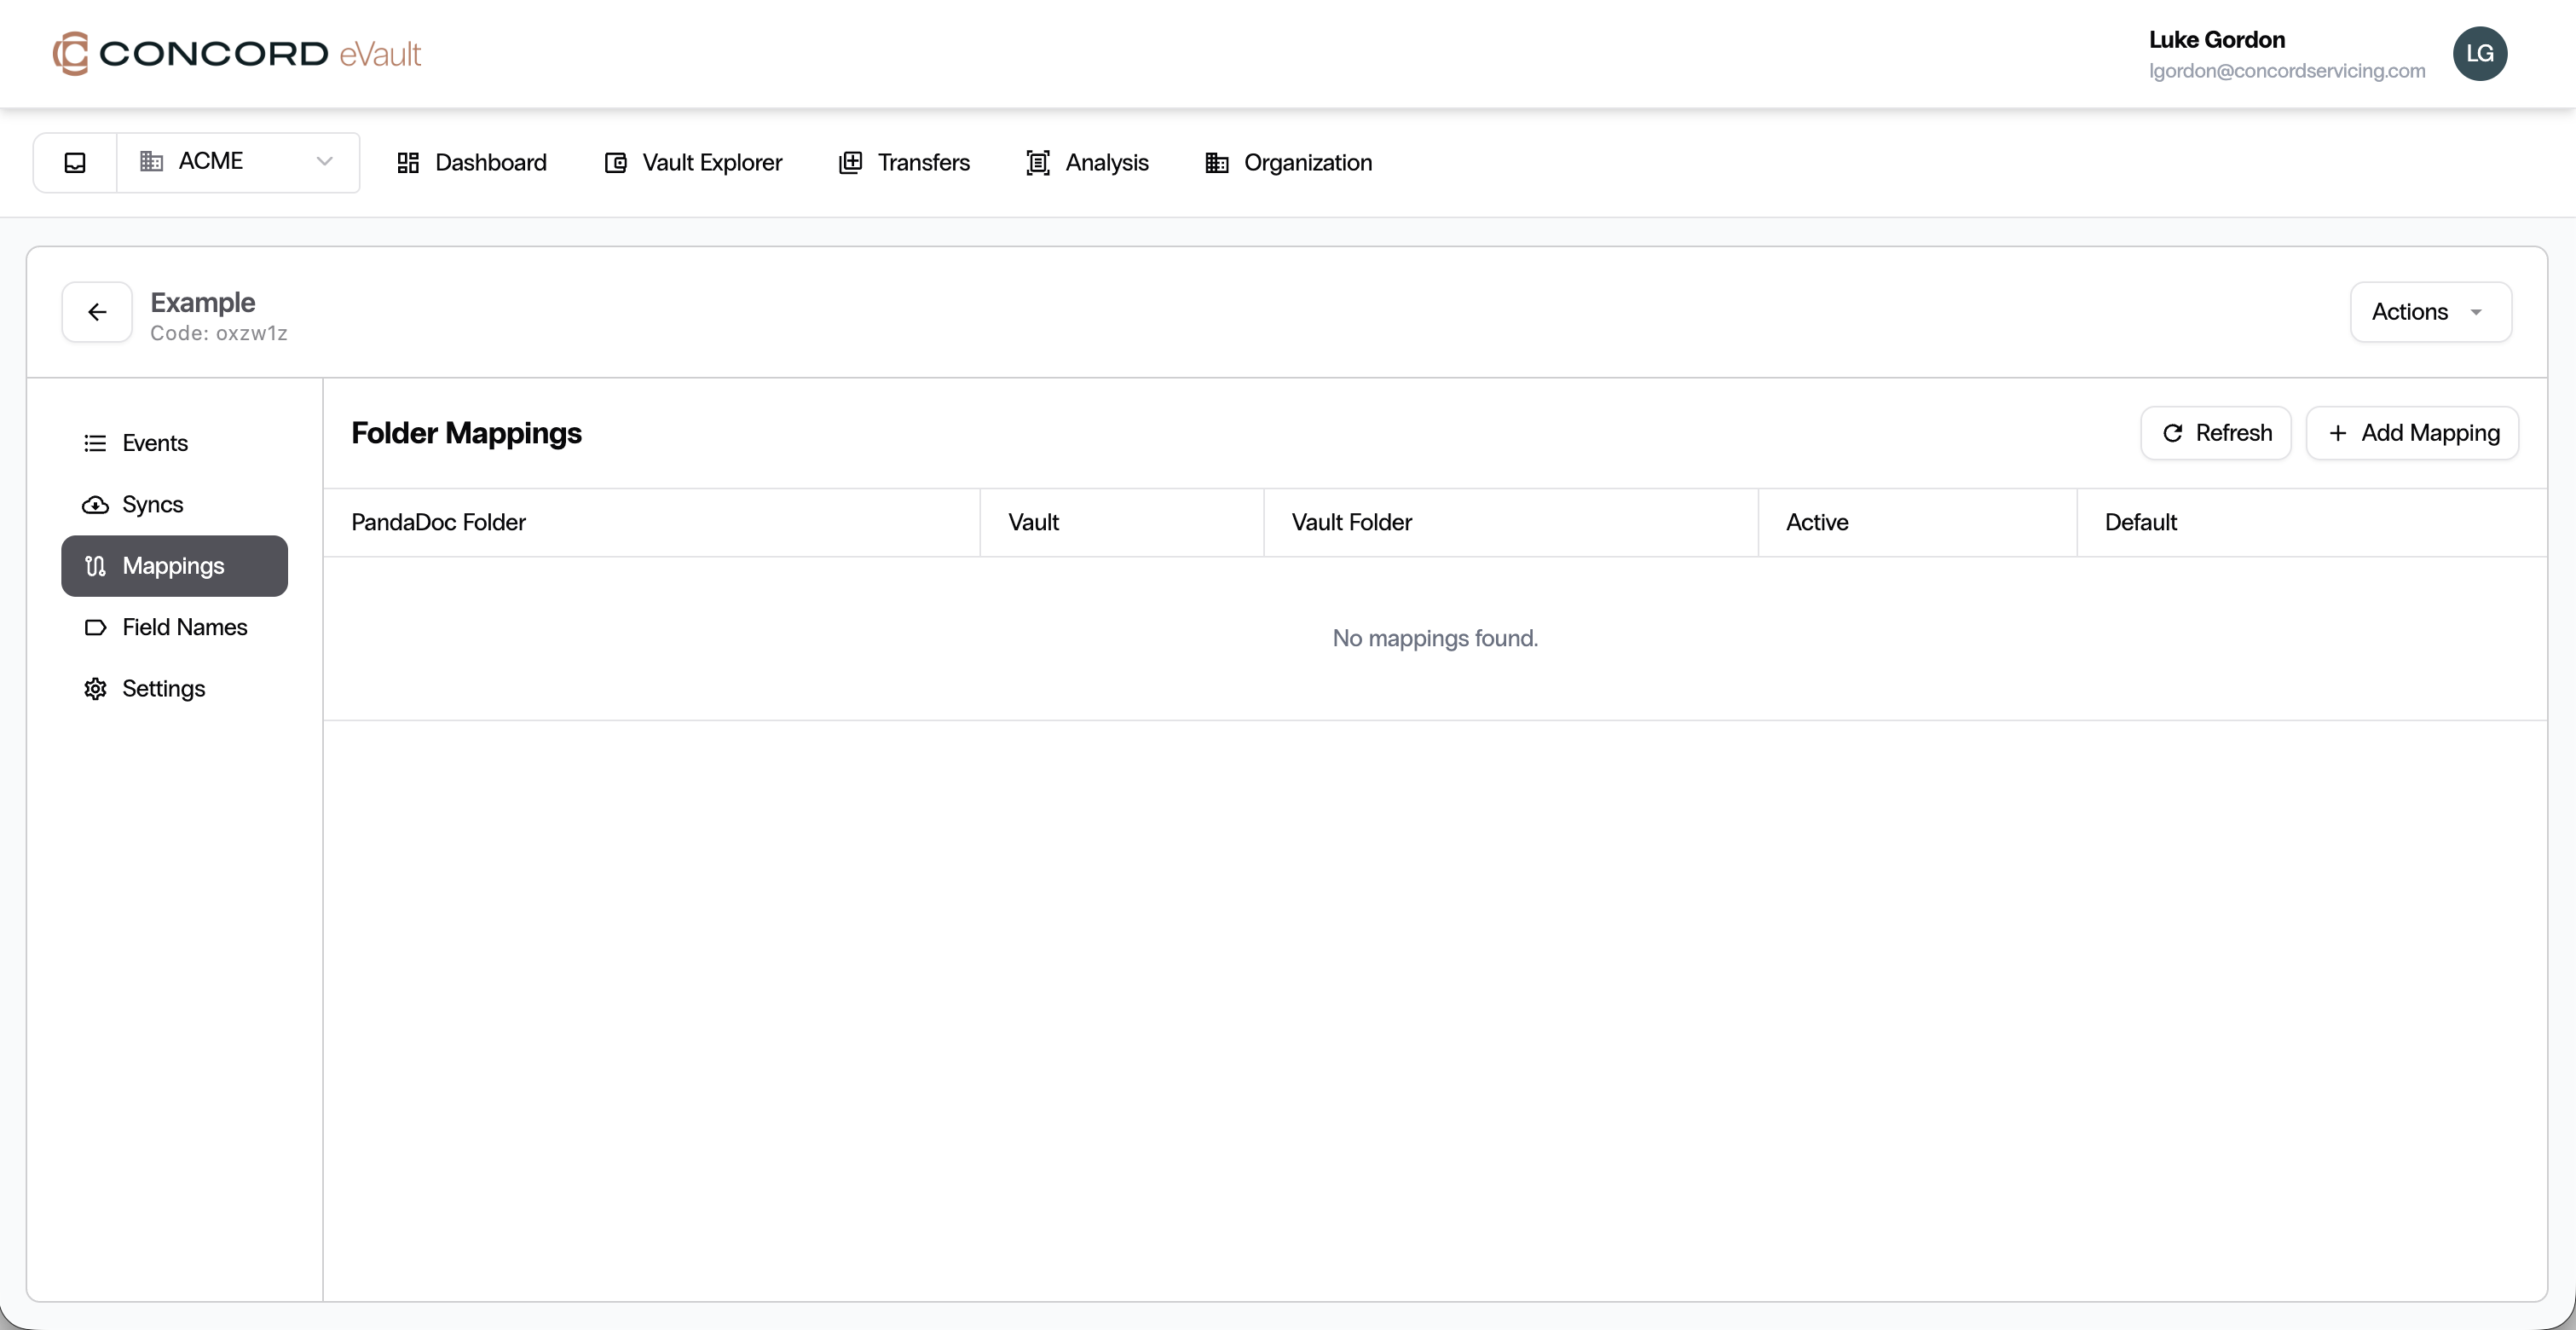
Step 9: Add a mapping
In the top right corner, click the Add Mapping button. This opens a dialog where you can define how you want to map documents from PandaDoc to your Concord eVault folder.
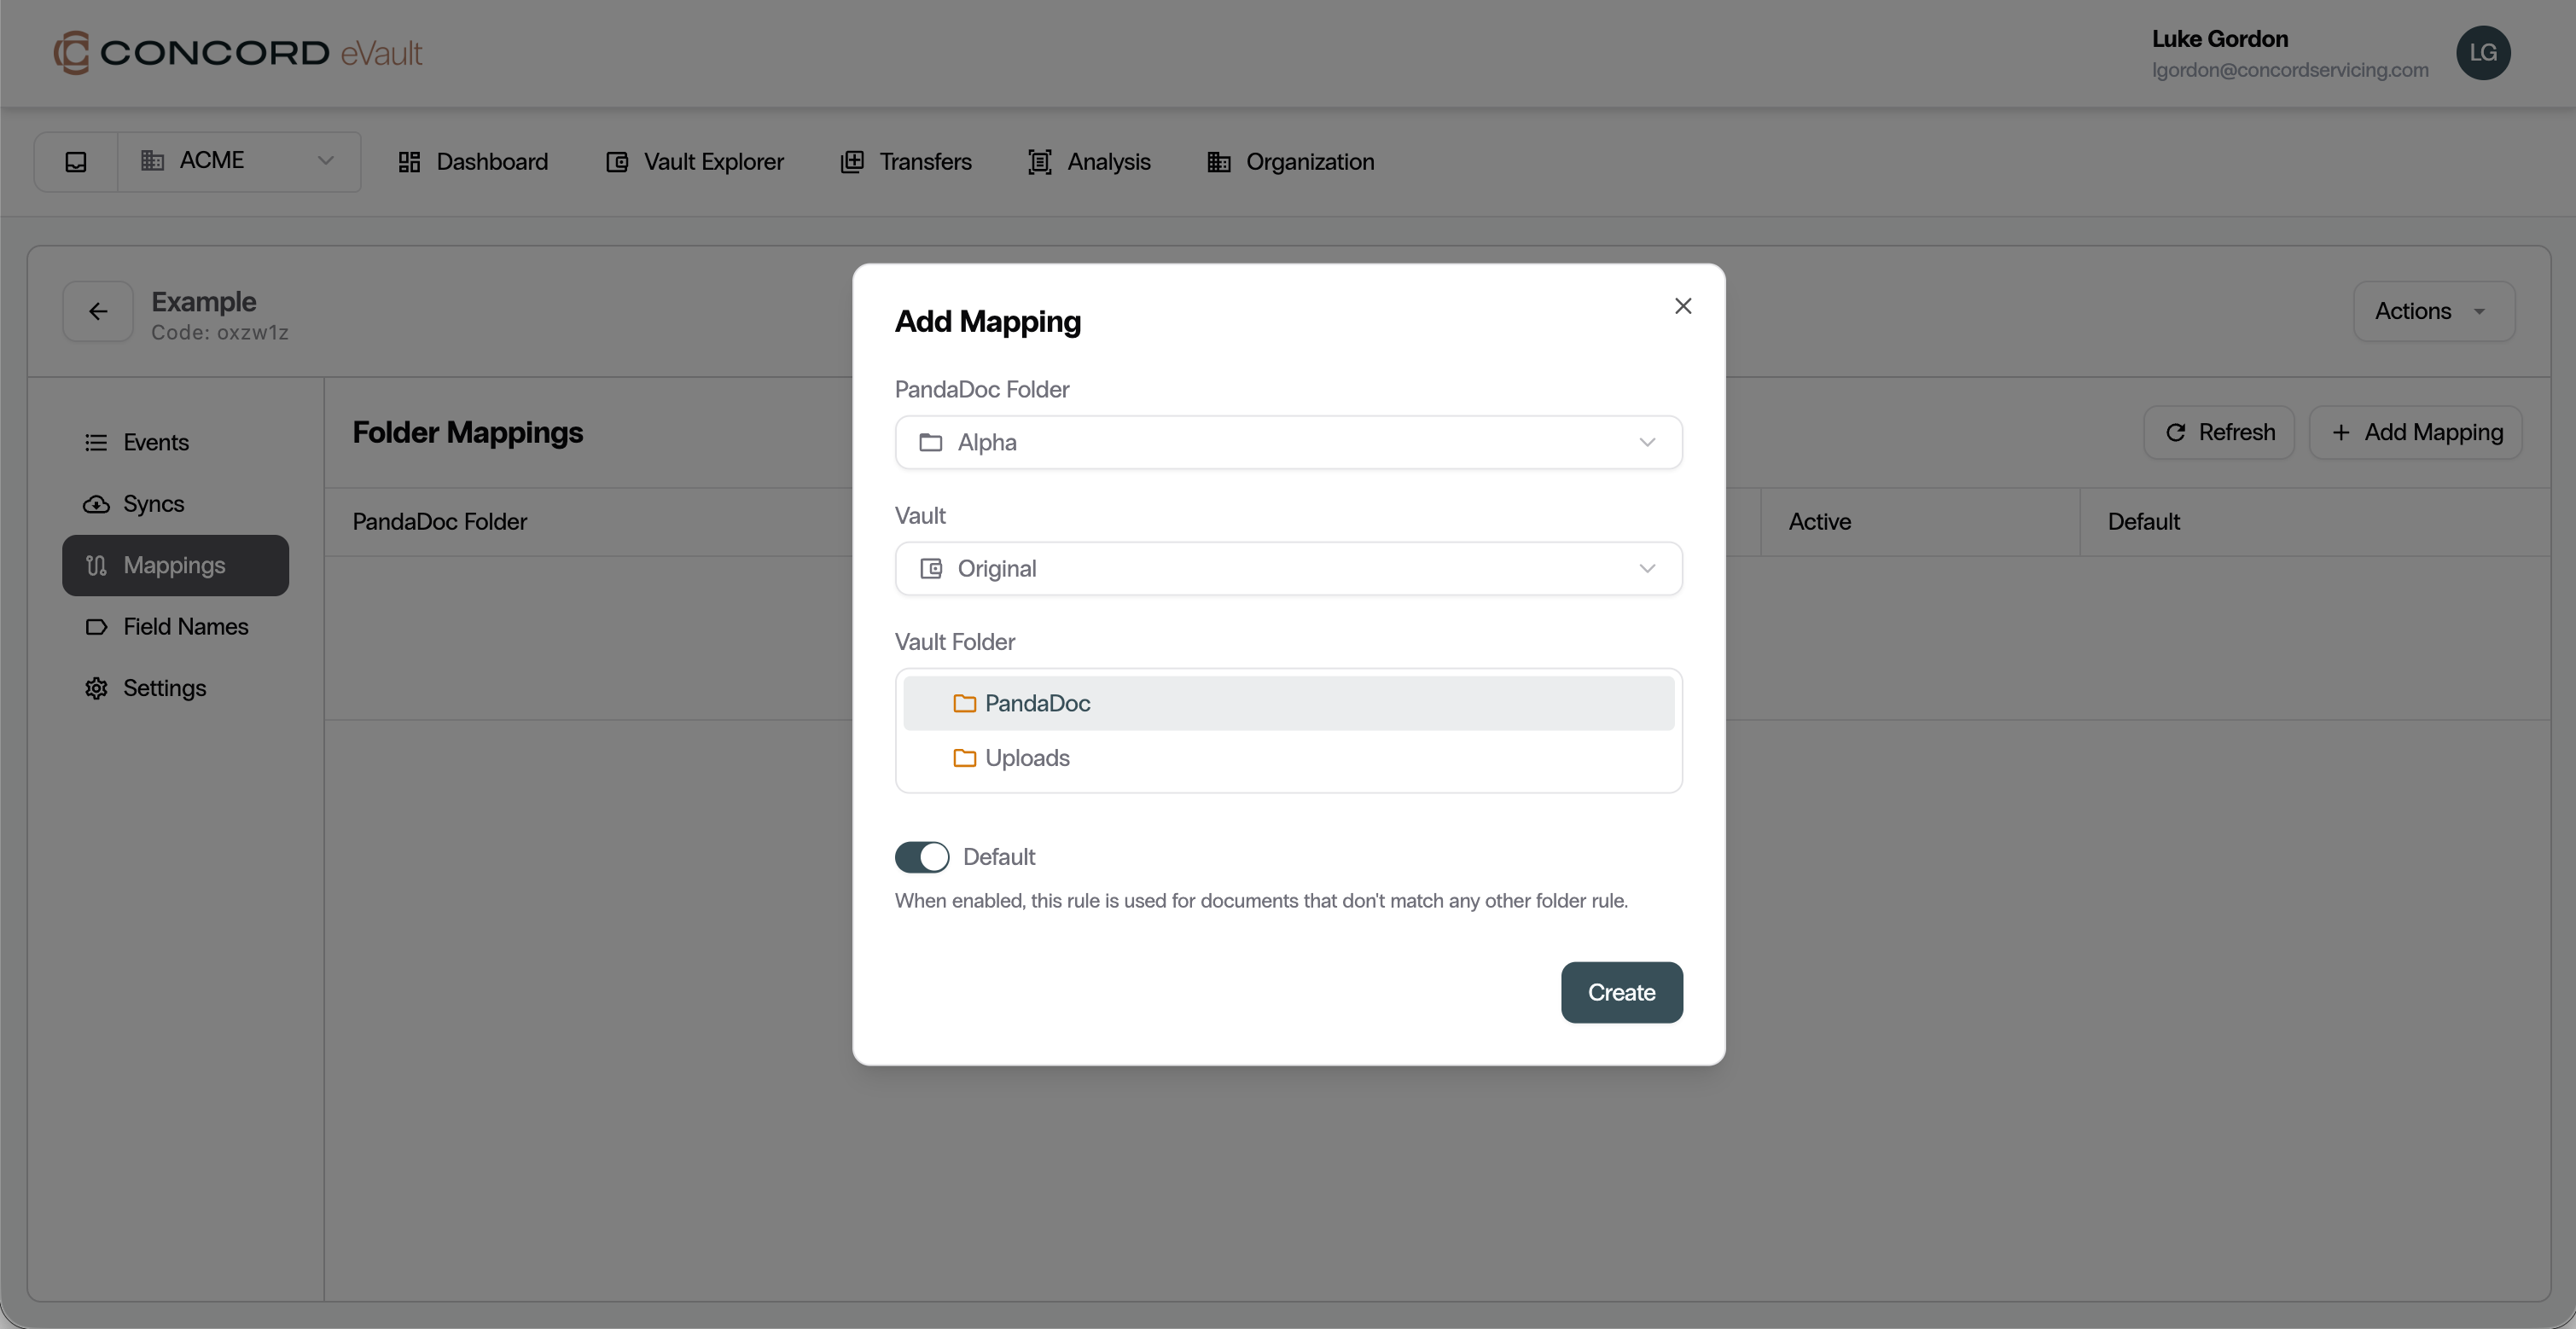
For now, make sure the Default toggle is enabled. This will be a catch-all, so any documents from PandaDoc will go to the folder you have selected. In the future, if you want to have multiple rules, you can. It is strongly encouraged to have a default rule so that if there is no folder that matches the incoming PandaDoc folder, it can still be imported into Concord eVault.
You should now see the new folder mapping rule in your table.
Part 4: Test the integration
Now that we have set up the Concord eVault integration, we can start testing it.
Step 10: Create a test document in PandaDoc
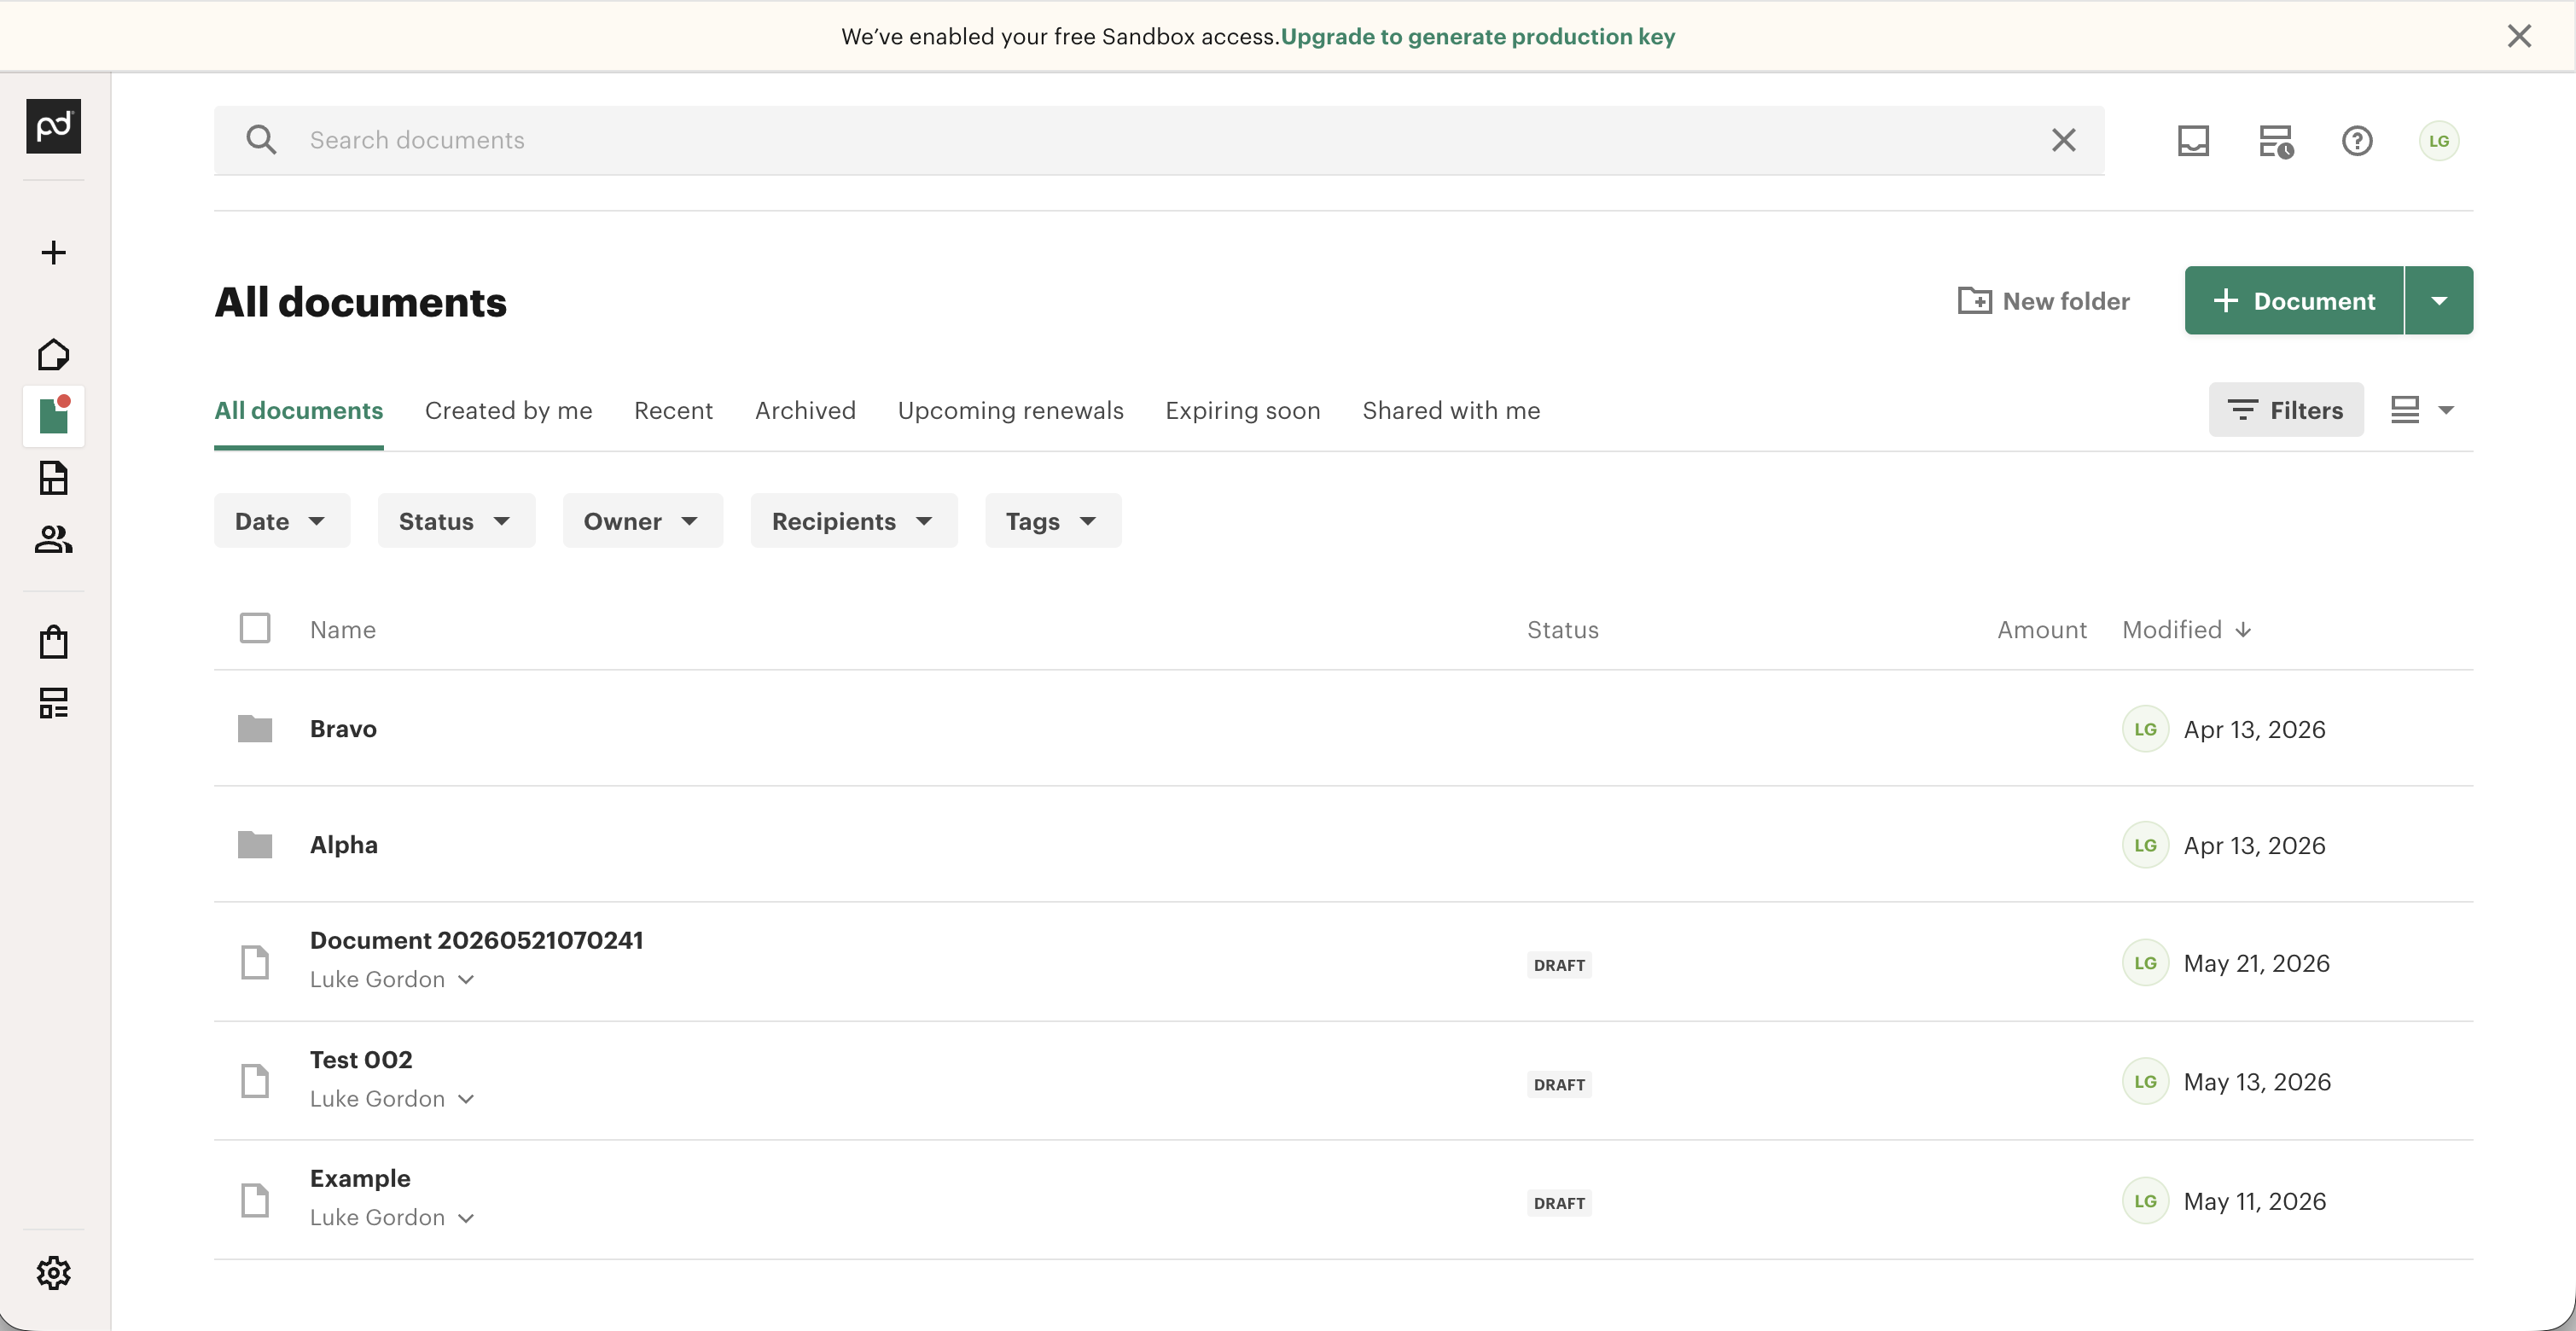
Go to your PandaDoc account and navigate to the All Documents section. Click the + Document button in the top right corner to create a new test document.
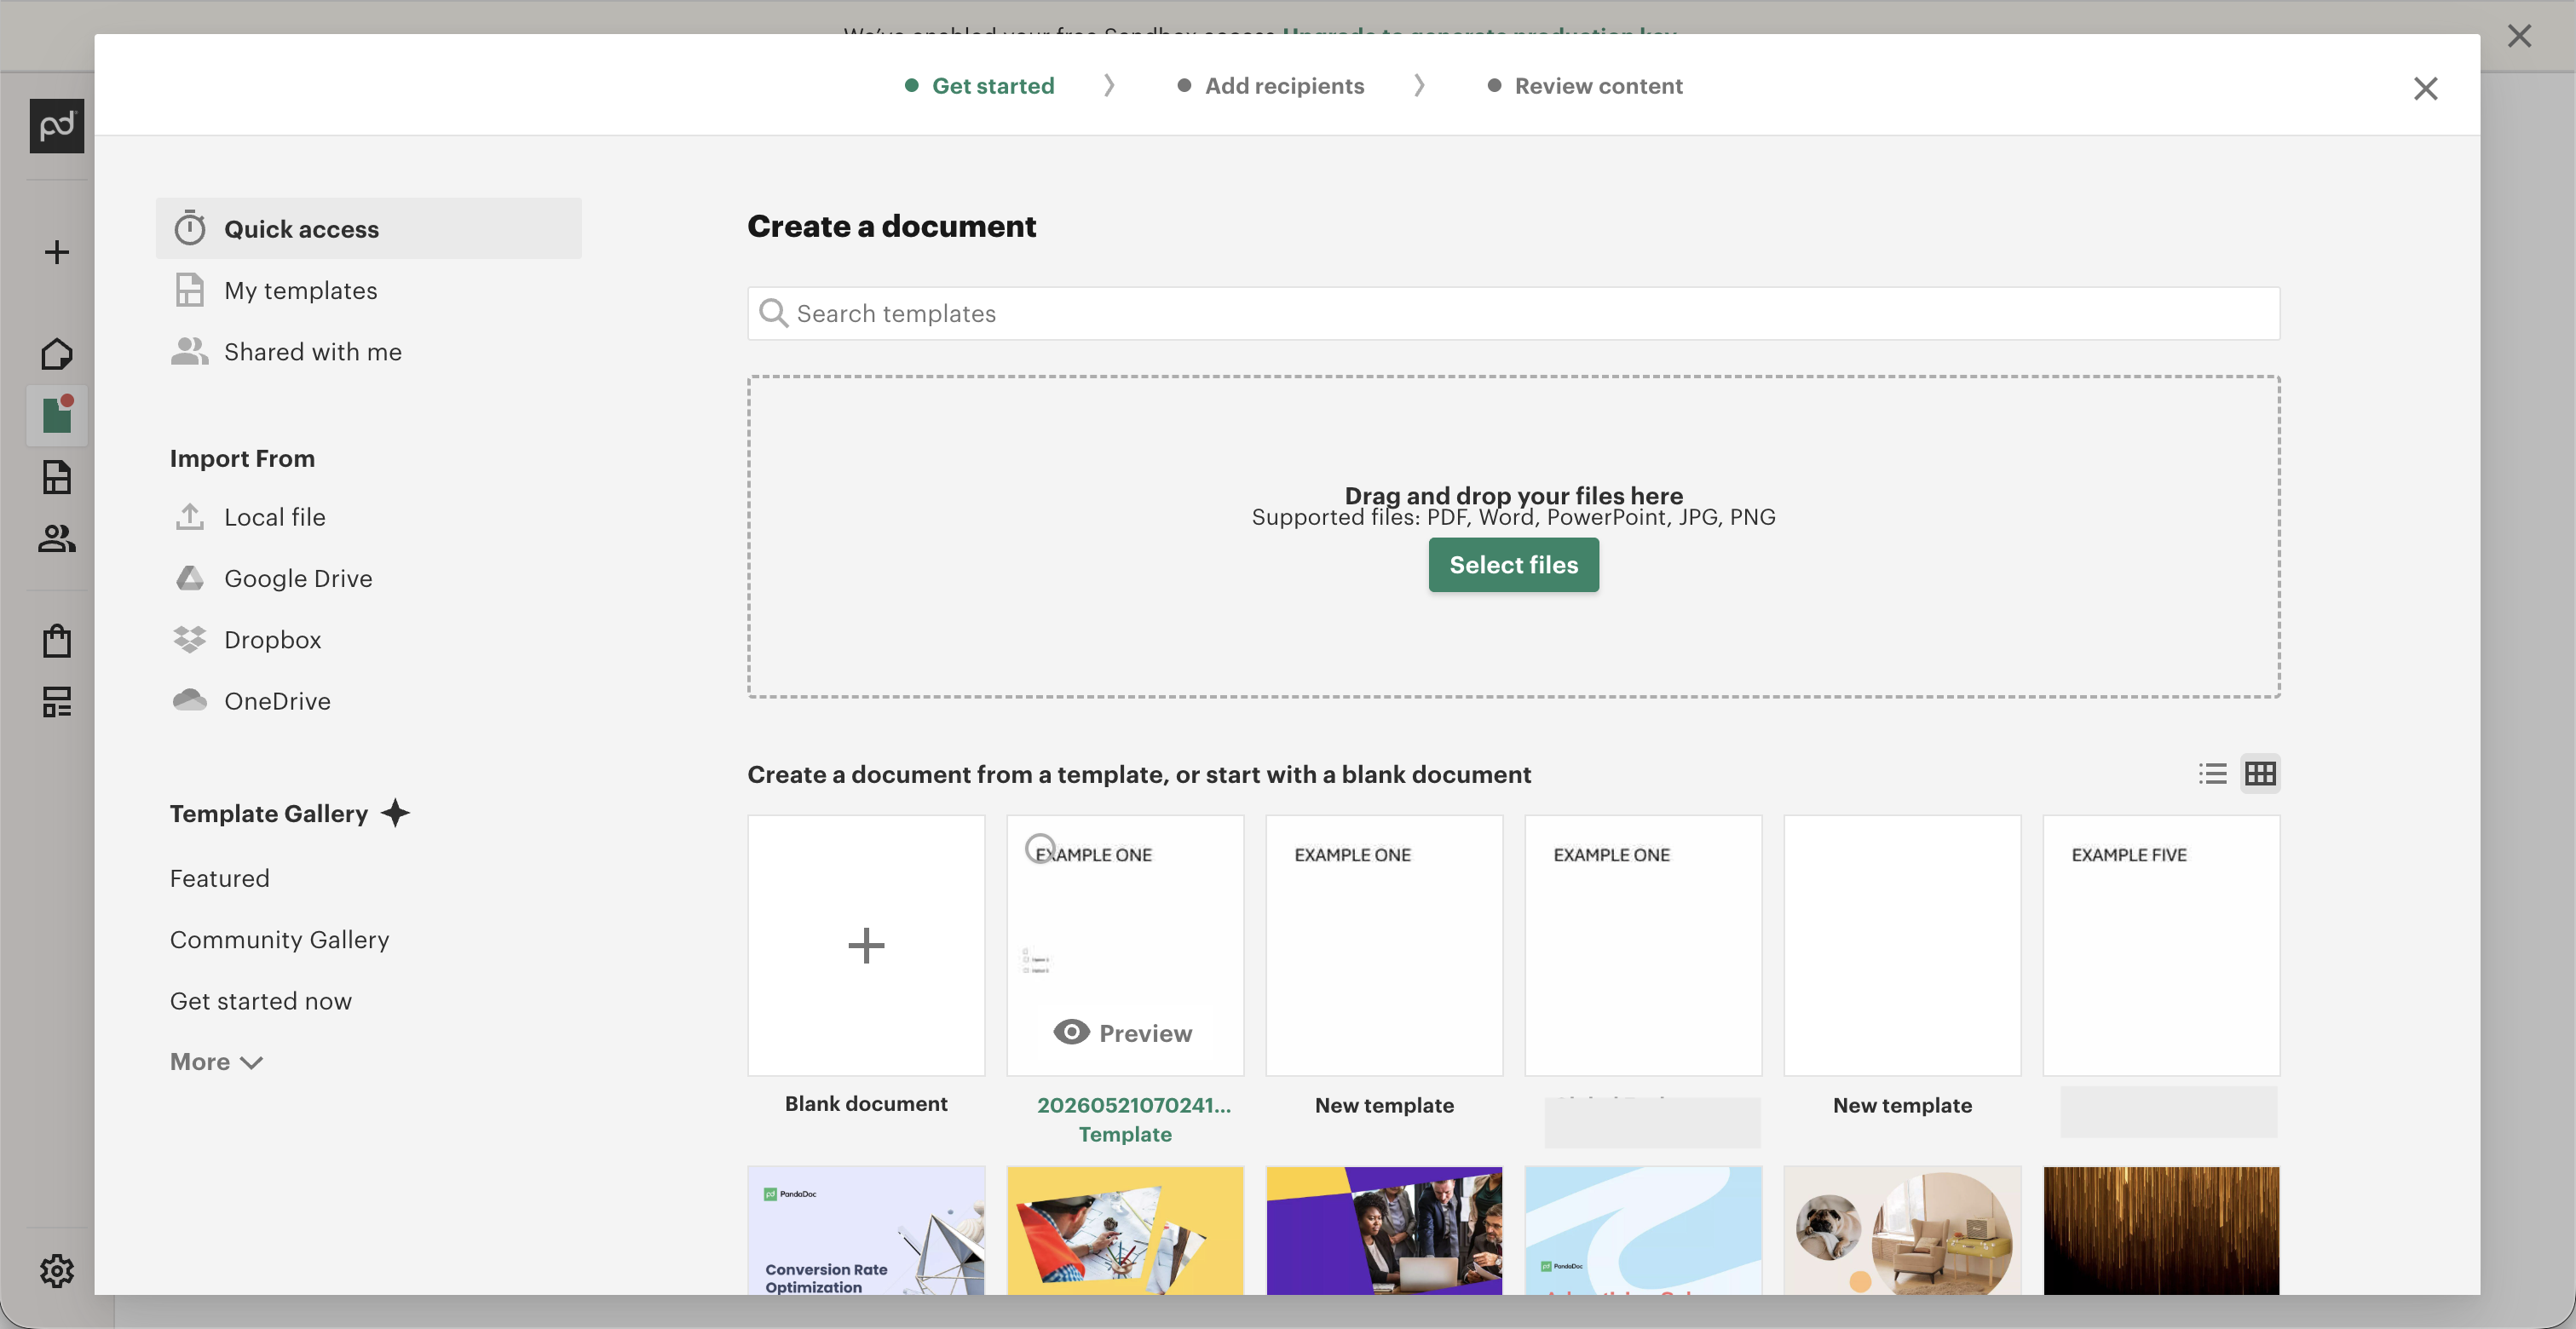
From here you can select one of your existing templates to use for testing, or you can create a blank document to use for this test.
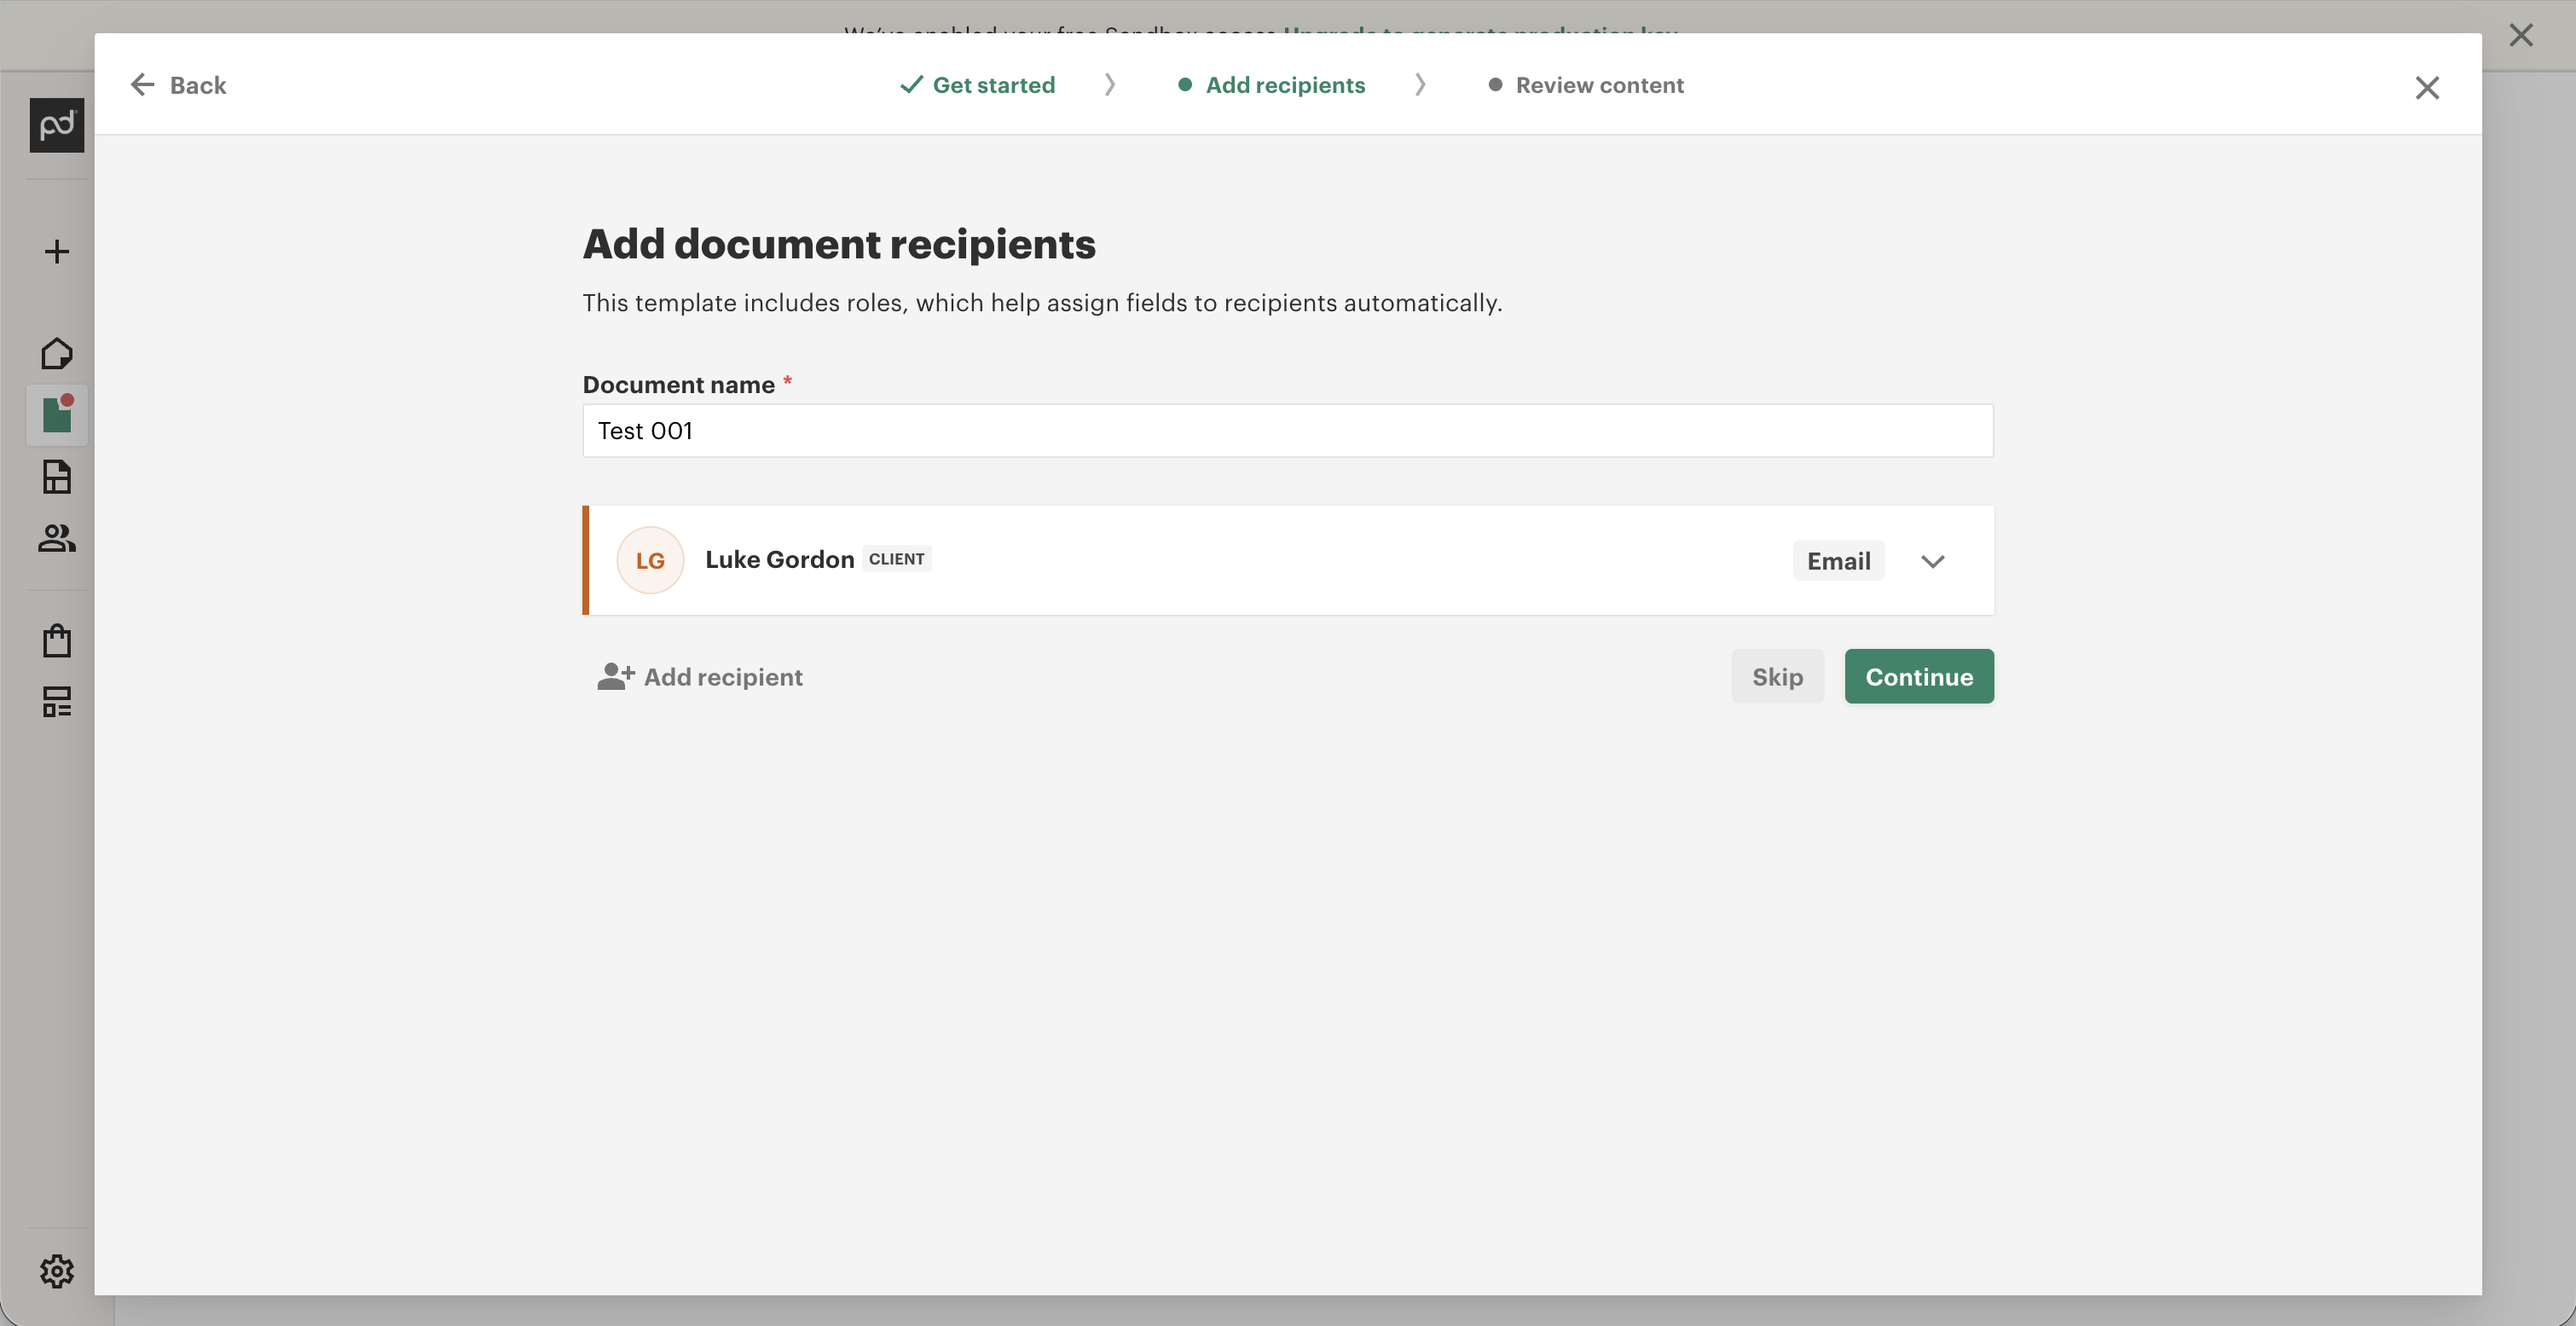
After you have selected a document, add a document name and a test recipient. You will not actually be sending this document for testing - you will just be creating it and then marking it as complete.
Step 11: Add fields and mark the document complete
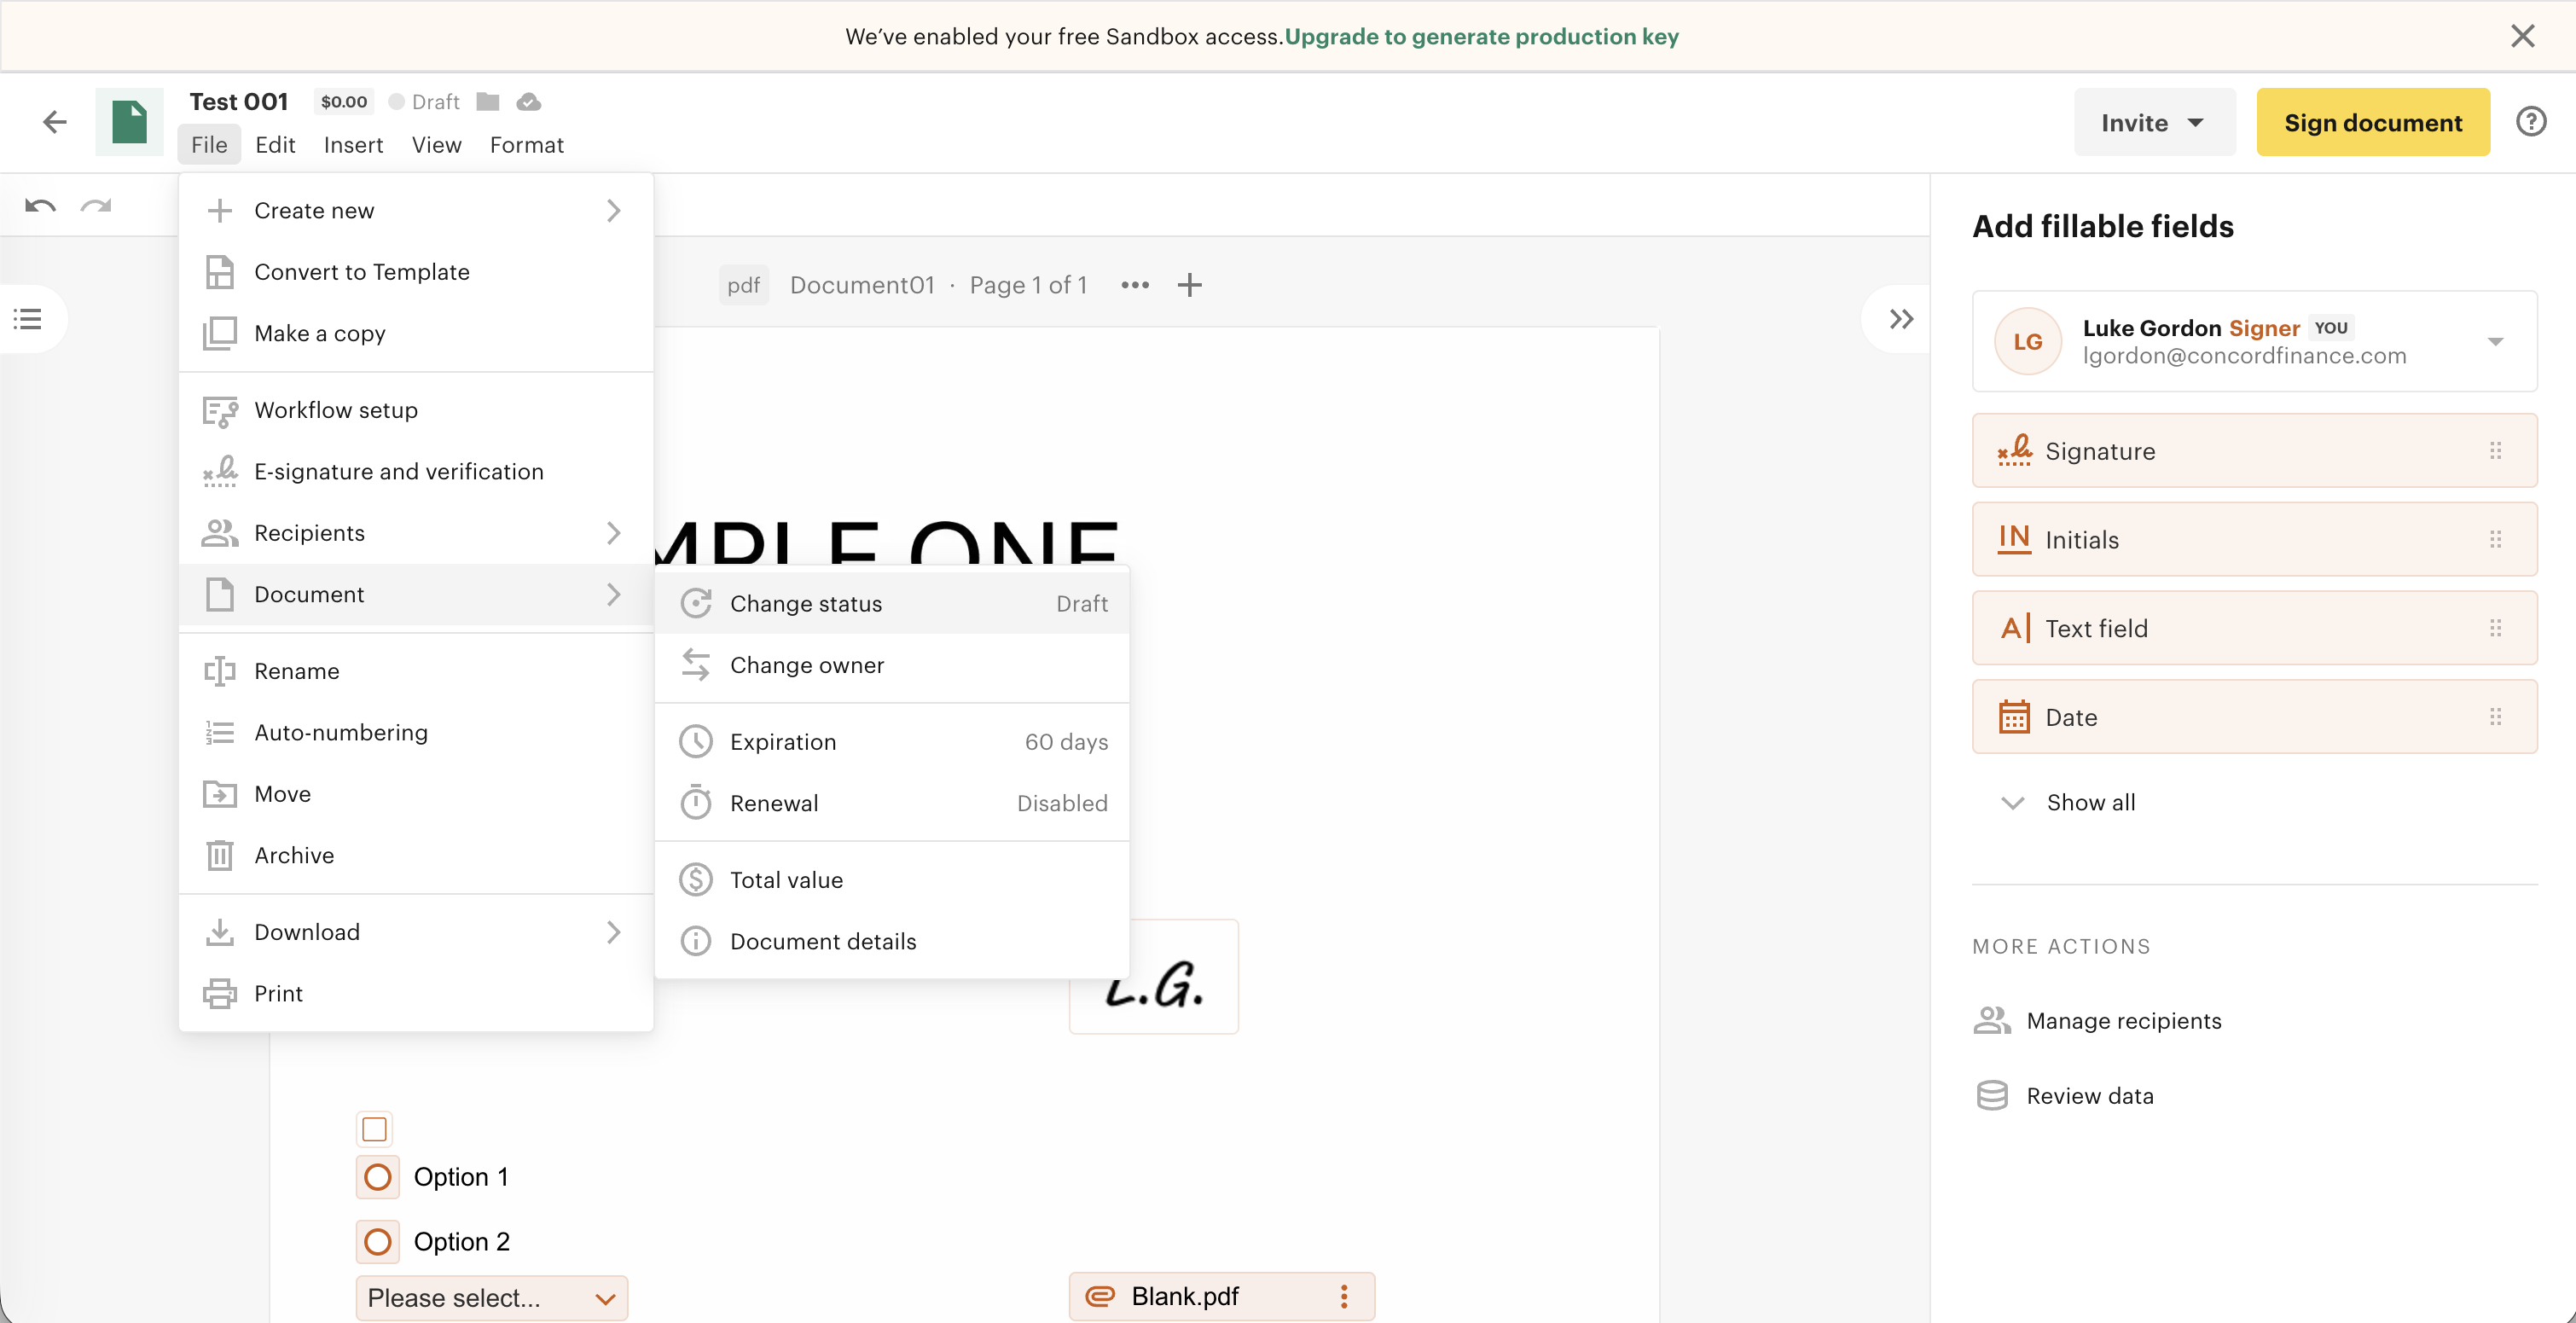
After you create the document, you can add any custom fields you'd like. You can also add signatures and initials to different pages to see how that metadata maps into Concord eVault. Once you are satisfied, click File in the top-left menu bar, then Document, then Change Status.
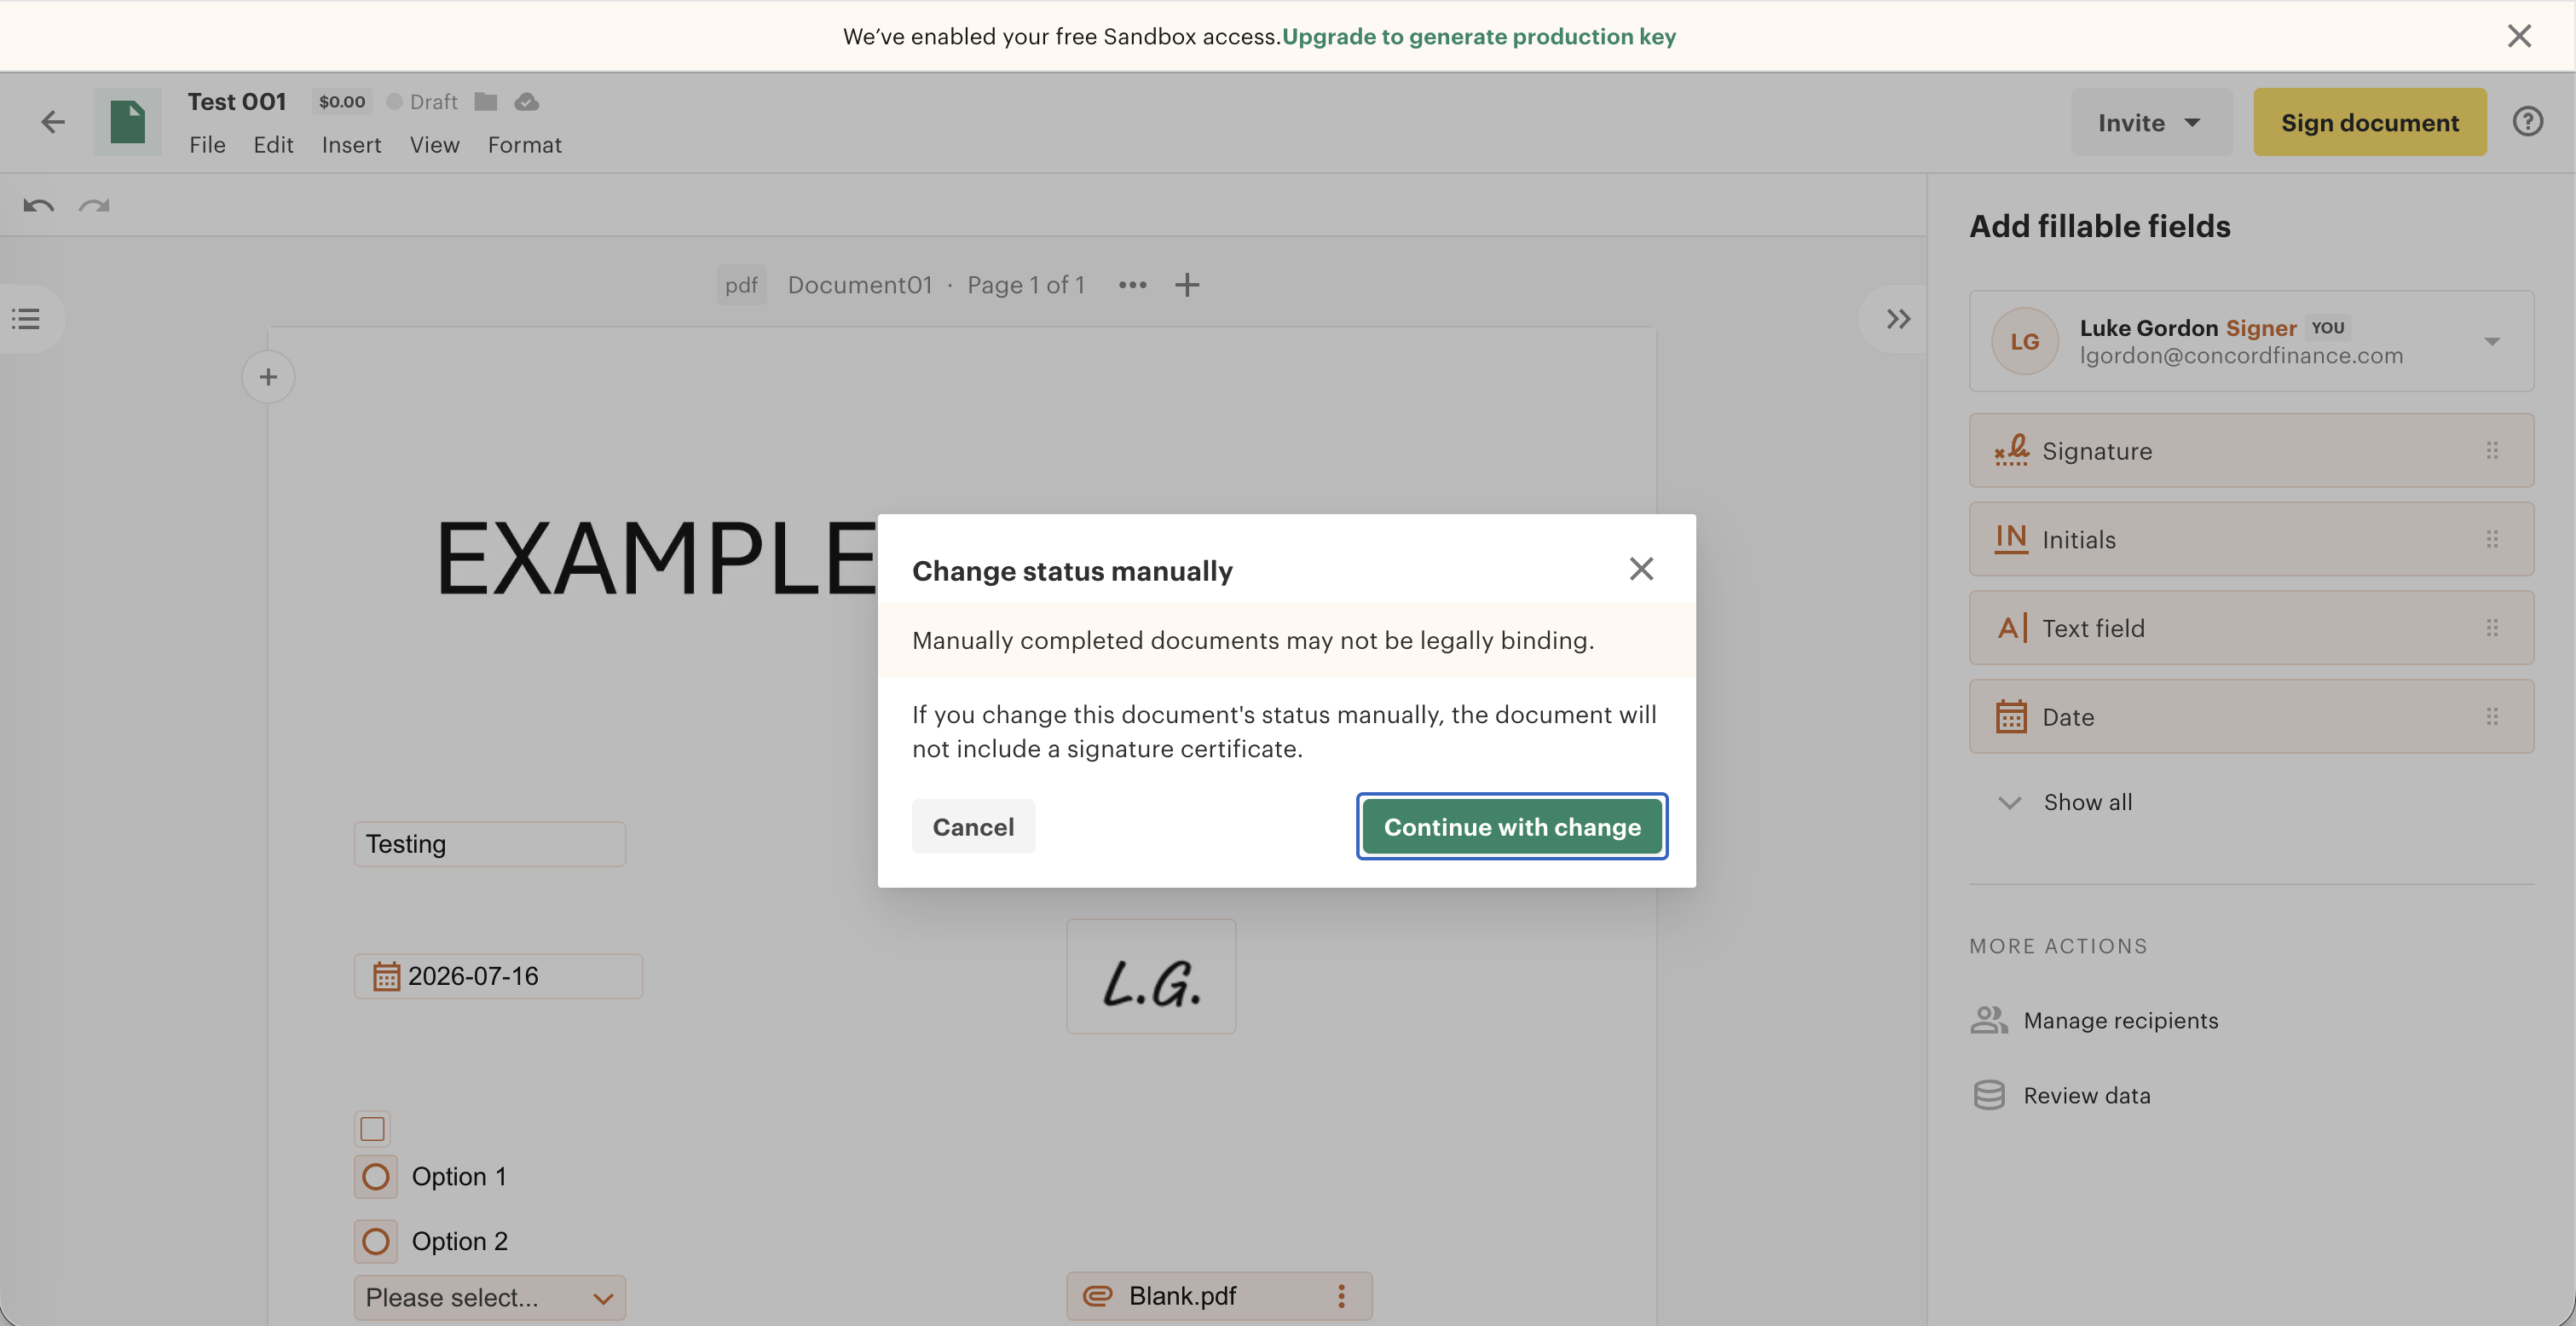
An alert dialog will appear informing you that manually status-changed documents will not be legally binding. This is okay because we are doing this for test purposes. Click Continue with Change.
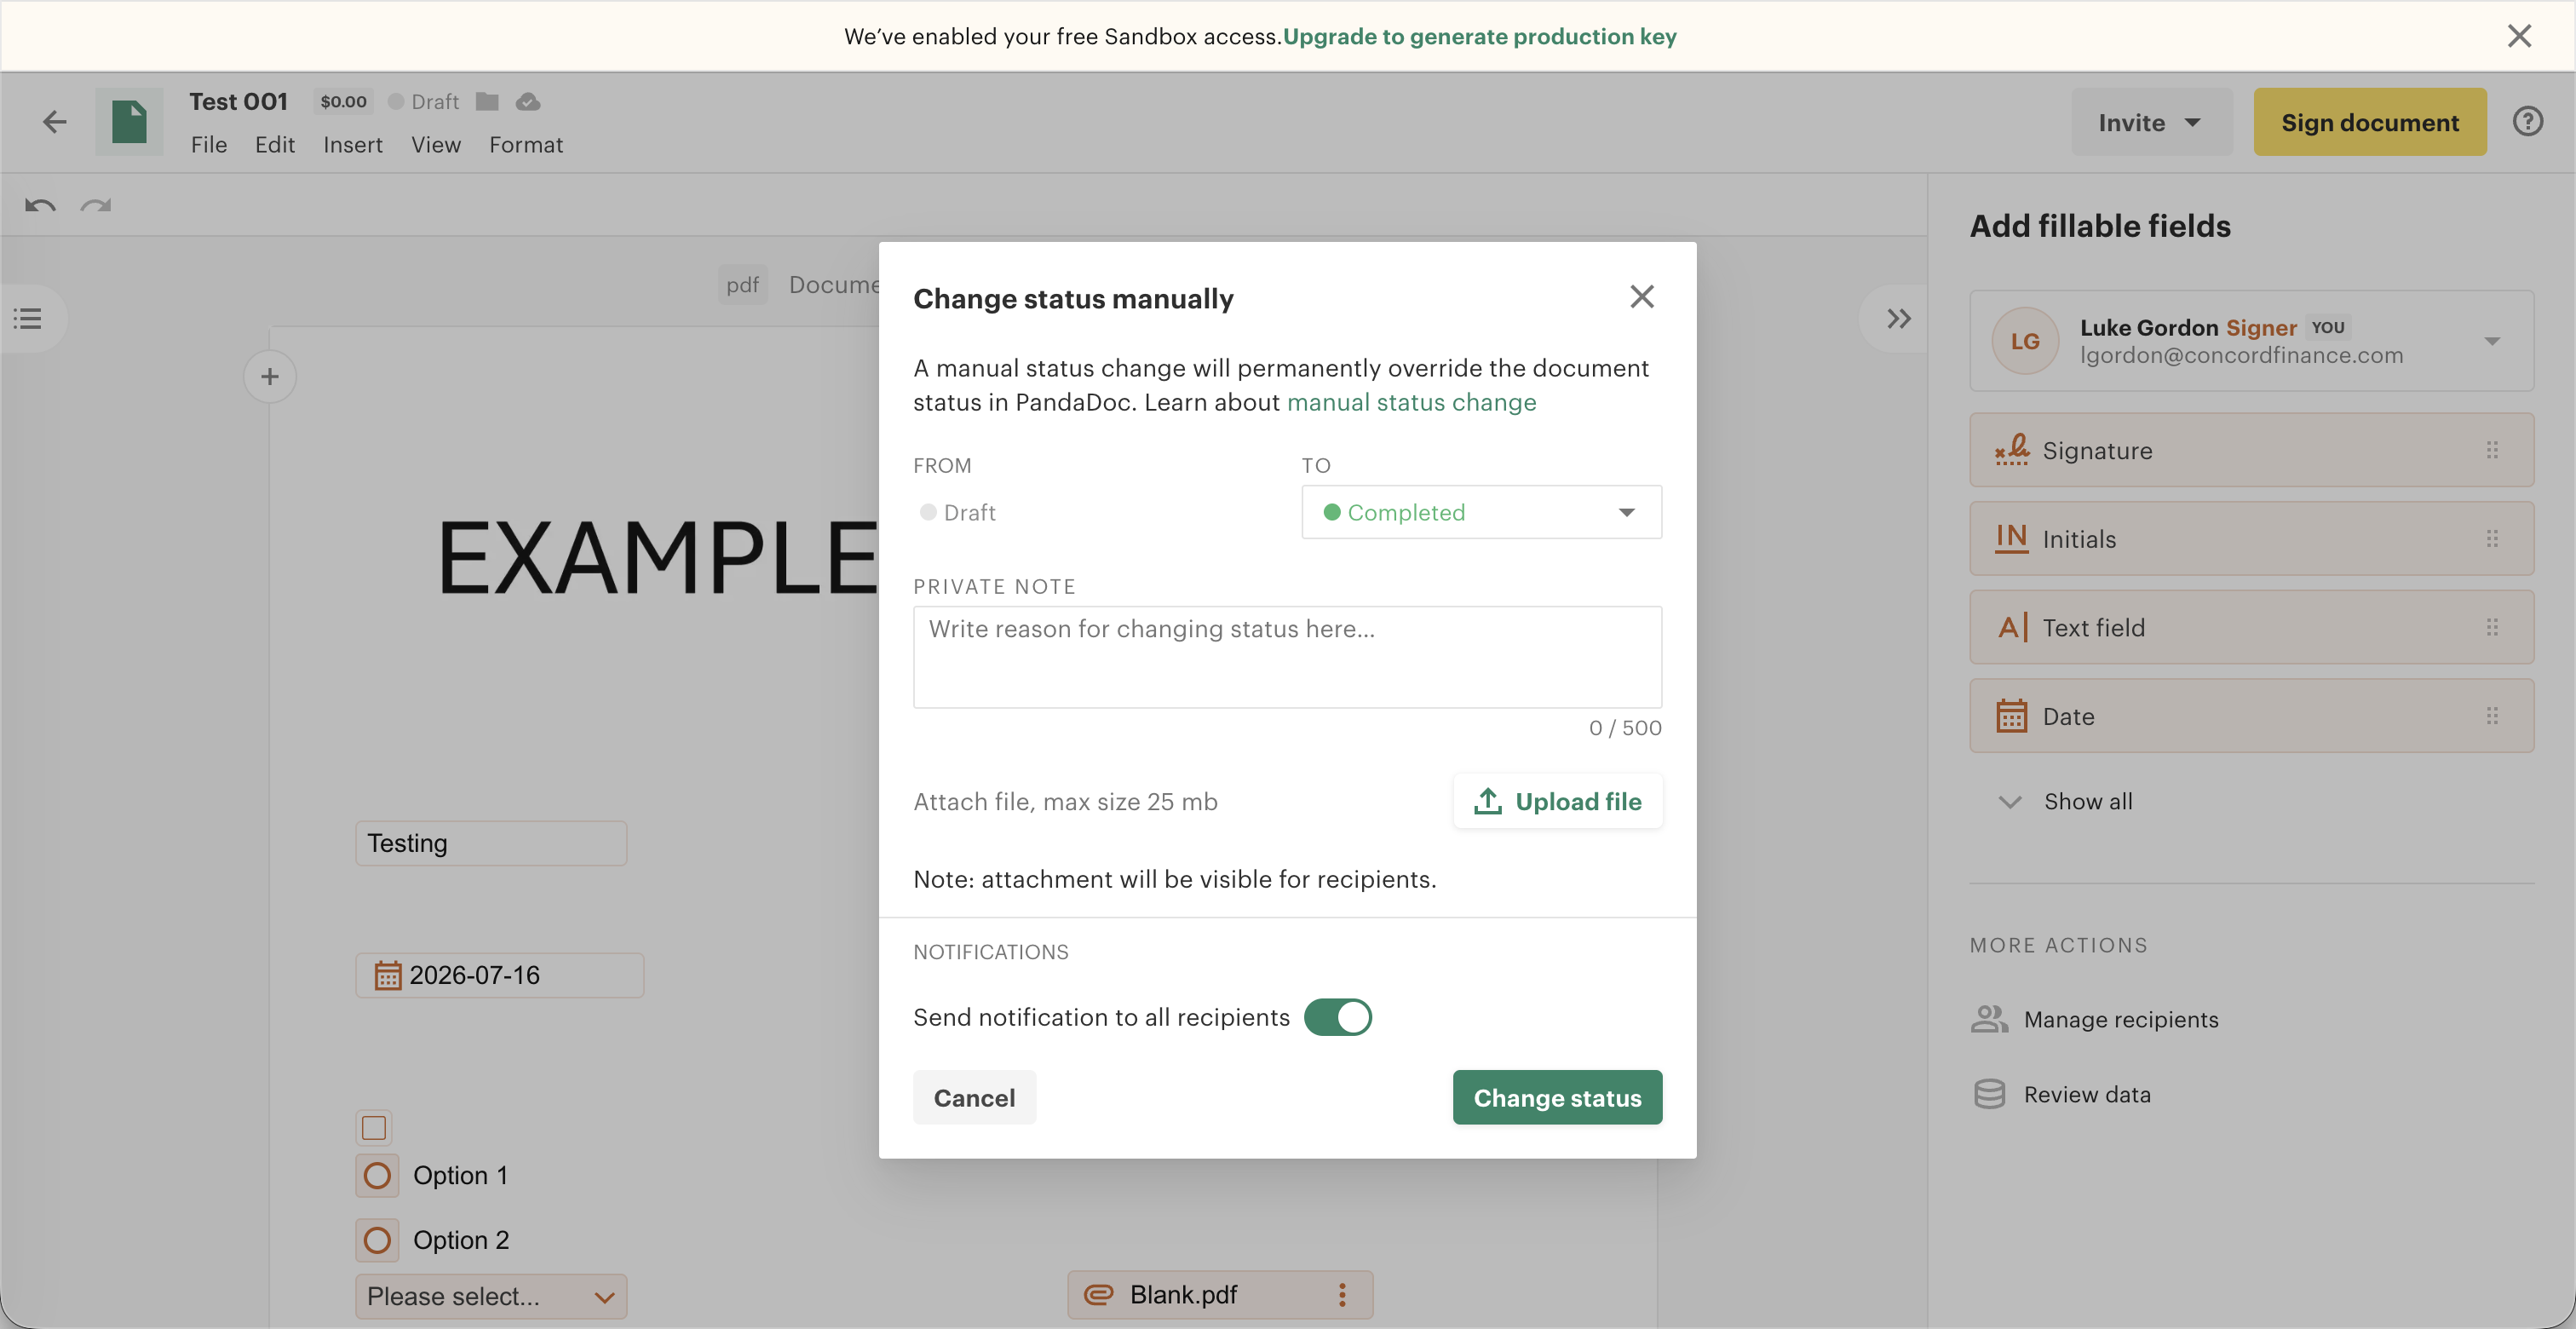
On the next screen, you'll see that we are marking the document as Completed. Click the Change Status button in the bottom right corner.
Step 12: Verify the webhook event in eVault
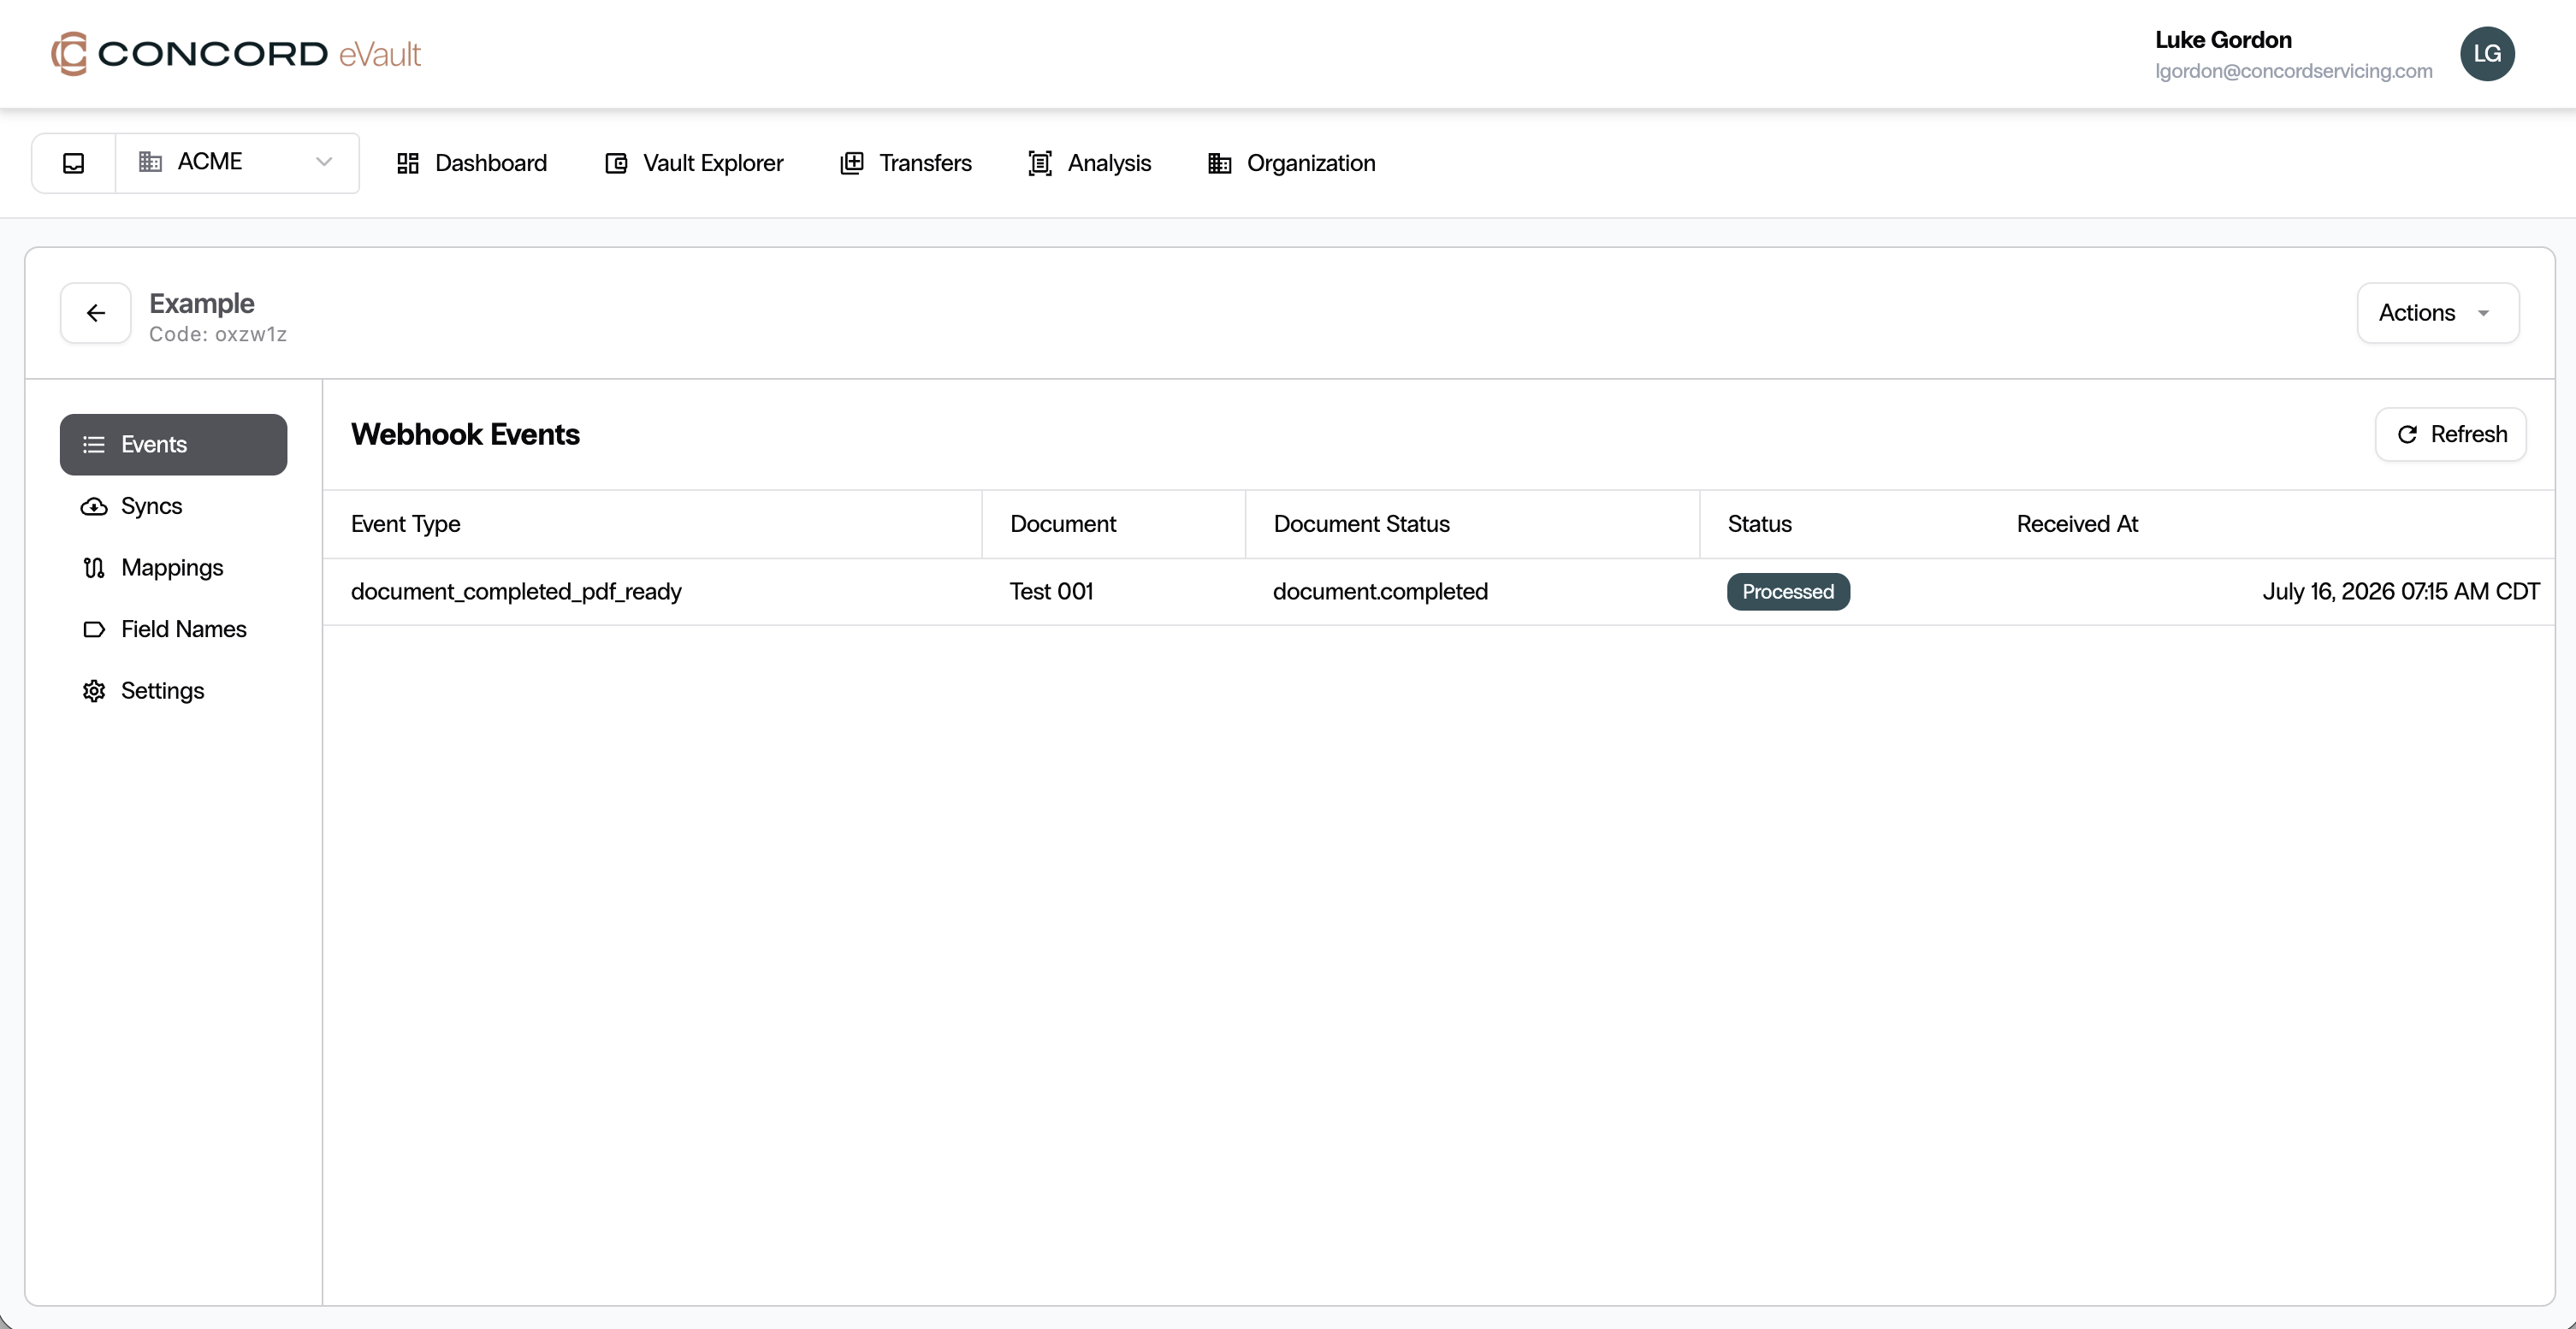
Navigate back to Concord eVault. On your PandaDoc account, look at the Events section by clicking on the left nav link. You should now see a webhook event from PandaDoc that is Processing. If you do not see this, click the refresh button in the top right to refresh the page.
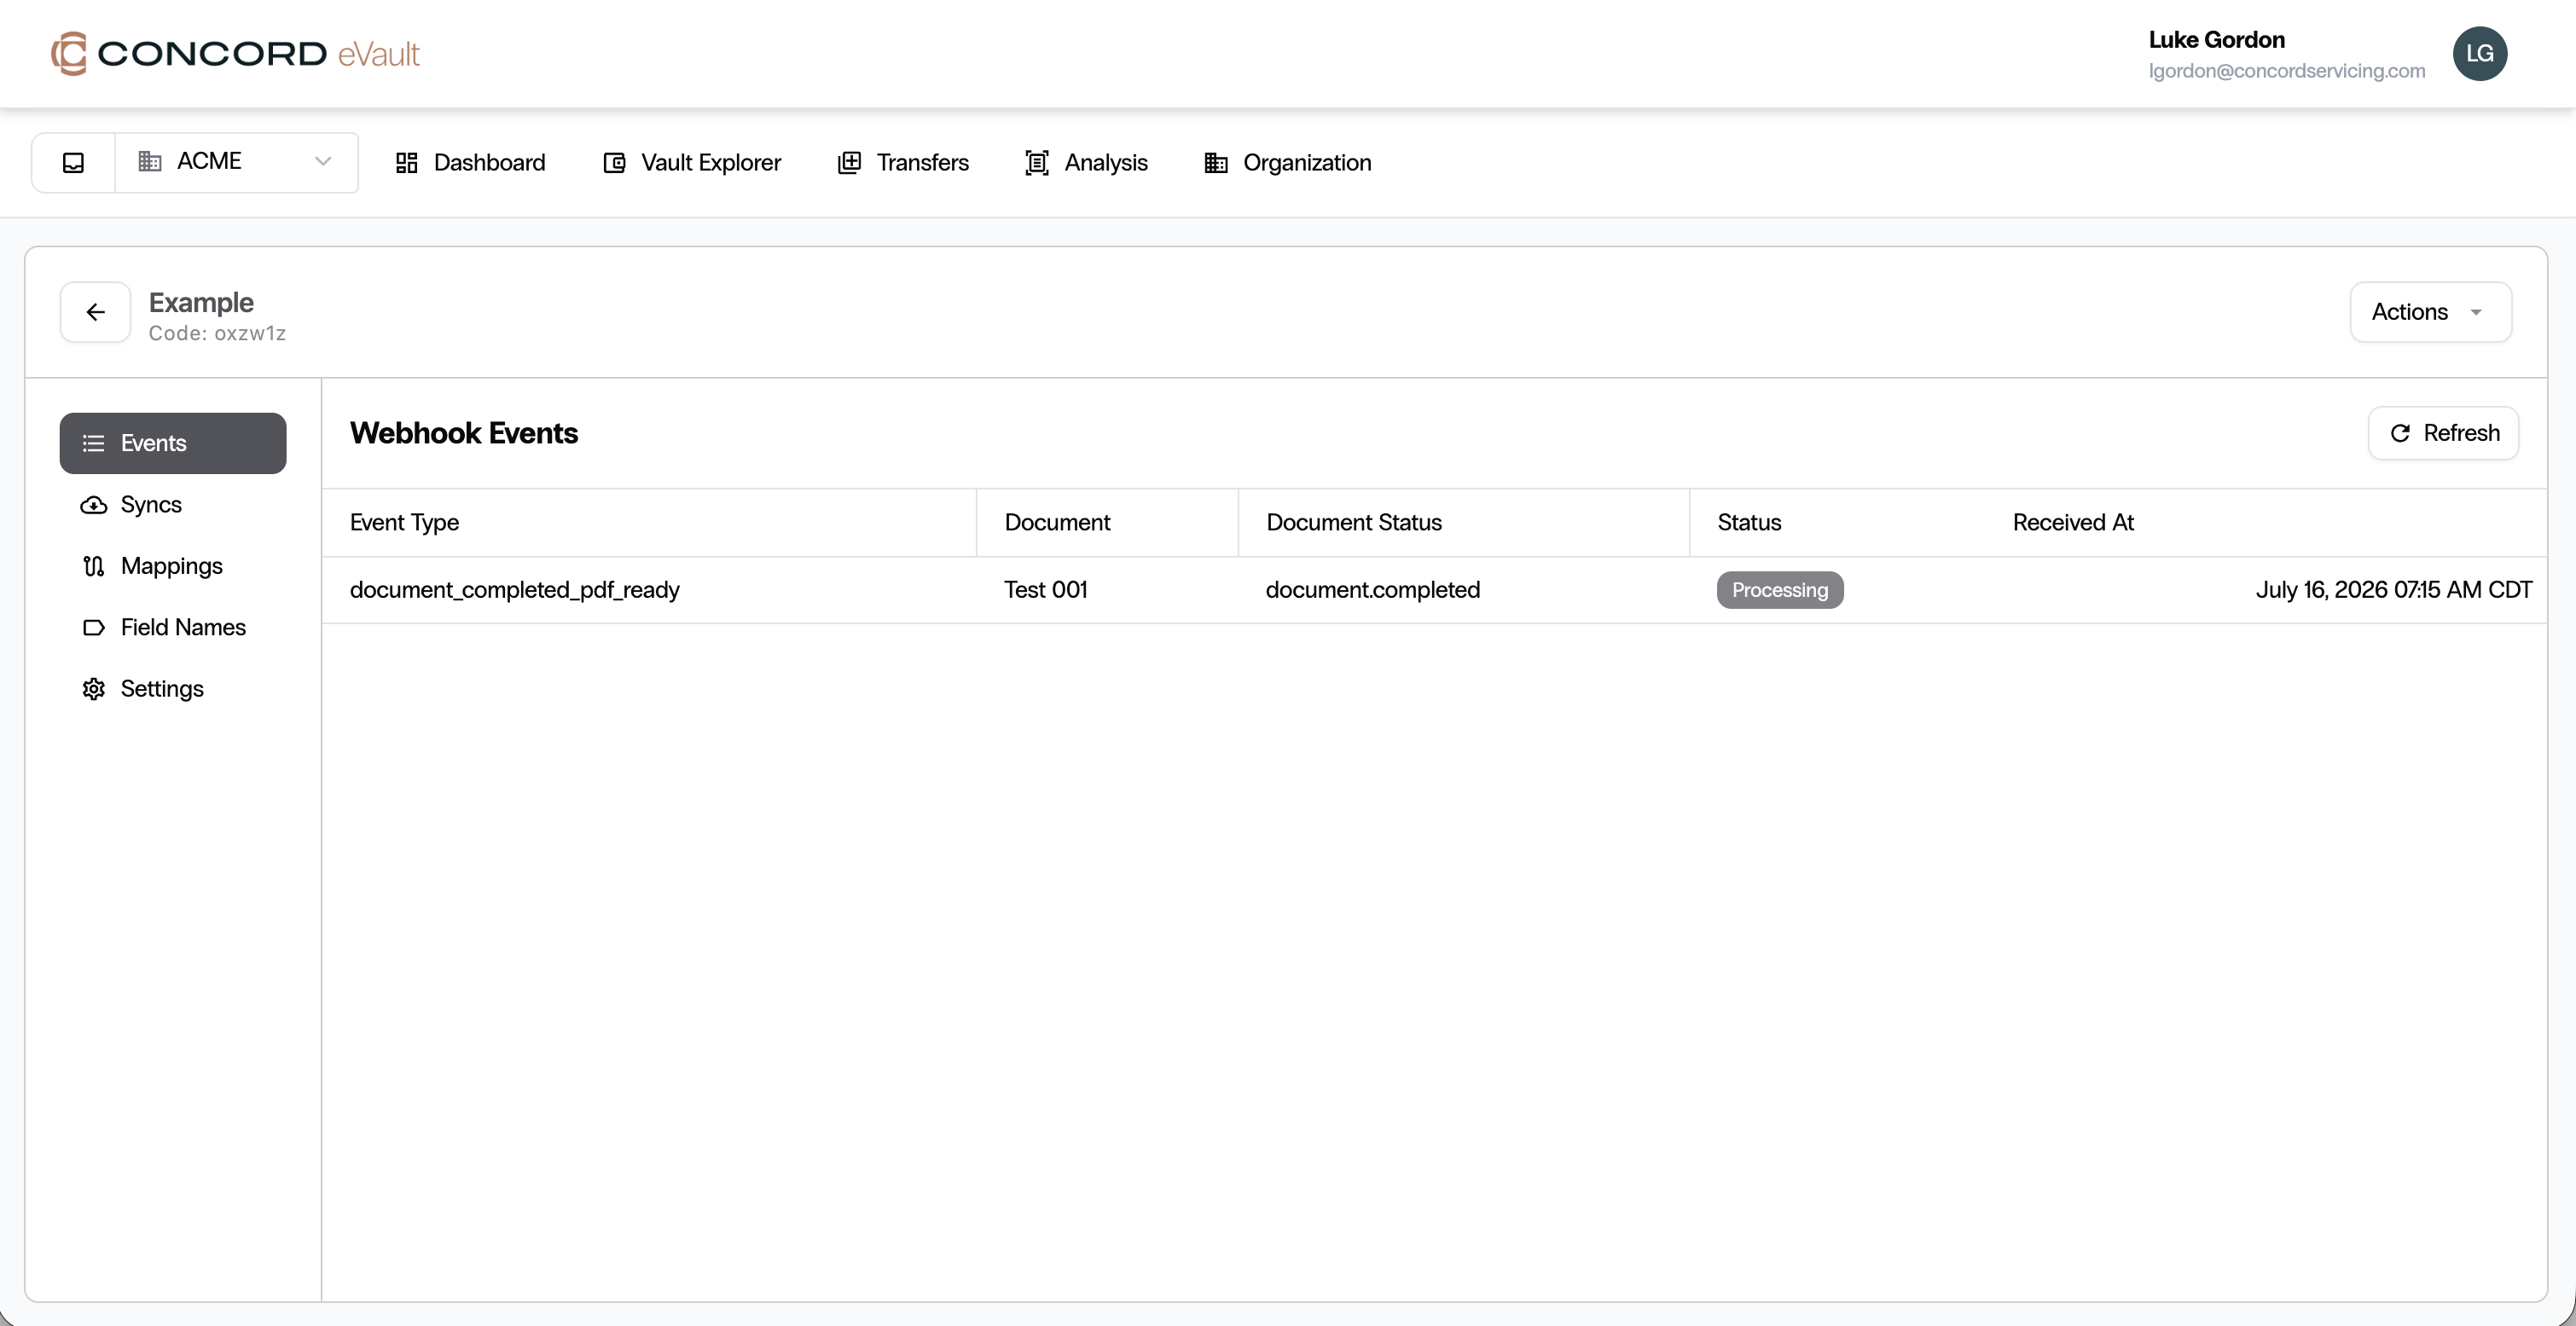
Once the PandaDoc document has been imported into Concord eVault, the status will change to Processed.
Step 13: Verify the document in the vault
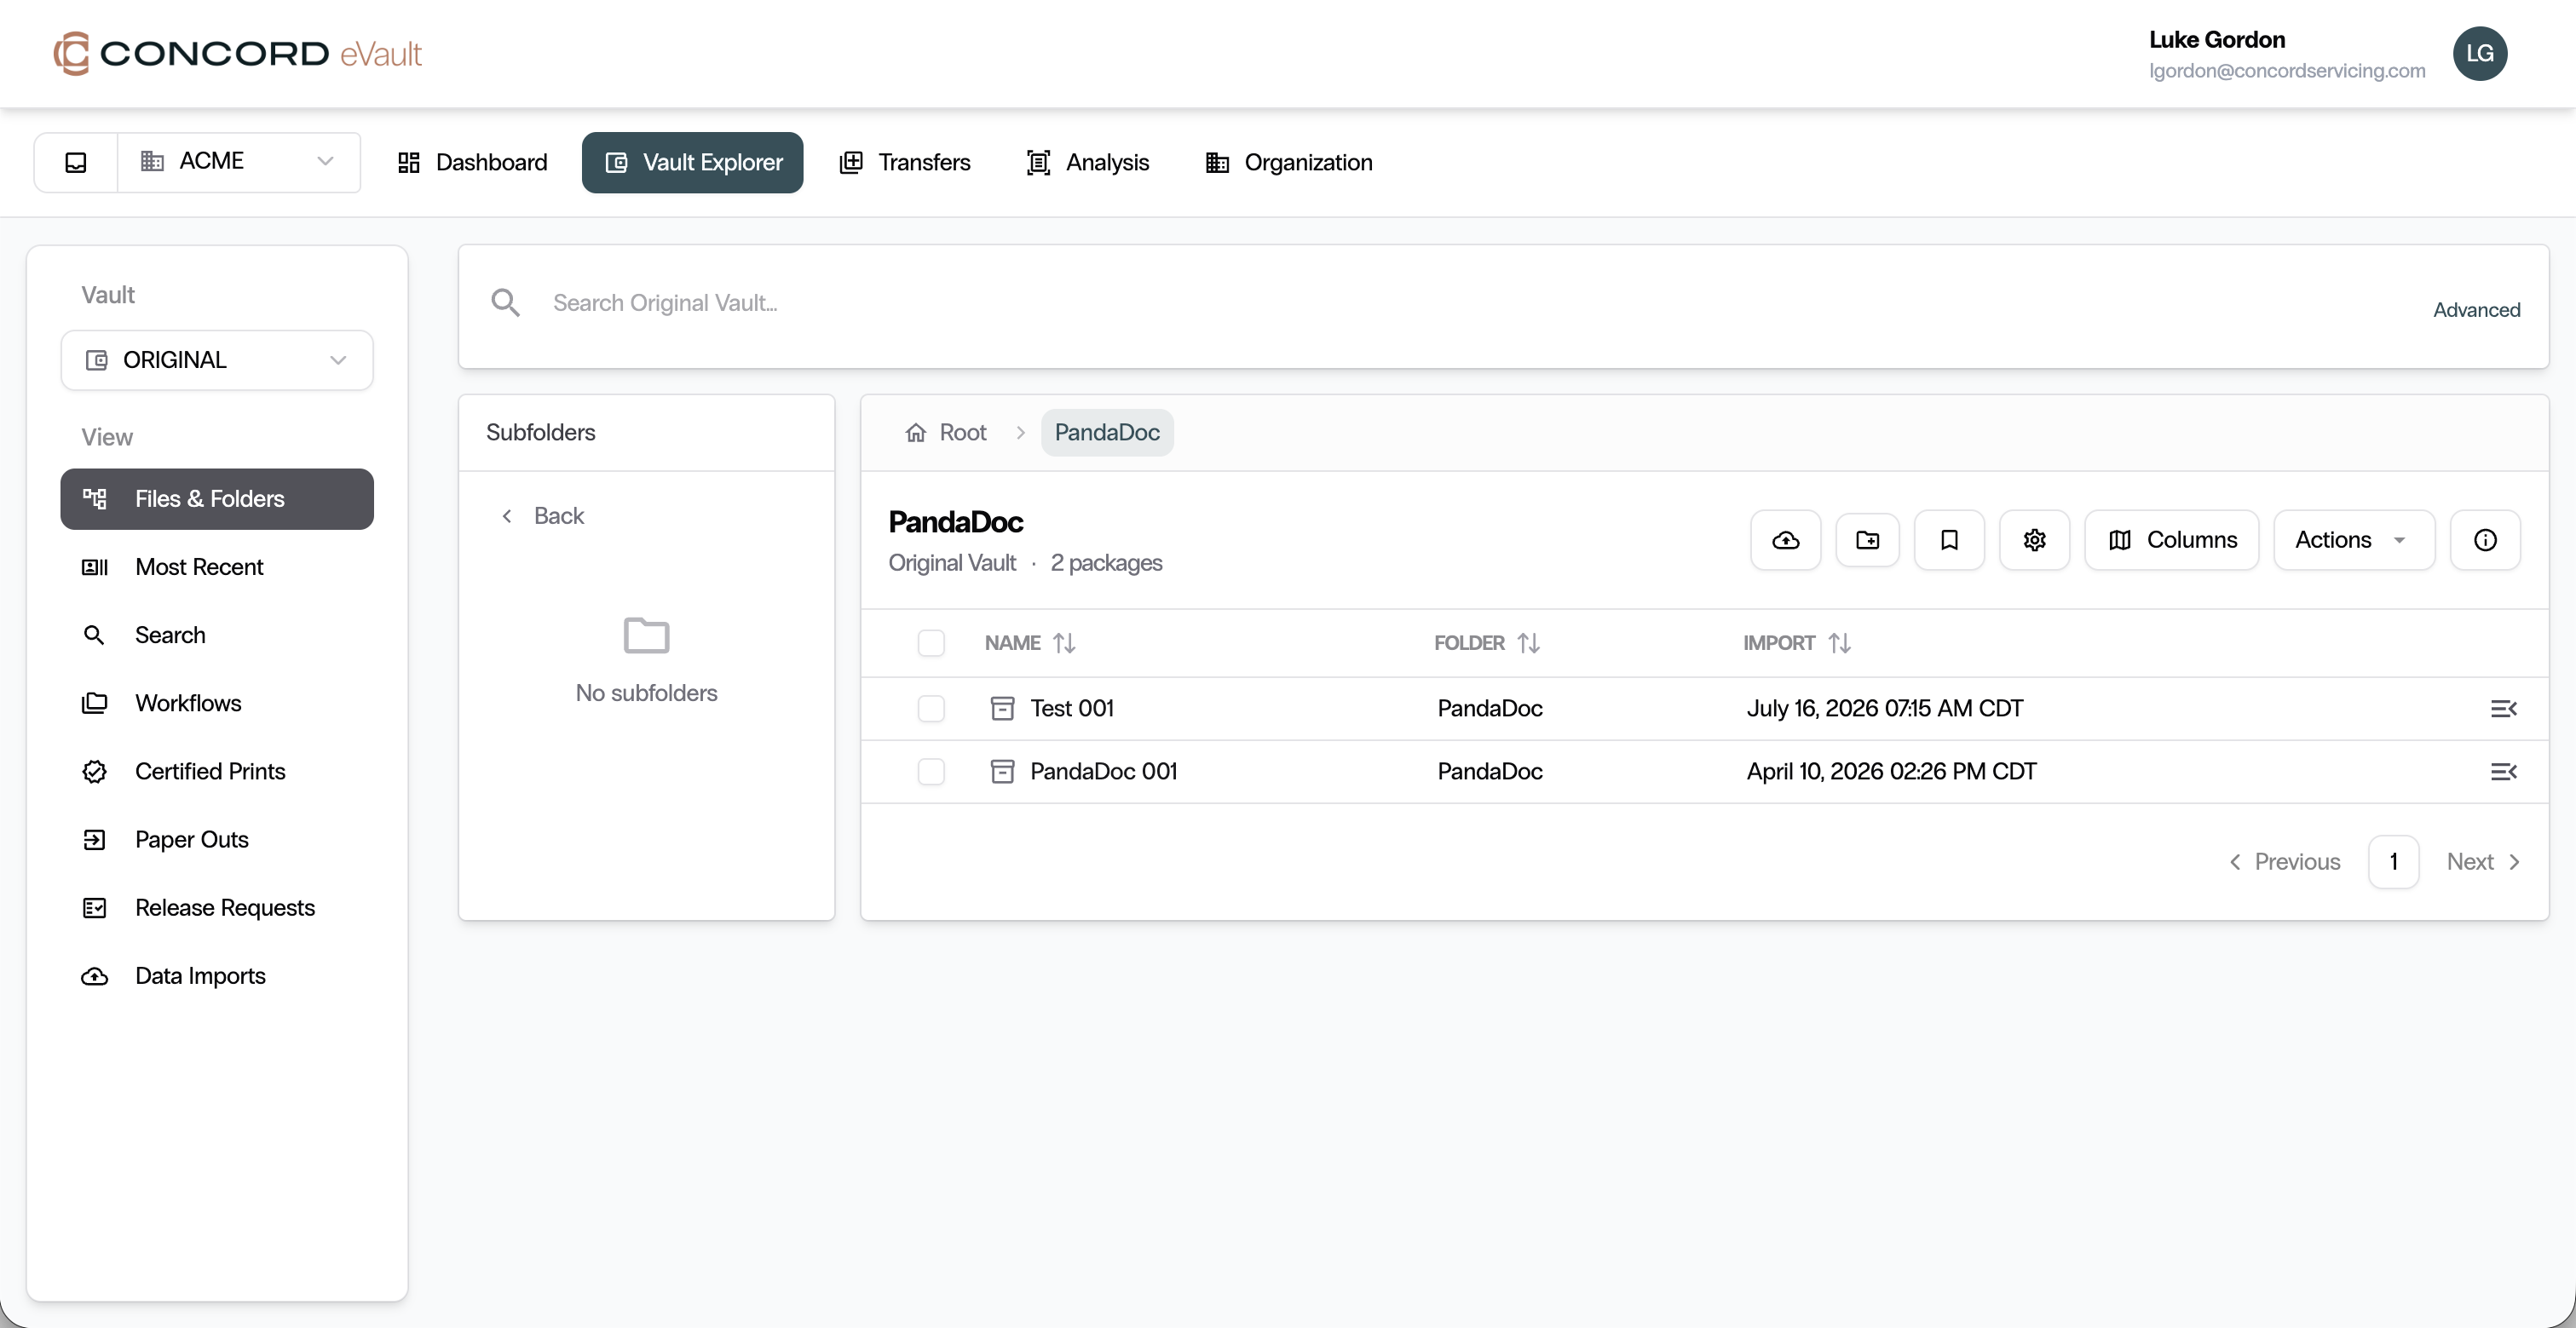
Go to the Vault Explorer folder you specified PandaDoc documents are to be imported into (from your folder mapping rules earlier). You will now see the PandaDoc documents in that folder.
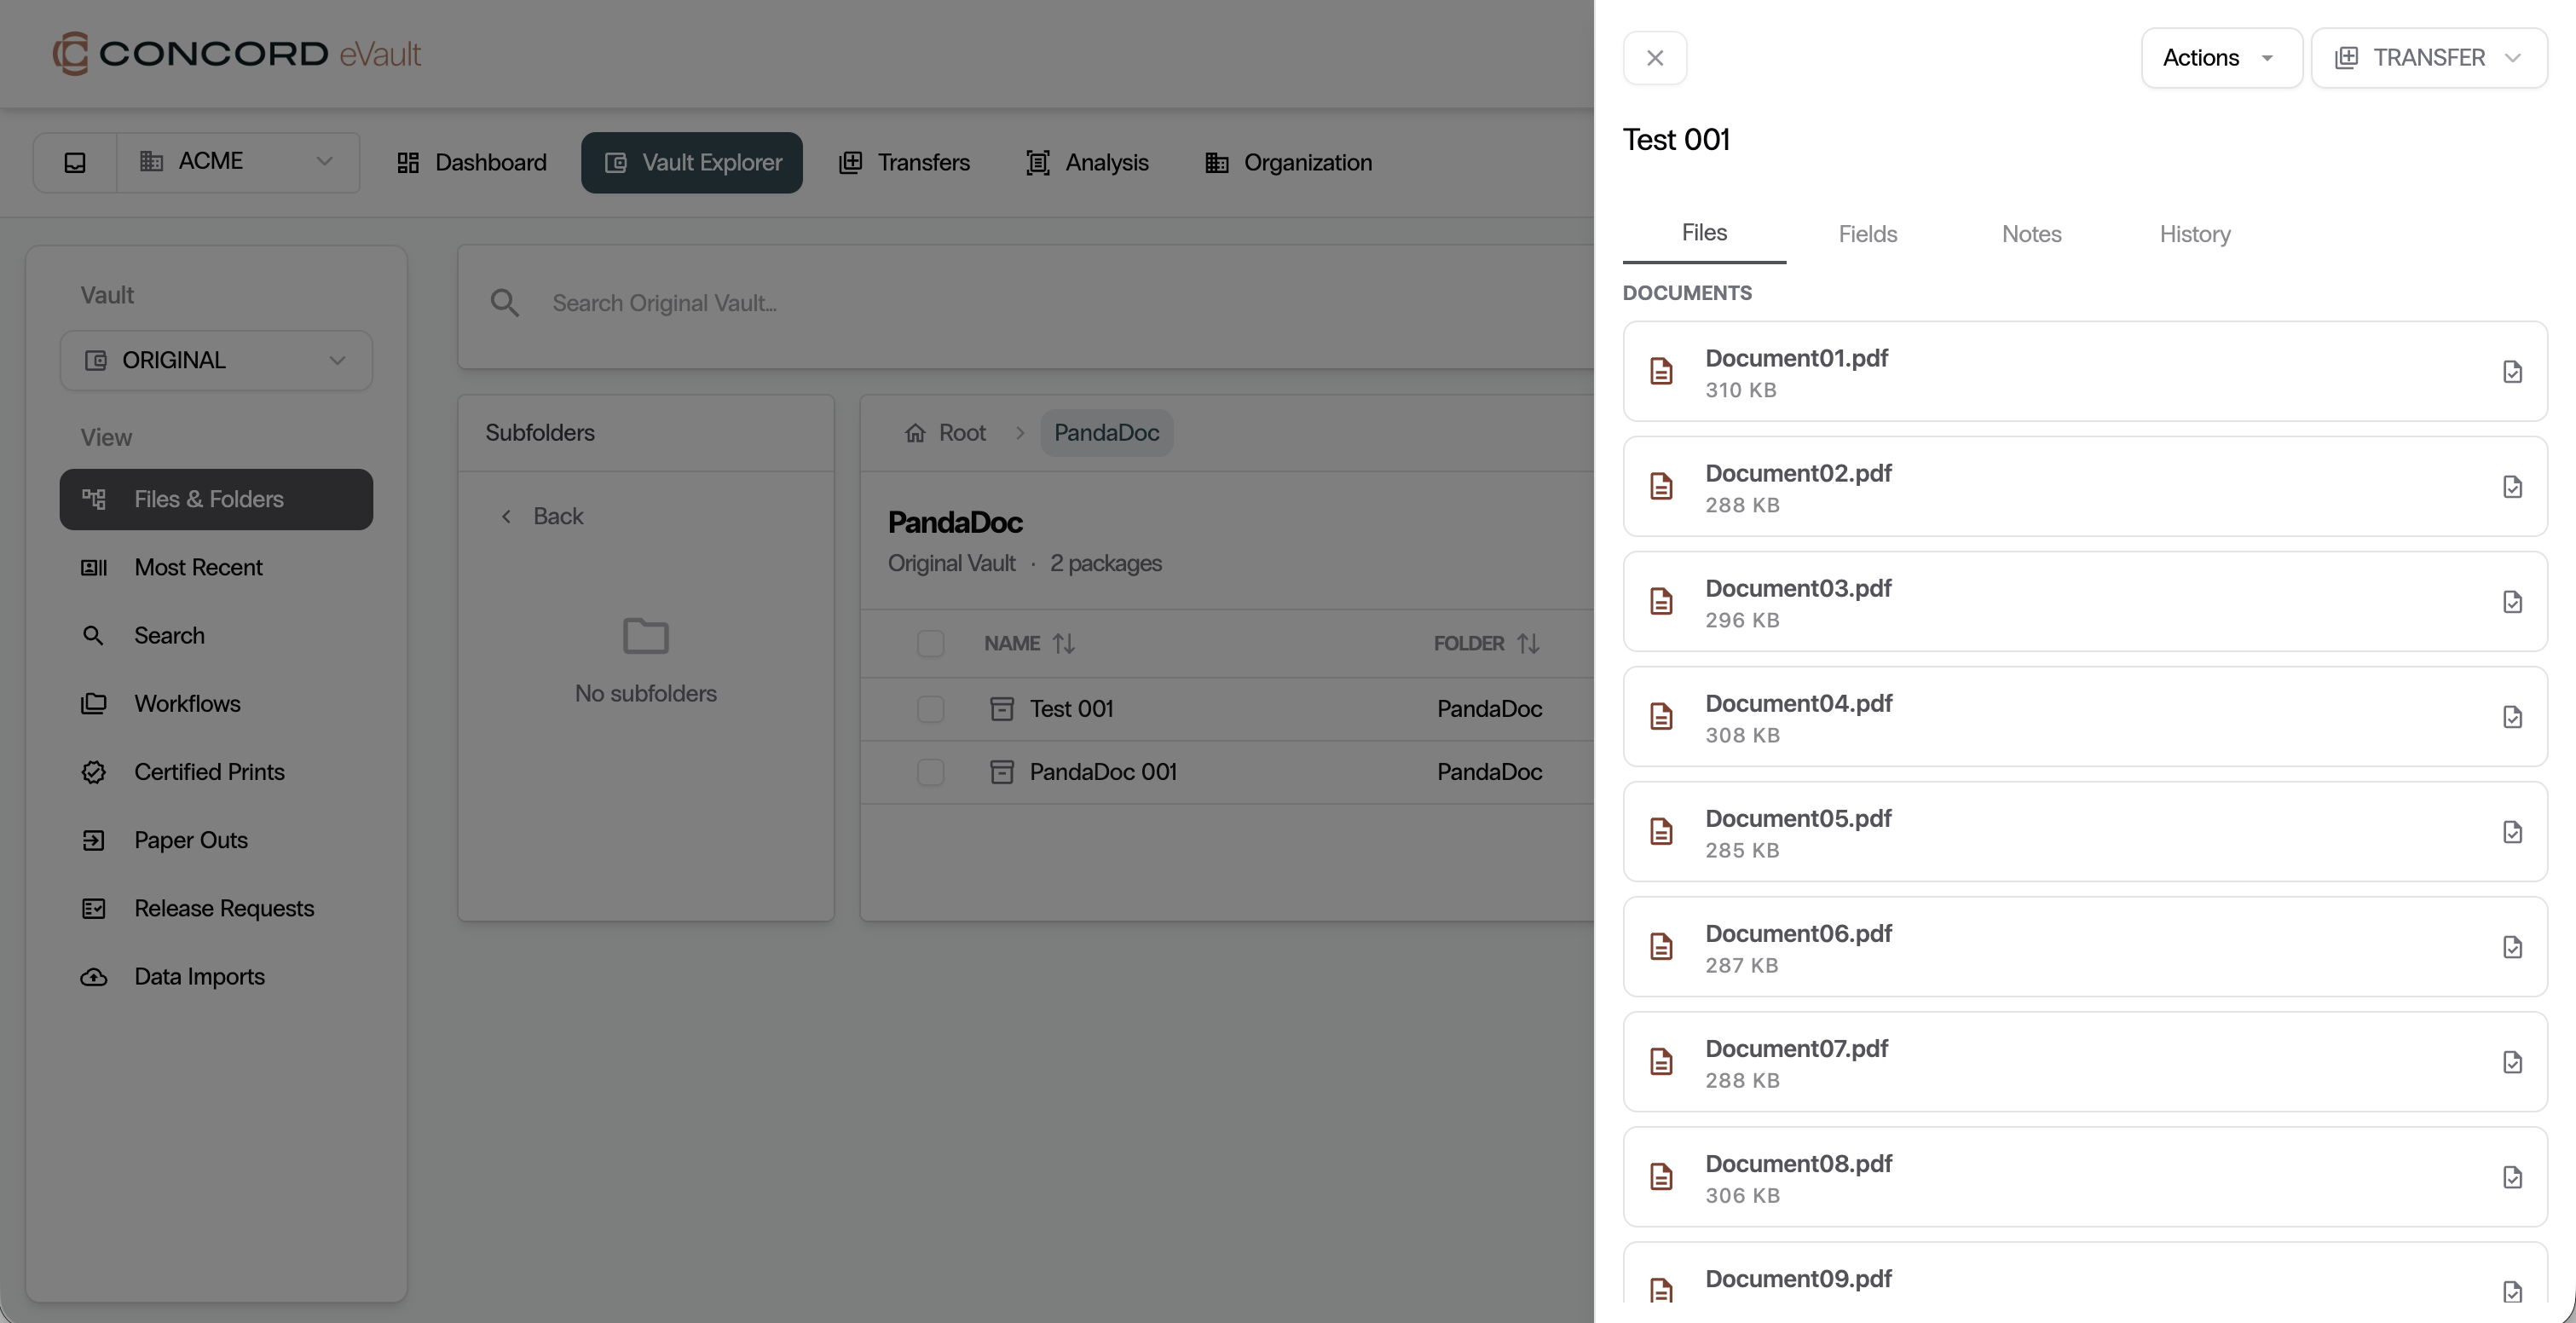
Click on the PandaDoc package. You will now see all the different sections, which were individual PDFs, broken out as files on the package.
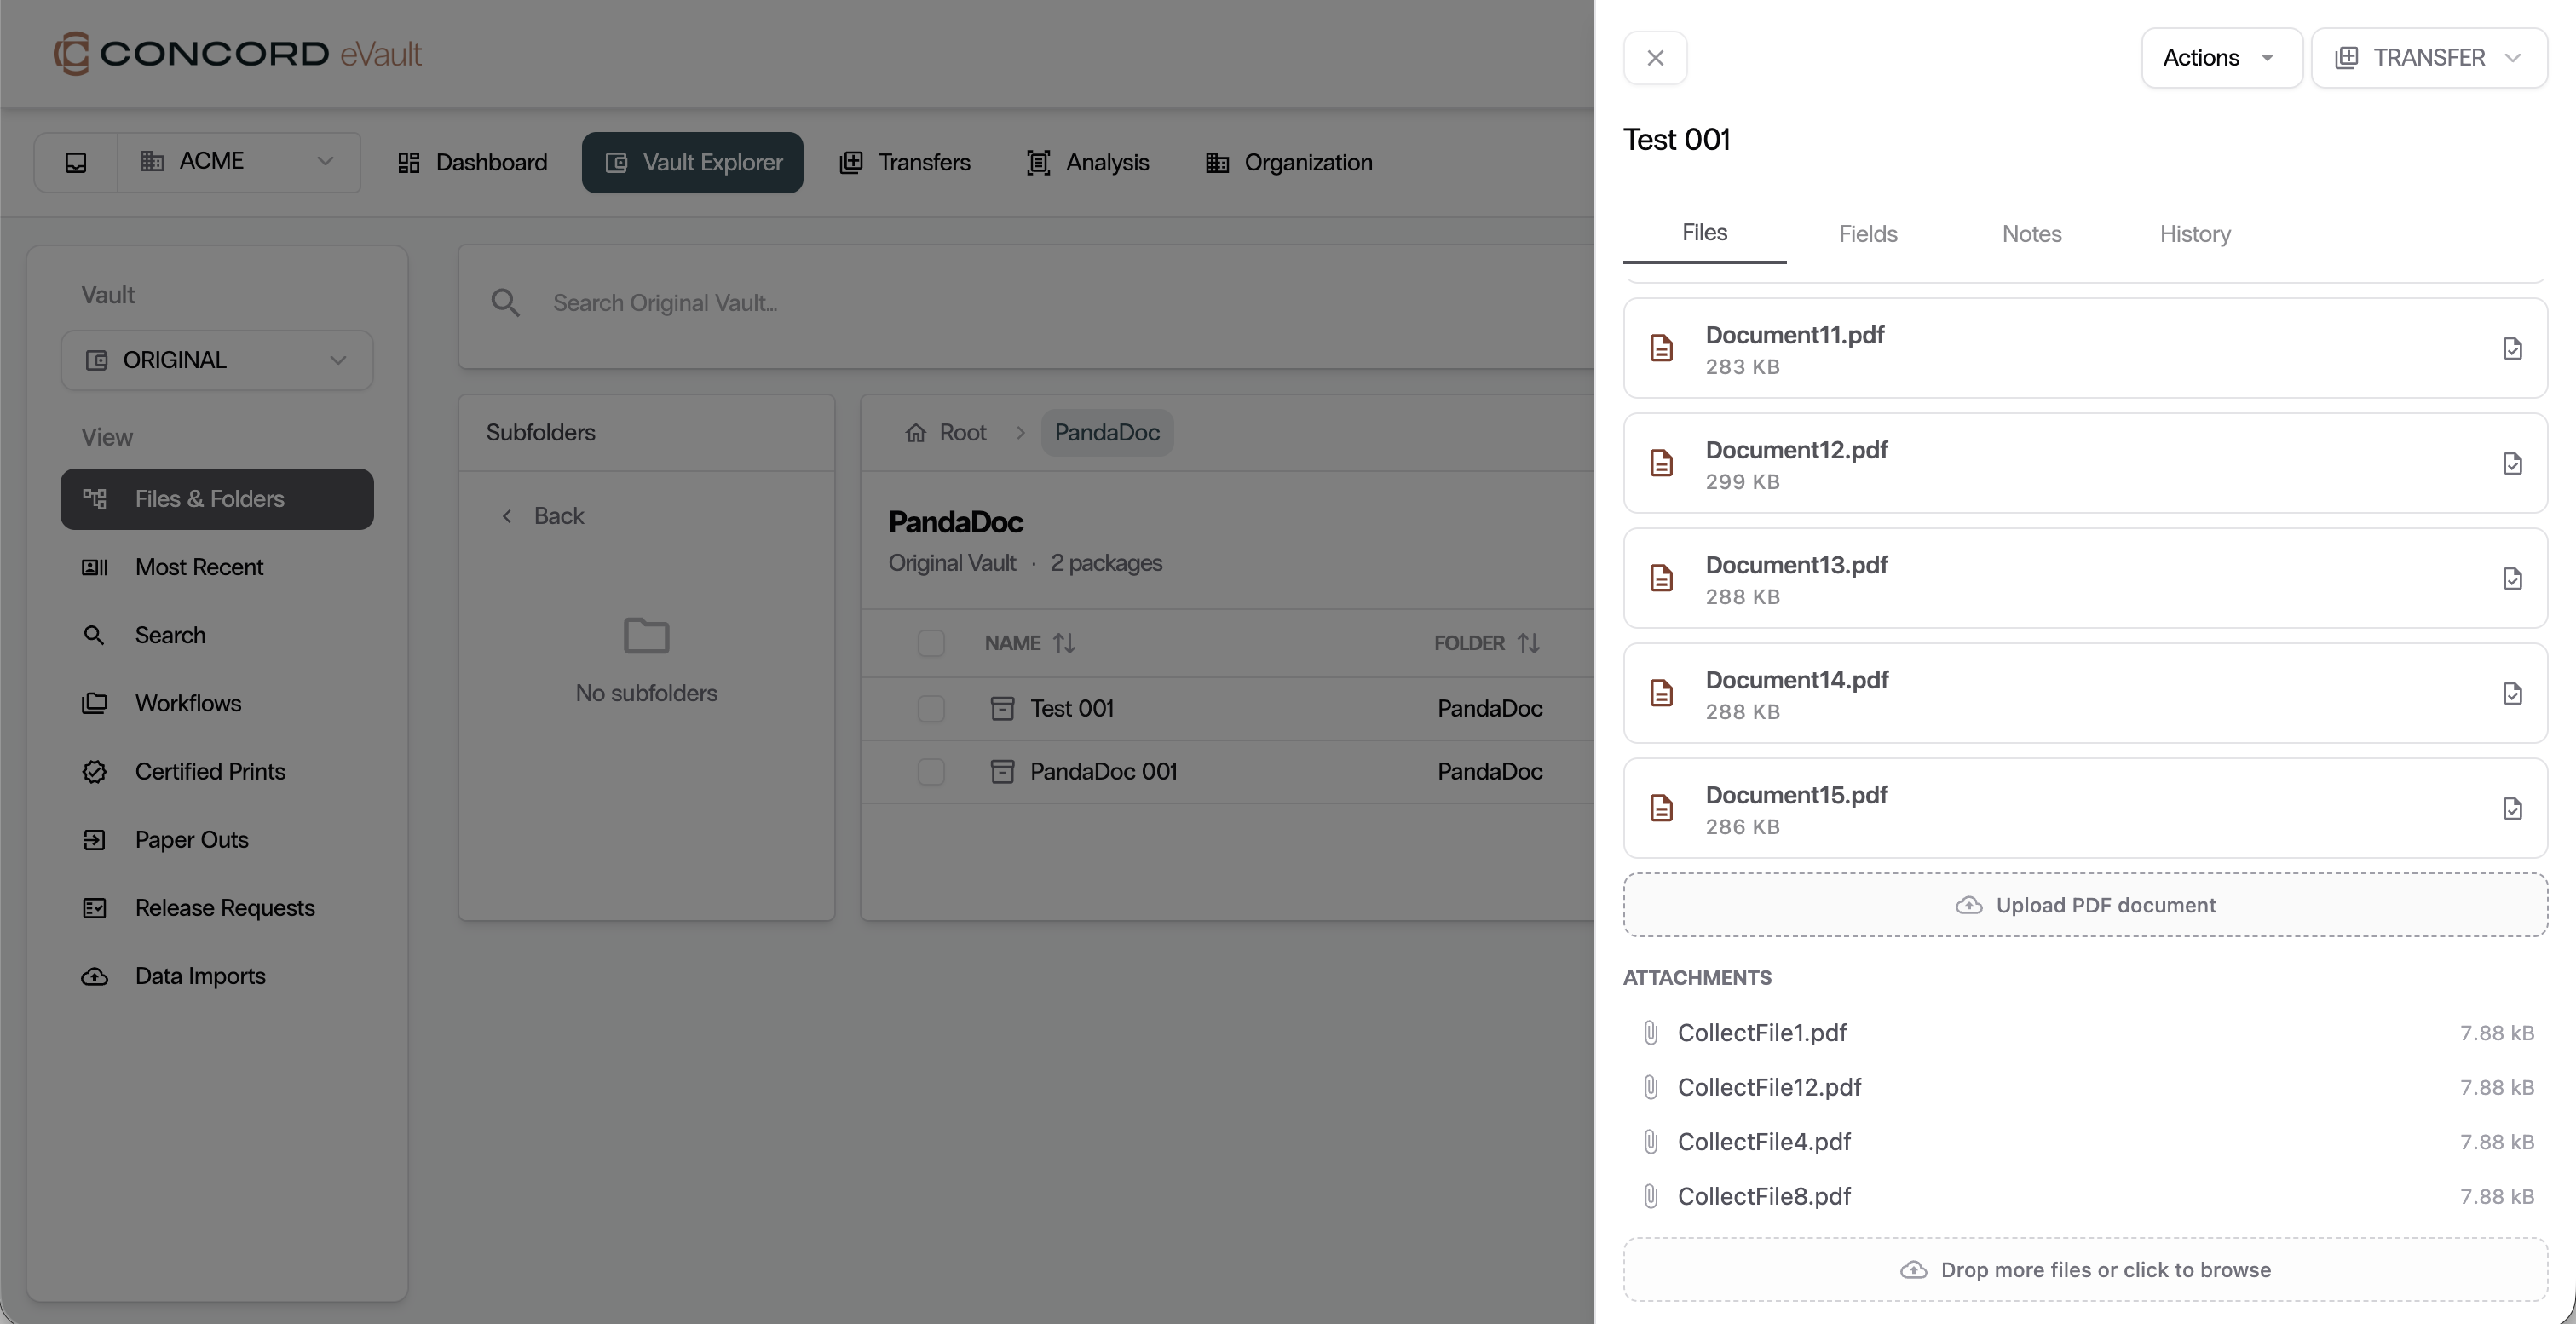
If you had any custom fields on your PandaDoc document where users could upload files, those will also be imported with the package as attachments.
Copy Behavior: Authoritative vs. Non-authoritative Copies
PandaDoc integrations can be configured to let each client dictate how imported documents are handled once they reach Concord eVault. When setting up or editing a PandaDoc account connection, choose one of the following behaviors:
- Non-authoritative copies: Imported documents are stored as uploads in eVault and remain in PandaDoc. Use this option when PandaDoc is the system of record and eVault is used for secure storage and data validation.
- Authoritative copies (default): Imported documents become the authoritative copy and are deleted from PandaDoc once secured in the vault, since an authoritative copy cannot exist in both systems. If you need a local copy after an authoritative import, ask about Certified Prints.
This is set per PandaDoc account connection on the account detail screen in eVault (Organization → PandaDoc → account → account settings).
Notes
- Multiple accounts: You can connect more than one PandaDoc account to the same vault. Each account gets its own webhook URL and signing secret.
- Webhook URLs are unique to each account/vault pairing - don't reuse a URL across accounts.
- Regenerating the secret: If the signing secret is lost or rotated in PandaDoc, generate a new one and update the Webhook Secret field in eVault, otherwise inbound events will fail verification.